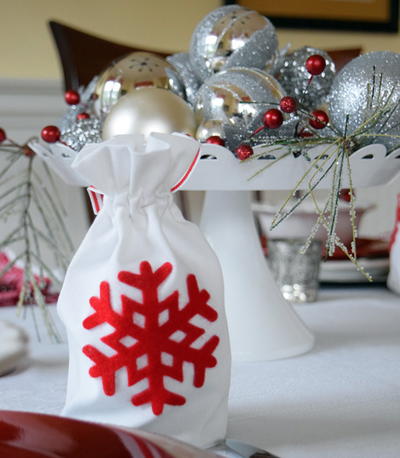
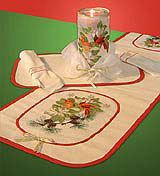
Sheer Magic Embroidered Holiday Table Set
This holiday embroidery craft project shows you how to embroider motifs onto sheer fabric to create a stunning holiday table set. Create a table runner, covered candle centerpiece, placemats, napkins and more.
Level of Difficulty: Intermediate
Materials:
- Brother ULT2001 or ULT2002D embroidery machine
- Embroidery designs from Birds (SA624) Appliqué kit
- Memory Card 57
- Memory Card 33
- Embroidery needles
- Assorted Brother embroidery threads including Satin finish & Metallic
- Brother Water Soluble Stabilizer (SA520)
- 4-5 pkgs. of Wrights 1/2" Double Fold Bias Tape Extra Wide, color - Red
- 1 pkg. of Wrights 1/4" Tubular Bias (Passementerie), color - Red
- Steam a Seam 2 Double Stick Fusible Tape 1/4" wide
- Silver & Gold Offray 1/4" metallic ribbon, approximately 2 & 5/8 yds. each
- White linen/ linen blend fabric 52" wide, 3yds.
- White polyester organza 45" wide, 1 & 1/2yds.
- Fusible interfacing to firm up placemats and table runner if desired.
- Glass candle chimney with straight sides approx. 8" high. (This was purchased at a craft store and has a place to hold a votive candle on top)
- Basic sewing supplies including white and red sewing thread
Instructions:
Preparation
Cut the following pieces from Linen:
- Two pieces 14" X 44" on the crosswise grain to make one Table Runner
- Eight pieces 18" X 12" to make four Placemats
- Four pieces 19" X 19" to make four Napkins
Cut the following from Polyester Organza:
- Two rectangles 18" X 20" for Table Runner Overlays
- One rectangle 18" X 20" for Candle Chimney Cover
- One rectangle 12" X 18" for Napkin Rings
- One strip 12" X 32" for Ruffle
Embroider Sheer Rectangles
- Embroider each sheer rectangle for table runner and chimney cover as follows: Hoop sheer fabric with a layer of water soluble on the top and bottom, having fabric centered in the hoop. Select Embroidery Edit mode. Create a design layout using image of table runner as a guide. Note that designs are overlapped in some areas. When finished, carefully press embroidered rectangles using a press cloth to avoid damaging the organza. These designs were placed on the Edit Screen and stitched in the specific order listed:
SA624 Cardinals Appliqué
Memory Card 33, pattern #10 Pinecones, rotated, sized, & mirrored to fit lower hoop area
Memory Card 57, pattern #11 Cross Stitch Snowflakes (Silver MT997 substituted for 017)
Memory Card 57, pattern #35 Snowflakes (Gold MT999 substituted for 348, Silver Sheer Magic Holiday Table Set MT997 for 001)
- Hoop 12" X 18" sheer rectangle for napkin rings as in step 1. You will complete four napkin rings in one "hooping". Select Embroidery Edit mode to create a design layout for napkin rings. Insert card #57 and select pattern 11. Touch Set. Touch End. Select pattern #35. Touch Set, and move to the right of the first pattern. Touch End and repeat the process to place another snowflake to the left. Using this same process select a satin stitch rectangle from built in frames. Re-size to 4.0 X 15.7. Stitch the design in the center of the hoop, then move the design to an empty space in the hoop to stitch again. You will need to embroider a total of four designs by moving to an empty area of the hoop. Use the trial feature to avoid overlapping your previous stitching. Remove stabilizer thoroughly and apply Seam Sealant such as Fray Check to the satin stitched outline. Let dry and carefully cut close to the edge. Tack short ends together to form rings. Note that frame patterns form a tacking stitch in the center at the end of the pattern. You will need to stop the machine before it is stitched or remove it afterwards.
Finish Table Runner & Placemats
- Fuse interfacing to wrong side of each of the placemat and table runner pieces. Best results are achieved when you fuse the top as well as the underside pieces. Having wrong sides together, baste table runner and placemat pieces together. Using a small (6") plate, round off each corner. Bind edges with double fold bias tape, piecing where necessary. Be sure to ease the binding around the corners, taking care not to stretch it. Topstitch the binding in place with the Quilting Appliqué Stitch 01-33, Mirror image (W-2.5) (L-2.5). TIP - Stitch binding using the walking foot.
- Cut the two rectangles for table runner overlays down to 8 1/2" X 11", having the Appliqué centered. Use a 6" plate to round off the four corners. Pin in place along each short end of the table runner with the raw edge approx. 2" from the end. Secure with a narrow zigzag around the raw edge. Next, completely cover raw edges by applying Steam a Seam II to the wrong side of 1/4" Tubular Bias, fusing it in place over the raw edges. Using a press cloth, follow package instructions for fusing. Begin and end at the center of the lower edge. Cover ends with metallic ribbons tacked in place and tied into a bow.
Sew Candle Chimney Cover & Ruffle
- Wrap remaining sheer rectangle around Candle Chimney with the Appliqué centered. Pin loosely to fit, then mark top and bottom edge of the chimney. Remove and cut down to size leaving enough seam allowance to make a French seam at the center back, and a 1/2" hem at the top and the bottom. Hem top and bottom with a double turned 1/4" hem. Trim the top edge with bands of gold and silver ribbon. Sew up center back seam. Slip over chimney.
- For ruffle, first hem short ends with a double turned 1/4" hem. Fold strip with wrong sides together having long raw edges even. Stitch a 1/2" seam along this edge. Press seam open and refold strip so the seam falls in the center. Select a narrow zig zag stitch and top stitch down the center of the seam as well as 3/8" on each side to form casings for the ribbon. Thread 36" of gold and silver ribbon through casings. Pull up and tie ribbon to form a ruffle that fits around the bottom of the Candle chimney.
Hem napkins
- Press and stitch a double turned 1/2" hem on napkin edges. Tip- Miter the corners for a quality look, then topstitch with gold and silver metallic thread to add a little glitz!
For other great sewing crafts, check out the FREE "The Sewn Christmas Gifts Guide" eBook on our sister site, AllFreeSewing.com
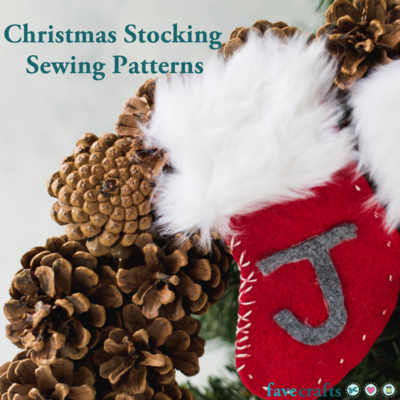
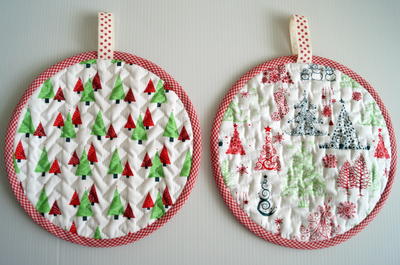
Read NextFestive Pot Holder Pattern


Thanks for your comment. Don't forget to share!
Weberme
Nov 06, 2018
This Holiday place setting is so elegant looking and it is made from sheer fabric and embroidery on it. I love it but it takes a little bit of experience and patience to work with sheer. I will put it on my list for the future but for those that are good at it this would be perfect. Let's see some pictures for inspiration please. This would even be pretty for a wedding placement too.
Report Inappropriate Comment
Are you sure you would like to report this comment? It will be flagged for our moderators to take action.
Thank you for taking the time to improve the content on our site.