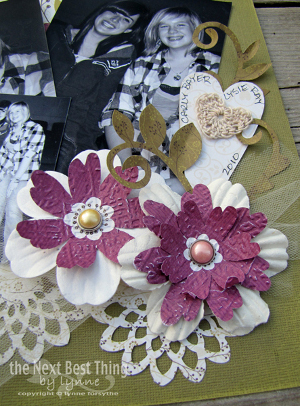
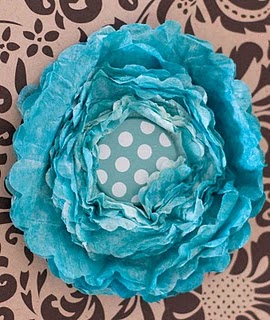
Tissue Paper Flower Tutorial
Make perfect tissue paper flower embellishments for your scrapbook pages with this tutorial from Paper Trunk. Start with white tissue paper and use inks to coordinate with your scrapbook pages.

Materials:
- Tissue Paper
- Brayer
- Ink or Large Inkpad
- Scissors
- (Optional) Shaped Punches or Spellbinders
Instructions:
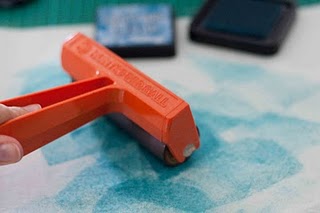
- Grab your brayer, some ink (a large inkpad works much better) and your tissue paper. If you have some shaped punches or spellbinders, it will make your life much easier ;)

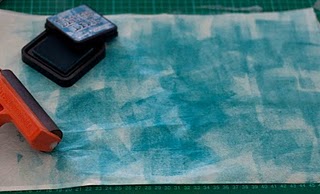
- Using your brayer, ink up the whole sheet of tissue paper. Make sure you roll the ink into various directions to get a lovely distressy type look. I'm not worried about covering every single inch in colour, but if you want a more solid look add a good slather of ink!
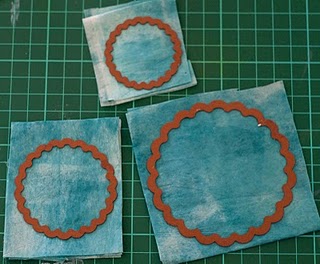
- Next use your dies (I have used 3 different sized scallop circles) as your template to cut out squares. Each layer of flower should have about 8-12 layers. Once you have them all cut and sorted, pop them through your die-cutting machine, I'm a cuttlebug girl ;) If you are a punch girl, make sure you back your tissue paper with a bit of cardstock to give your punch something as a base.
- The die-cutting machine will compress your layers together, so pull them apart again.
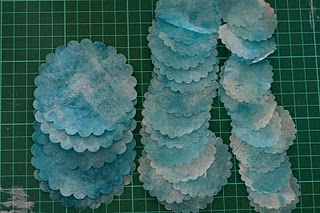
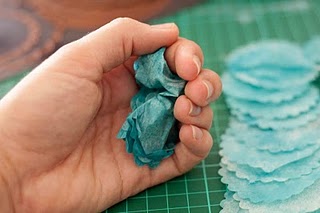
- Next gather up each pile again and then scrunch them up really well. Scrunch - unfold - scrunch - unfold - scrunch ;)
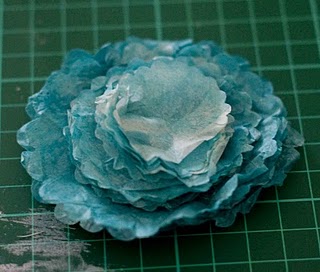
- Next simply place the layers one on top of the other.
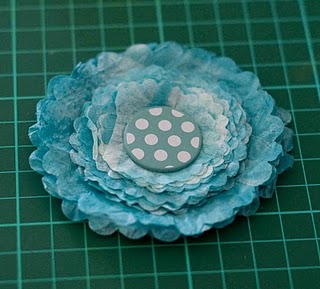
- Top it off with a big brad, a button or other embellishment of your choice.
- You can either leave it at this stage or go further and ruffle up the layers again, I just kinda squeeze my layers all up and around the brad.
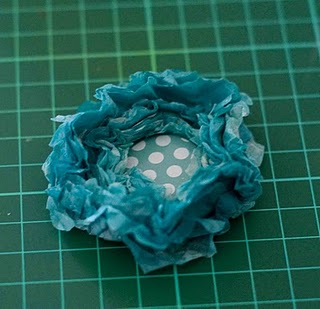
And then lightly unruffle them till I'm happy with the look.


Thanks for your comment. Don't forget to share!
FluteGiggles
May 27, 2011
What a great idea and fantastic tutorial!!! I LOVE that there is a picture for each step; that is SO helpful for me! And such a pretty finish, too, with so many different ways you can shape the flowers - definitely going to be using this one! Thanks so much!!! Traci
Report Inappropriate Comment
Are you sure you would like to report this comment? It will be flagged for our moderators to take action.
Thank you for taking the time to improve the content on our site.