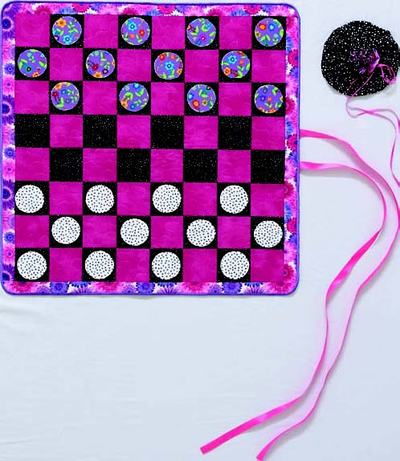
Crayon Stained Quilt Art
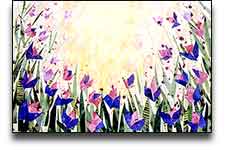
Crayons are used to stain the fabric of a quilted wallhanging, accented with strips of fabric, free-motion embroidery and applique. Create a beautiful textile painting of your own with this project from Sulky of America.
Materials:
Supplies
- Off-white poly/cotton fabric at least 60/40% in whatever size you choose
- Printed fabrics for borders and back of quilt
- Regular crayons
- Fabric crayons by Dritz (only comes in 8 colors)
- Sulky Totally Stable Stabilizer
- Small pieces of fabrics about 8" x 8" in greens, pinks and blue-purples, each in at least three values from light to dark
- Steam-A-Seam 2
- Sulky Soft 'n Sheer Stabilizer
- Permanent-ink, black marker
- Various Sulky threads for free-motion butterflies (Carol used Sulky UltraTwist)
- Sulky Bobbin Thread
- Sulky Rayon Threads to stipple quilt
- Cotton batting 33" x 43"
- Old cheese grater and clean 1" paint brush
- Pressing mat
- Teflon Pressing Sheet
- 10" Wooden Machine Embroidery Hoop
- 12" x 12" piece of Crystal Organza
- Sulky KK 2000 Temporary Spray Adhesive
- Zig-Zag Sewing Machine
- Even Feed Foot
- Darning Foot
- Several Scrap Muslin pieces for press cloths - disposable
Finished Measurements
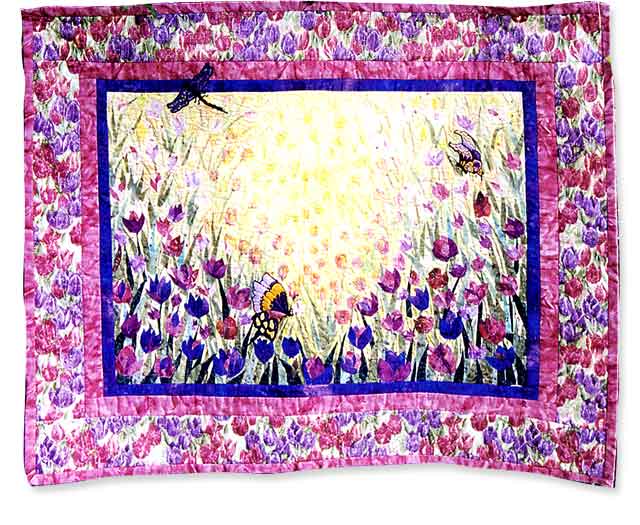
Landscape format finished piece - 32" x 42"
Image - 20" x 30"
Border - 1", 1-1/2", 3-1/2"
(All should have a 1/4" seam allowance added.)
Binding - Cut 2-1/2" strips (folded in half) for a 1/2" finished edge
Carol prepares a small colored sketch of the design. You may get your inspiration from photographs, magazine pictures or cards. This helps you organize fabrics and colors, and is also useful to determine background, middle ground and foreground, as well as a focal point in the picture. Once the piece starts unfolding, some changes may be made, but generally Carol stays with her original sketched idea.
Prepare the Fabric
- To remove any finish, wash and dry the poly/cotton fabric. (100% cotton will not hold the crayon and will fade with washing.)
- Iron Totally Stable over the back of the entire piece of fabric to be used for the whole cloth image. It should be one piece, not several small ones, because as you draw with the crayons over the sections, you will create demarcation lines which may spoil your design.
The Totally Stable serves two purposes. One, to act as a stabilizer and hold the fabric taut for the scrubbing when coloring with the crayons, and the other to act as a resist so the crayon will not bleed through to anything underneath during the ironing process. The Totally Stable should be ironed on very well from both sides and all wrinkles ironed out.
- Prepare "Snippet" fabrics by cutting them into 8" x 8" pieces and applying Steam-A-Seam 2 to the back. Set aside to use later.
Using the Crayons
- Gather and organize regular crayons, matching colors chosen for borders and "Snippet" pieces for the appliqué.
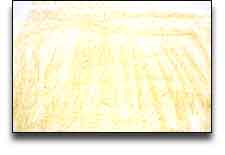
- Start with the background, using yellow ochre regular crayon. Lay the large crayon on its side and, starting from the top, make broad strokes over the entire piece to give it a yellow coloring. Place more concentration of color to the center for the "sun" spot. Color evenly about 2/3 down from the top.
- Use an olive green crayon to color the bottom portion the same way by making broad strokes up from the bottom in a "knife-shaped" leaf pattern, just filling in the bottom area.
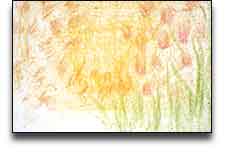
- With very light shades of flesh pink, yellow and lavender, indicate positions for background tulips. The crayon should be fairly heavy as some will fade during the washing process to remove the wax. Complete the drawing, remembering that this is just the background and you are only after an illusion of what would show in the faded sunlit background - hazy tulips. You should not try to enter any detail at this time, just shapes and shadows that look like tulips.
- When finished, lay a piece of scrap muslin over the top and PRESS each area for at least 10 to 15 seconds to melt the crayon wax into the fabric. DO NOT USE THIS CLOTH AGAIN since the crayon will transfer to another piece, giving you tulips where you don't want them.
- Once you have ironed your piece, re-evaluate the coloring and make any adjustments to the design with your crayons, and then re-press. When you are happy with the design, remove the Totally Stable and wash with mild detergent, no bleach, and warm water to remove the wax residue left by the crayons. Line dry. Press. Reapply Totally Stable to the entire back.
Create the Design Using Snippets of Fabric
Carol suggests that you use a large June Taylor Pressing Mat so you don't have to disturb your design while working with the small "Snippet" pieces.
- Start with the light values of the green leaf color and make large cuttings, creating long, knife-shaped leaves. Begin at the middle ground and place the leaves with the fusible side down; choose the middle value of green and the the darkest value in the immediate foreground. This creates depth with the darkest value in the foreground which gradually recedes to the background toward the greatest light. Make large angular cuttings of the darkest values of the blue-purple and pinks to make the tulips in the foreground.
- The shapes should be largest in the foreground and gradually get smaller as you place them in the background toward the light. The theory being, large shapes and dark bold colors belong in the foreground that gradually get smaller and paler in the background, disappearing into the light.
- Once the cut pieces are as you like them, cover them with a Teflon pressing sheet and press everything down.
Evaluate Your Painting
- If any crayon leaves or stems are needed, add them now. Also, you may want to add a slight amount of detail on some of the crayon tulips for effect. During this process you may want to use the "Fabric" crayons, since they are much bolder in color when ironed.
- If the background is too faint, adding touches of the bolder color ties the foreground and background together. Carol prefers a combination of both regular and fabric crayons. If you added any crayon, press again with a new, clean muslin pressing cloth.
Add the Speckled Effect
To create the speckled effect, use an old cheese grater and two colors of crayon (Carol used two shades of purple). Grate small particles of both colors over the entire image, except the sunlit portion. Use the clean paint brush to scatter the particles evenly so concentration is mainly on the leaf and flower sections. Cover with a Teflon pressing sheet and melt the specks onto the image with a hot iron. Do not use a fabric pressing cloth since the cloth will just absorb the particles of crayon. The Teflon resists the crayon and forces it to melt onto your image.
Embroidering
- Leave the Totally Stable in place on the back of the image and add the sashing pieces. Since the Totally Stable helps to square up the painting during the rotary cutting and prevents the seams from being distorted while handling the fabric, leave it in place until all embroidery and appliqué work is completed.
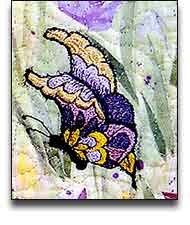
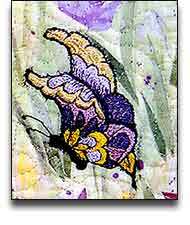
- Use a permanent-ink, black marker to trace the butterflies from the pattern onto Soft 'n Sheer Stabilizer. Place it in a wooden machine embroidery hoop and free-motion embroider the butterflies with Sulky 35 wt. UltraTwist Rayon. Carol used #3003, #3005, #3006, #3009, #3011, #3021 and #3049. When complete, cut the butterflies away from the Soft 'n Sheer, leaving a 1/8" allowance all around the edges of the butterflies. Spray the back with KK 2000 and, using the photo as a guide for placement, appliqué the butterflies with Sulky 40 wt. Rayon #1005 Black onto the crayon design using a narrow satin stitch. Leave a small opening to stuff a slight amount of fiberfill inside to make the butterflies more dimensional; then stitch opening closed with a small zig-zag stitch.
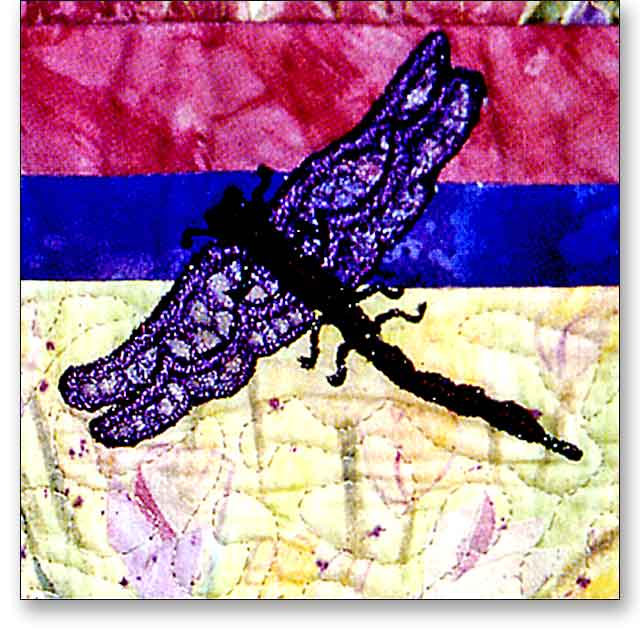
- Use a 12" x 12" piece of Crystal Organza in the same manner to free-motion embroider the dragonfly. Using the organza allows the wings to become translucent. Place the dragonfly slightly outside the design, overlapping onto the border for effect. Appliqué the dragonfly with Sulky Sliver #8051 Black onto the crayon design using a narrow satin stitch.
Quilting
- Lay the backing wrong side up and spray it with Sulky KK 2000. Place the cotton batting on top of the backing. Spray the wrong side of the quilt top with KK 2000 and place it right side up on top of the batting. Now you have a quilting sandwich.
- Stipple quilt over the entire image with Variegated Sulky 30 wt. Rayon or 35 wt. UltraTwist Threads. Carol used a green Sulky UltraTwist #3017 for the leaf area and a lighter yellow UltraTwist #3012 for the light area. Sulky Sliver #8016 was used to add sparkle to the tulips.
- Use an even-feed foot to stitch-in-the-ditch along the seam between the image and the border with Sulky Polyester Clear Invisible Thread.
- Bind edges and make a hanging sleeve. Apply label. Hang your quilt and enjoy!
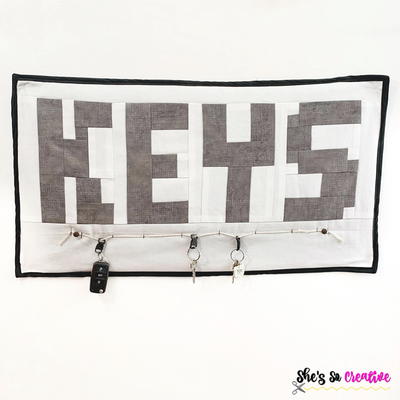
Read NextKey Holder Wall Hanging Quilt
Your Recently Viewed Projects
Thanks for your comment. Don't forget to share!
Marilyn B
Mar 27, 2017
WOWZERS, this is just about the most gorgeous pattern for a true piece of art and creation! I like the tip regarding using a cotton/polyester fabric blend rather than a pure cotton because of the ability to absorb the color and fading! Such a good tip! The colors and techniques are wonderful! For an even added embellishment, I could see twisting some narrow satin or metallic ribbon into the pattern and using a simple taking stitch here and there to secure. Perhaps add some tiny clear iridescent glass beads here and there for dew drops on the blooms! Love this project! Thank you for a super tutorial! )
jenjen1982
Jun 02, 2012
this is totally what i have been looking for ! I am an artist who sews quilts on the side and i always wished i could bring my art to my quilt making, awesome!
taurusborn61 56652 75
May 19, 2011
I think I'll use my embroidery machine to put in the butterfly and dragonfly. There are so many designs available, I'm sure to find some that will fit in well with the rest of the design. And I may also use a stipple embroidery design, rather than doing it myself.
nangy
Oct 22, 2010
Absolutely beautiful,I dont like tedious quilt making,but this is a grandkids project. we will start on this for gifts this year.
Report Inappropriate Comment
Are you sure you would like to report this comment? It will be flagged for our moderators to take action.
Thank you for taking the time to improve the content on our site.