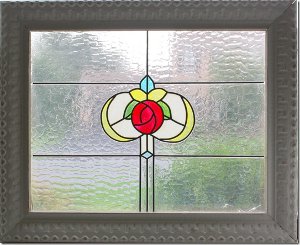
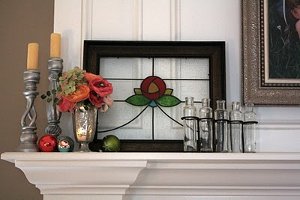
Faux Stained Glass Window
Now you can create a beautiful Faux Stained Glass Window in no time! A simple pattern and glass paint make faux stained glass window panels like this one an easy and creative decoration for you or a loved one!
Materials:
- A frame with glass
- Glass paint
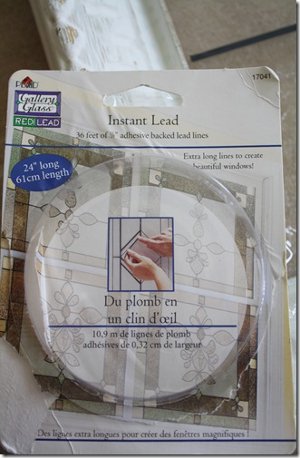
- Instant Lead
- Pencil
- Scissors
- Eye hooks and chain
- Safety Pin
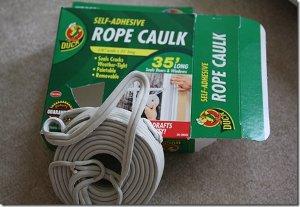
- Rope caulk
- Pattern 1
- Pattern 2
Instructions:
- Simply copy one of the patterns, or make your own! Enlarge it to take up as much of the page as possible. Print it in landscape mode.
- Decide how big you want it. It will obviously print out 8 x 10 or so, so you will work for an 8x10 frame. My frames are 11x14 to resemble more of an old window. If you want your stained glass to be larger than 8 x 10, you will need to take it to a copy center like Staples and enlarge it to fit in the size frame that you want.
- Be sure to consider which window you will be putting it in and compare the size of the window with the frame. It doesn't have to be the same size of the window.
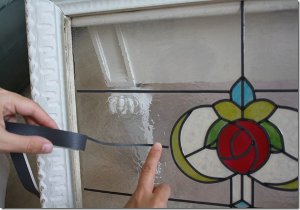
- Clean the glass and then take the glass out of the frame. Center your pattern underneath the glass. Tape with masking tape if you need to.
- Take out your "instant lead" stickers and peel off one strand at a time. Stick it onto the glass, following the pattern below. DO NOT PULL IT! Just set it down gently, and stick it to the glass. Cut it off at each stopping point on the pattern.
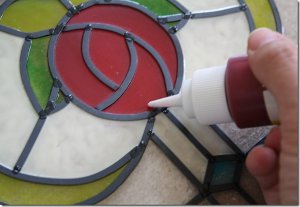
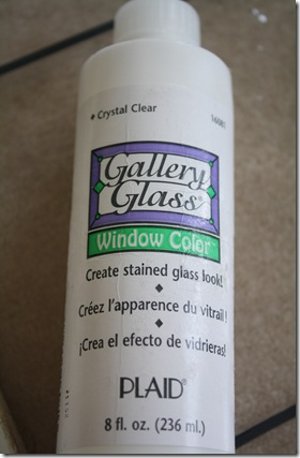
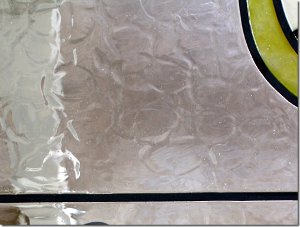
- After you have "leaded your design", start in the MIDDLE of the design and fill in the flower, leaves, and colored sections with the glass paint separately. DO NOT SHAKE THE BOTTLES OF PAINT, otherwise they get too many air bubbles. If you get too many air bubbles while you are painting, you can always pop them with a safety pin. Just paint each section by squeezing a little paint from the tube onto the section and move it around with the nozzle until the section is filled in. Be careful not to get it on the lead. You will definitely need the crystal clear paint. We also like Fresh Lime, Lime Green, Harvest Yellow, Aqua, Cameo Ivory, Black, and delta's transparent air-dry enamel glass paint in RED.

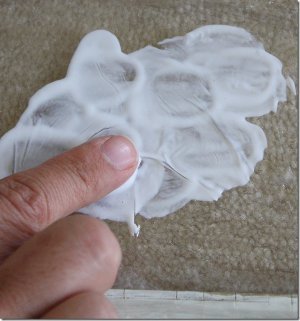
- After color painting, use this crystal clear paint. It goes on white, but dries clear. Gently squirt it and paint it all over the parts you want to look like clear textured glass, working one section at a time. After you finish a section, use your finger to make overlapping "finger prints" to give it texture. You can use other tools to make texture if you would like.
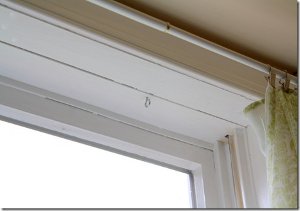
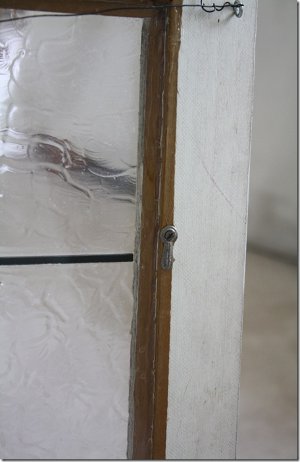
- Let dry at least 24 hours, and maybe longer. While it is drying, prepare your frame. Center two of these hooks as far apart as you would like them, and screw them into the top of the frame.
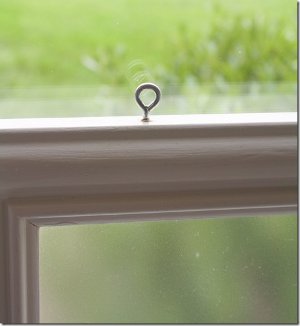
- Pencil in, and then center and attach two more hooks the same distance apart as the ones on your frame in the window frame.
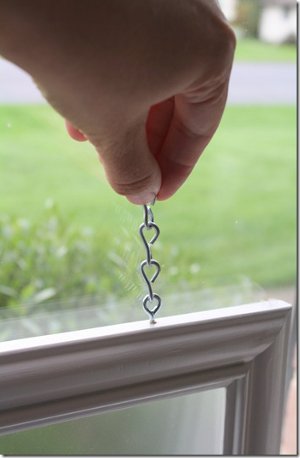
- Measure two strands of chain, depending on how low you want to hang the frame, and affix them to the hooks on the frame.
- When your glass is dry, lay it in the frame. To keep the glass in the frame, you have a few options. If the glass is lightweight or you used plexi glass, you can hot glue it in around the edges. Or you can nail it in place with skinny picture nails every few inches. Another option is to use the existing metal bendable tabs that may have come with the frame, if they are not too noticeable. We used a little hot glue, and then some of this rope caulk to seal it in.
Your Recently Viewed Projects

Thanks for your comment. Don't forget to share!
brainybiker 059256 9
Oct 05, 2014
Absolutely fabulous! Definitely my next project on my "To Do" list. Your technique is by far the best (as in most beautiful) I've seen so far for people such as myself -all the willpower, motivation, determination, but no skills! LOL!! Thank you for taking the time to create the art piece, document the steps (with pictures!) and sharing with all who are in the same "boat" I am. Lynne (Ottawa, ON, Canada)
Melissa Ryan
Oct 06, 2014
Hi brainybiker--Thanks so much for your kind words, and we're so glad you liked the project! We'd love to see a photo of it when it's done! Thanks and have a great day!--FaveCrafts Editor
beculley 9214730
Jan 22, 2014
I LIKE MAKING LARGE PIECES. 36X70. LOOK LIKE STAINED WINDOWS, CAN'T FIND ALL COLORS. CAN'T FIND AN ADATIVE THAT MAKES PAINT LOOKED AHATTERED WHEN DRY. WPOULD LIKE SOME HELP
maweeof4
Feb 04, 2013
I've been doing this craft for several years and I have never taken the glass out of the frame. An easy way to "trace" the paper design or stencil is to simply lay the window over the design and line it out with the leading lines or, if making a more detailed design, such as a landscape, for example, liquid leading. Of course, you can always tape the design to the back of the frame if you may need to change the angle from which you work. Unfortunately, the paints for this craft are becoming more difficult to find in crafts stores. Still available, but not nearly the color selection as a few years ago. Best to buy direct from the company online.
lesleland 1157721
Jan 14, 2013
Great project! As I live in the UK, can the needed materials be purchased here or do I have to get them from USA?
Report Inappropriate Comment
Are you sure you would like to report this comment? It will be flagged for our moderators to take action.
Thank you for taking the time to improve the content on our site.