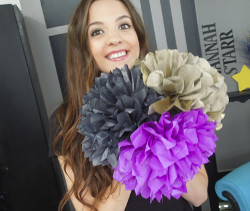
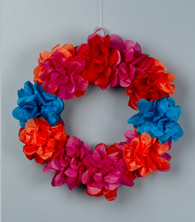
Tissue Paper Multi Colored Rose Wreath
Hawaiian-inspired wreath; great in every season, particularly appropriate for summer.
Materials:
-
STYROFOAM™ Brand Foam:
- Round Face Wreath, 12" x 2-1/2" x 1"
- Bright acrylic paint, color of choice
- Brightly colored tissue paper, several large sheets in assorted colors
- White chenille stems, 12" long, four
- Pencil
- Ruler
- Medium flat paintbrush
- Disposable palette
- Water basin
- Paper towels
- Scissors
- Optional: Rotary cutter, cutting mat and metal ruler
- Low-temp glue gun and glue sticks
Instructions:
-
Paint foam wreath desired color; let dry.
-
Cut chenille stems into 4" lengths.
-
To make one rose, stack four 6" tissue squares. Fan-fold tissue stack into approximately 1"-wide folds. Use scissors to round off each end of folded stack to form petals.
-
Fold one 4" chenille stem in half and slip over center of folded tissue squares; tightly twist ends together at bottom to secure. Use scissors to trim excess wire.
-
Spread folded tissue out in a fan-shape on each side of chenille stem. Gently separate tissue layers with fingers, then pull up petals and arrange as desired. Bring two center petals together and slightly crush to ensure chenille stem is covered.
-
Repeat Steps 2 -4 to create a total of ten roses. Be sure to gently separate tissue layers of each flower before fluffing petals.
-
Use glue gun to secure roses side by side around foam wreath, alternating colors as desired.
-
Twist ends of one remaining chenille stem together to make hanging loop. Use glue gun to glue twisted end into top center back of wreath.
Note: Each tissue paper rose requires four squares of tissue paper, either one color or a mix of colors. You will need a total of forty 6" squares. To save time, stack several layers of tissue paper and use rotary cutter to cut multiple 6"-wide strips. Combine strips into stacks and cut multiple squares at a time.
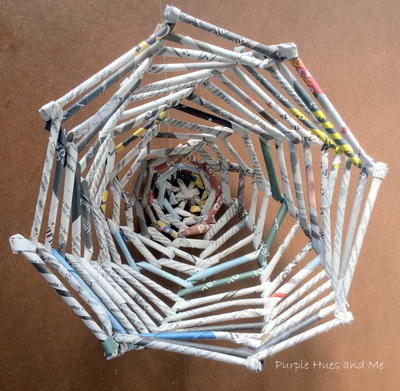
Read NextDIY Recycled Newspaper Tubes Bowl


Thanks for your comment. Don't forget to share!
mulberrygalprinces s
Jul 12, 2016
Oh golly this is so cute and after reading the directions , it seems very easy also. I remember making roses out of facial tissues when I was a kid. If we wanted colors we used crayons or moms old lipstick. This sure is prettier and easier. Thank you so much for sharing this great idea.
Report Inappropriate Comment
Are you sure you would like to report this comment? It will be flagged for our moderators to take action.
Thank you for taking the time to improve the content on our site.