Poppy

Common poppies, with their saucer-shaped scarlet blooms, are one of the most familiar of the wildflowers. The color play of bright red poppy flowers with rich blue cornflowers and white chamomiles makes a wild meadow look absolutely fantastic.
In addition to the red flowers and dark centers, another distinctive feature that sets poppies apart are the seed pods that stand on tall stems, bending and swaying around in the wind.
Materials List
-
COLOR PALETTE
- New gamboge
- Pyrrol scarlet
- Sap green
- Sepia
-
BRUSHES
- Big filbert brush
- Size 2 round brush
- Size 4 round brush
- Size 8 round brush
DIRECTIONS
-
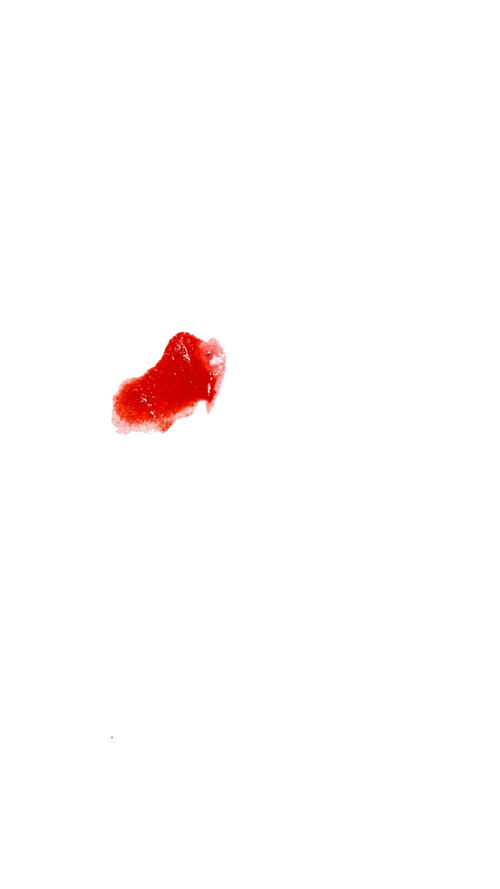
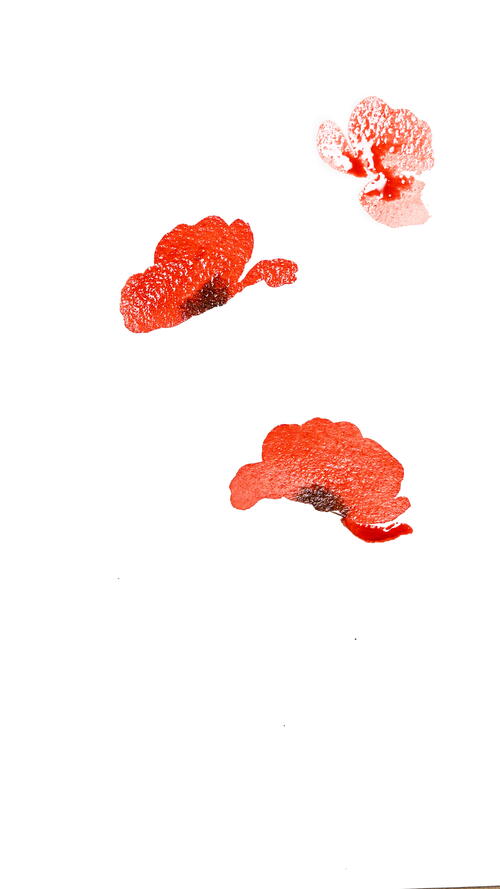
Mix 3 parts pyrrol scarlet and 1 part new gamboge, along with some water to make a creamy, deep red mix. Load the big filbert brush with the paint (not just the tip, but the entire brush) and paint an uneven semicircular design (almost like a blob) by fully pressing the brush to the paper.
-
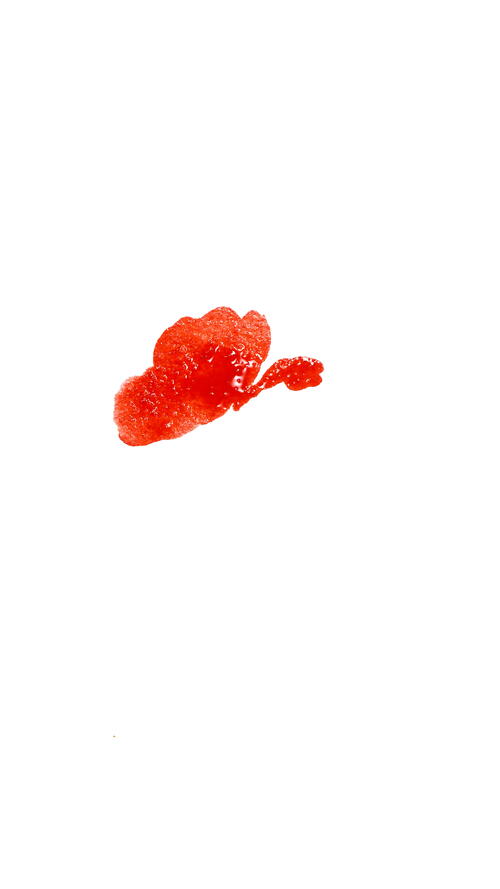
Adjust its shape using the filbert brush to make it slightly bigger so that it resembles a petal. Add another petal next to the first using the thinner end of the brush.
-
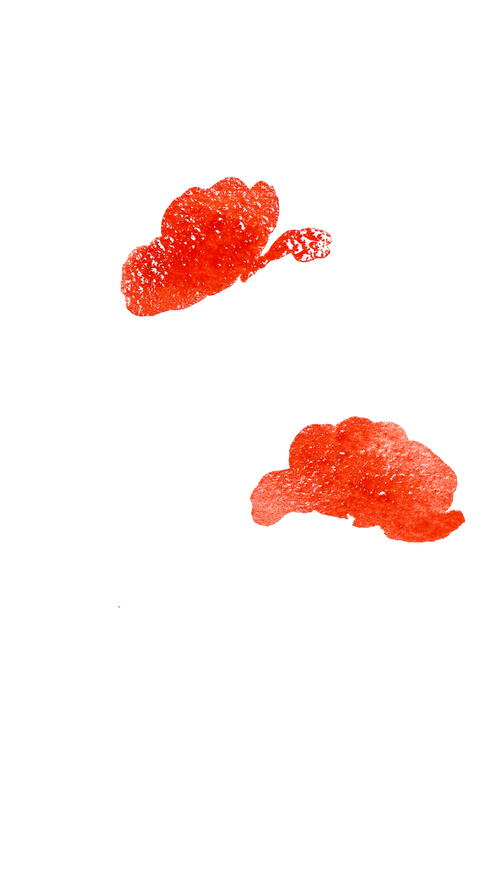
Repeat for another flower facing a different direction. These flowers can be different shapes and sizes. It is quite easy to paint poppy flowers this way because you just have to paint some blobs, and then tweak them a little!
-
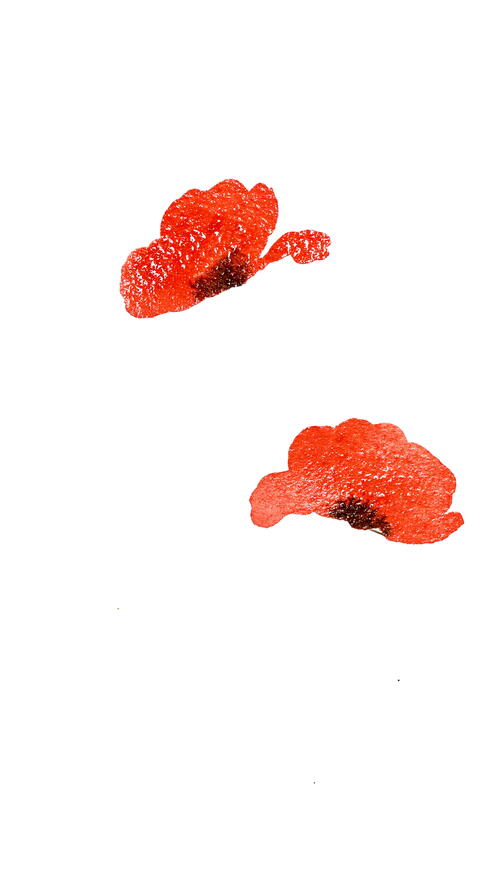
Prepare a thick paste of 3 parts sepia and 1 part water. While the flowers are still wet, take the paint only at the tip of the size 2 brush, and gently touch the brush to the ends of the petals. Enjoy watching the dark brown gently spread into the red regions of the flowers. Make sure your sepia mix is not too watery, as the colour would bleed too much into the red and make the flower look muddy. Create another smaller flower, if you’d like, to show the different stages of the blooming process.
-
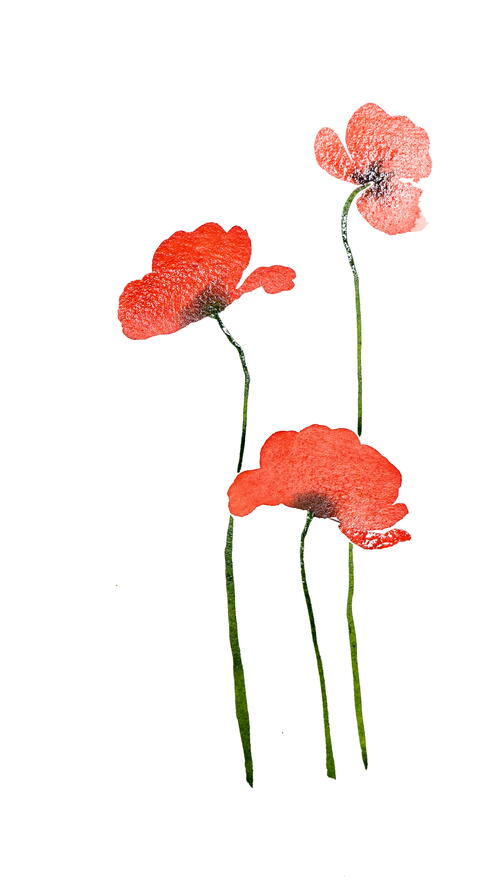
Prepare a dark earthy green mixture with 3 parts sap green and 1 part pyrrol scarlet, along with a little water to get a creamy consistency. To paint the stems, use the size 4 brush and add thin lines of green going downward. Make sure the stems are windy, curved and bent to show that the flowers are light and are bending due to the wind.
-
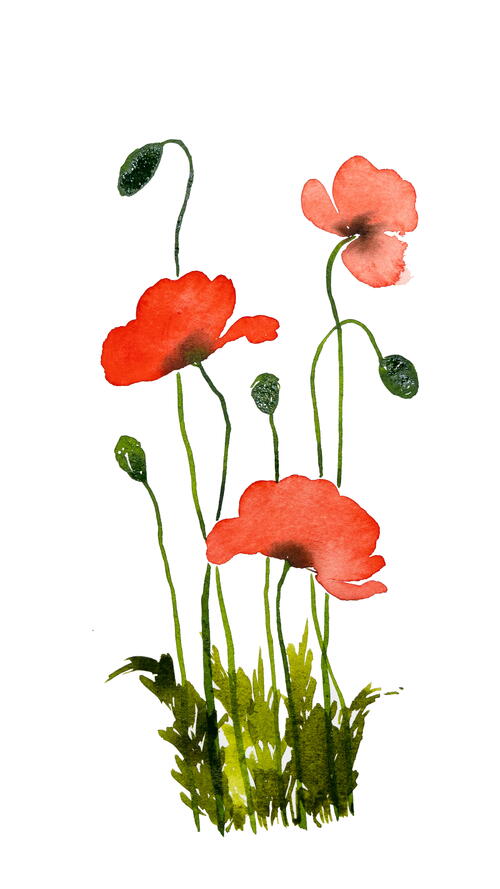
To add the buds, use the size 8 brush and create oval shapes using the same green mix. Make the stems of these buds slightly bent and curved. Add more buds of slightly different shapes.
-
Add more water to the green mix so that it flows freely from the brush. Using the size 8 brush loaded with the watery green mix, make swift, rough, upward movements from the bottom to create ruffled leaves. Repeat this to paint several leaves until the base of the stem is completely covered with leaves.

Read NextToco Toucan