


This project was submitted by one of our readers, just like you.
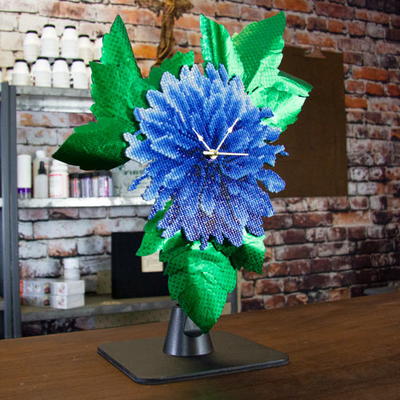
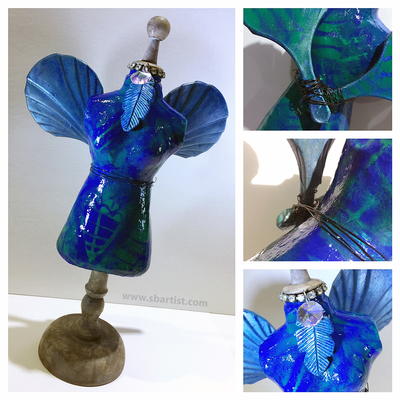
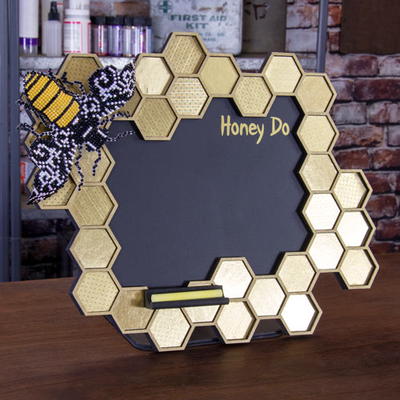
DIY: Dragon in the Window Featuring Diamond Art, Lights and "Stained Glass"

DIY Dragon in the Window Featuring Diamond Art Lights and Stained Glass
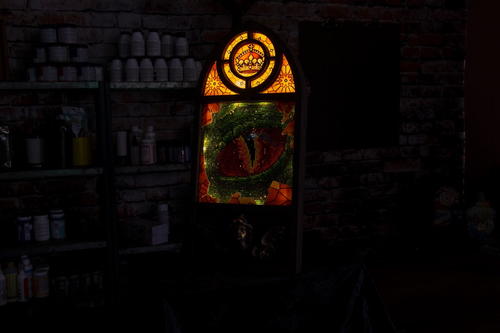
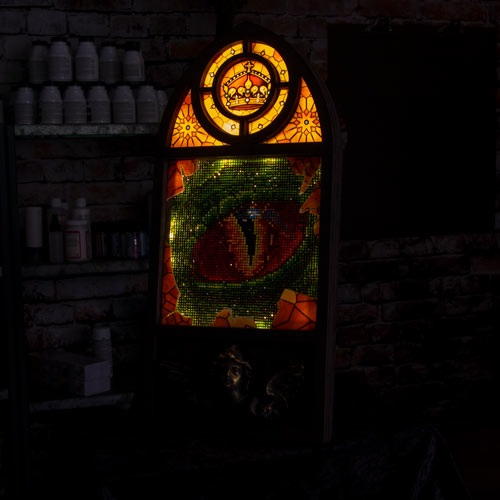
From the Designer: "As everyone knows, dragons are curious creatures. This dragon couldn't resist the temptation to peek inside the castle windows. One night she did just that. But her curiosity got the best of her and she got a bit too close - shattering the stained glass window with her nose. A custom made shadow box fits the Diamond Art by Leisure Arts Dragon Eye and houses the battery pack for the string of LED lights that bring this window to life. Includes downloadable patterns."
Get the PDF Project Instructions.
This project is divided up in to 4 parts: 1. Wood Structure 2. Diamond Art Dragon Eye Embellishment 3. Stained Glass Windows (Shrink Film) 4. Finishing and Assembly
Primary TechniqueMixed Media

Project TypeMake a Project
Materials List
- Diamond Art by Leisure Arts Dragon Eye
- Grafix Inkjet Printable Clear Shrink Film (5 sheets, 8-1/2″ x 11″)
- FolkArt® Acrylic Paint – Licorice, Burnt Umber
- Plaid Liquid Leaf – Classic
- Rinea Foiled Paper – Glossy Silver
- Relics and Artifacts embellishments – Ancient Soul II (wings only) and Archangels (head only)
- 1/4” or 6mm Baltic Birch (1 piece, about 24” x 36”)
- 1/8” or 3mm Baltic Birch (1 piece, about 24” x 36”)
- Saw-toothed hanger
- DAP RapidFuse
- Scor-Tape Double-Sided Adhesive Tape (1/4″ and 1/8″ wide)
- Strand of battery powered, LED Lights (about 23 feet)
- Felt – Black (preferred but any color will work)
- Hook and Loop (i.e., Velcro) tape or dots
- Proxxon Scroll Saw DS 115/E
- Proxxon Bench Drill Press TBM 115
- Brother ScanNCut SDX125
- Proxxon Micromot 50/EF Rotary Tool
- Hot glue gun
- Small drill bit
- Cutoff wheel (for rotary tool)
- Safety goggles
- Scissors, craft knife, cutting mat
- Pencil
- Brushes, Sponges
- Plaid® Art Materials – Brush Basin filled with water
- Clamps
- Dragon in the Window Patterns (Zip File)
Instructions
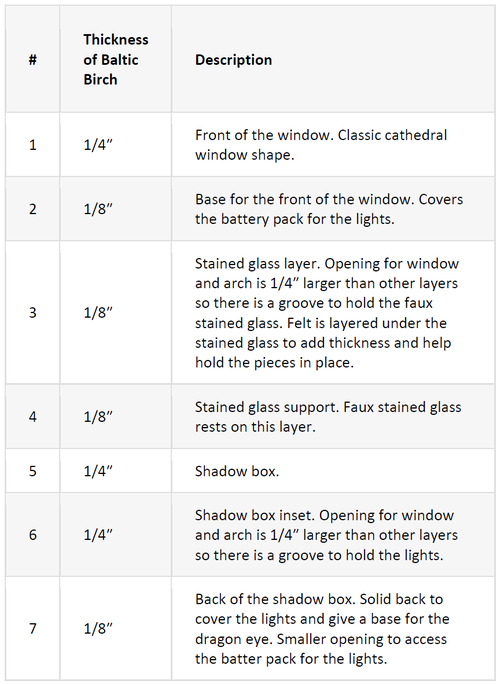
Wood Structure: 7 Layers
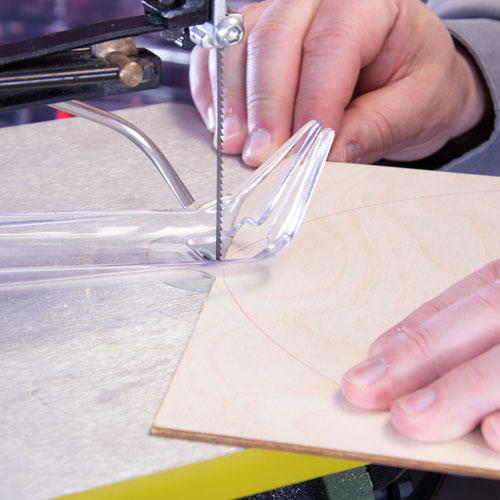
Scroll Saw Tips Always wear safety googles when working with power tools. Remove your watch and any dangling jewelry, like bracelets. Be sure your sleeves don’t get in the way. Never “hog” the wood. “Hogging” is the woodworking term for pushing the wood too fast through the blade. Allow the blade to do the cutting. It takes practice and patience to get the “feel” of using a scroll saw. The effort is worth it. You’ll be amazed at what you can create with this bench top tool.
-
Download the Patterns The structure of the cathedral window consists of seven layers of Baltic Birch. The layers are stacked to give depth to the project and to create “channels” for the stained glass and lights. Download and unzip the Dragon in the Window Patterns (Zip File). Print each pattern for the 7 layers and trace each one on to Baltic Birch.
Note: click the chart for larger version. -
Cut Out the 7 Layers Use the scroll saw to cut out the 7 layers of the window. Be sure to use the thickness specified for each layer. To make the interior cuts for the window, battery compartment and arch windows, start by drilling a small hole inside of each of those areas. Insert the scroll saw blade through the hole and then cut out that area. Use a pencil to write the number of each layer on the front (e.g., in the lower right corner). This will make it easier for you to identify the layers referenced in these instructions.
Diamond Art Dragon Eye
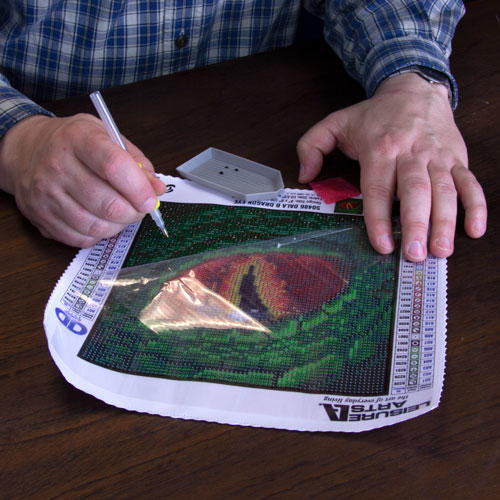
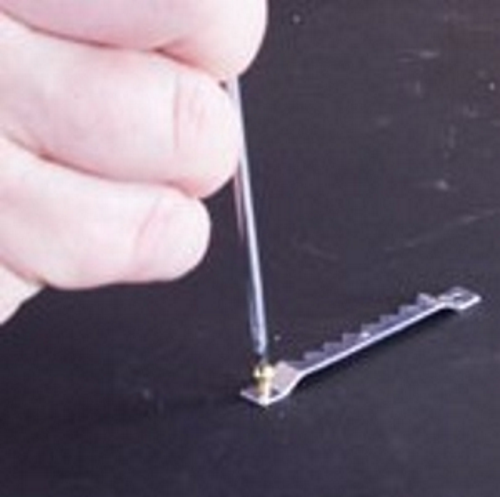
Diamond Art Tip Only pour enough Diamond Gems in to the Craft Tray to cover about two-thirds of the tray and then gently shake (or shimmy) the tray side-to-side so the gems align in the grooves and magically arrange themselves with the faceted side up. This makes the gems quick and easy to pick up and place on the pre-printed design.
-
Apply Diamond Art Gems Following the instructions included with the Diamond Art by Leisure Arts Blue Dahlia kit, apply the Diamond Art Gems to the pre-printed design using the wax coated tip of the stylus. Everything you need to create the dahlia is included. New to Diamond Art? Check out Joe Rotella’s unboxing video for how to get started at https://youtu.be/ZeAUSxwthSs
-
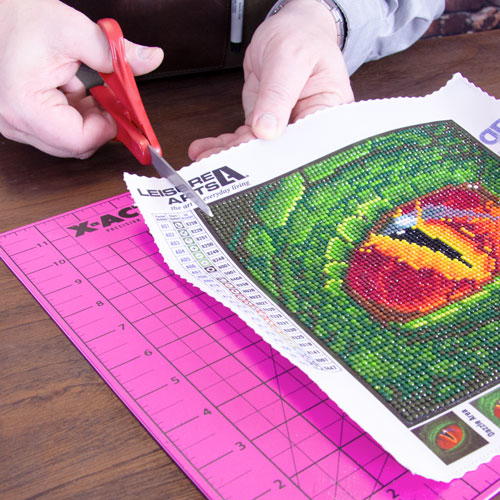
Cut Out the Dragon Eye Use scissors or a craft knife and cut out the dragon eye.
Stained Glass Windows (Shrink Film)
Shrink Film Tip Different brands of shrink film will shrink different amounts. This project needed finished “shrinks” that were a precise size. To determine the shrink rate for a specific film, create a test design of a specific size (e.g., a 6″ square). Shrink the test piece and measure the results (e.g., 2.7″). Divide the original size (6″) by the “shrink” size (2.7) and you’ll get the shrink rate. In this example, 6/2.7=2.22. Using that rate and knowing what the “shrink” size of a piece should be, you can determine how big the original should be when printed/drawn and then when it shrinks you should get close to the desired size.
-
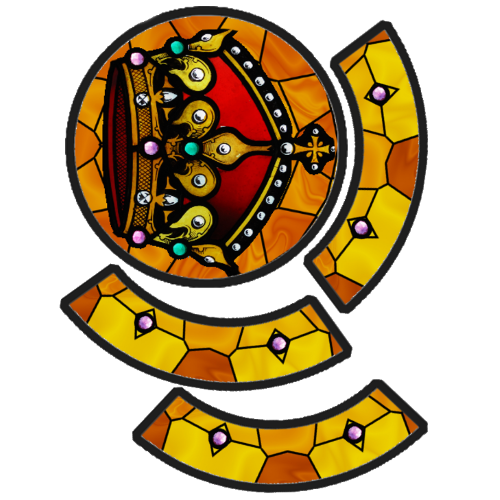
Create Stained Glass Windows Download the Stained Glass Window pattern (PDF). Follow the manufacturer’s instructions and print the design on Grafix Inject Printable Shrink Film. Cut out the pieces. Shrink a few pieces at a time at a lower heat (e.g., 300°F) for a slightly longer period time (e.g., 3 minutes). Flatten the resulting pieces if necessary.
-
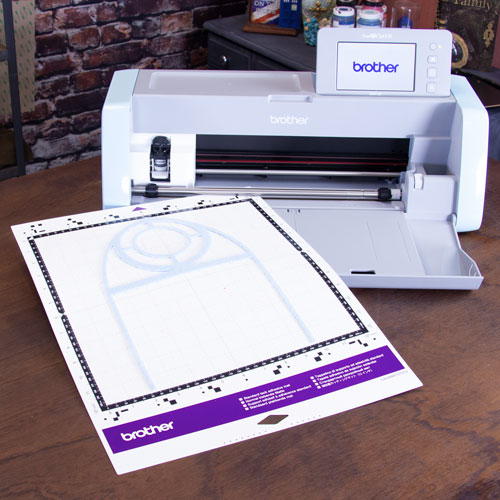
Cut Out the Felt Spacer Load the Felt Stained Glass Spacer FCM file in to the Brother ScanNCut SDX125. Put a piece of felt on the mat and cut out the design. The felt I used was very stuff, so it could be cut without the addition of fusible web or spray starch. Consider using a dedicated blade for cutting fabric. Just as you should have a dedicated pair of scissors for fabric and one paper, you should have a dedicated blade for fabric and a separate one for paper.
-
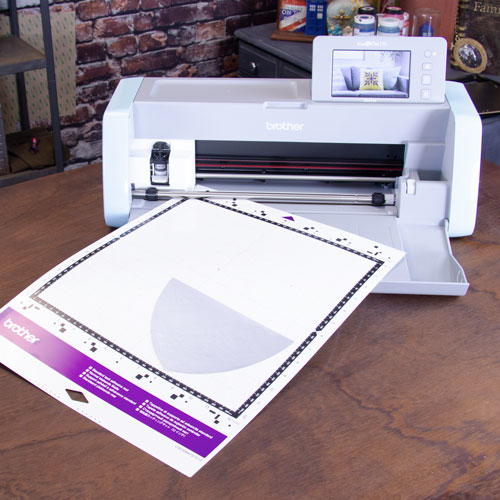
Cut Out Silver Reflector Load the Silver Reflector FCM file in to the Brother ScanNCut SDX125. Cut the reflector out from a piece of Glossy Silver Rinea Foiled Paper. This will be used inside the shadowbox, under the lights, to help the light reflect off the inside back up through the stained glass windows.
Finishing and Assembly
Assembly Tips Whenever you’re adhering two pieces of wood together, it’s always best if you can clamp the materials in place until they are dry. This ensures a nice tight fit. It’s always easier to work on a project when it can lay flat. In this project, we put the saw-toothed hanger on last so the back can lay flat for all the previous steps.
-
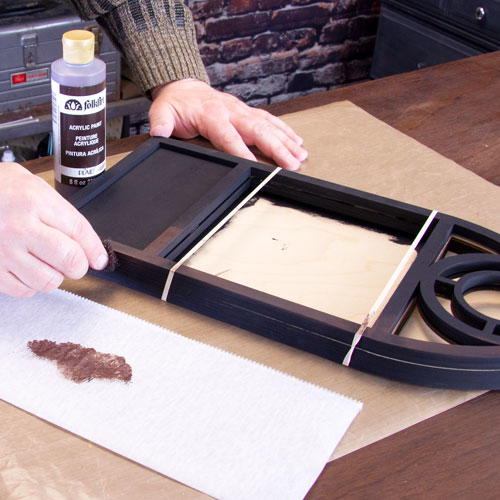
Paint the Window Frame Black Dry fit the 7 layers together and paint all the exposed areas black (Licorice). You can hold the assembly together with a couple of rubber bands while you work. By painting the pieces layered together, you’ll have an easier time painting only what’s going to be exposed in the finished project. There’s no need to paint areas that are covered by other layers. Be sure to paint the underside of the back (layer #7), since that’s exposed and having it painted gives your piece a professional touch. Set aside to dry.
-
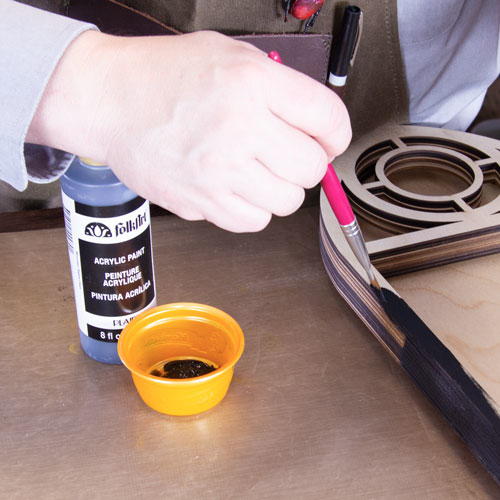
Dry Brush or Stipple Burnt Umber Apply Burnt Umber to the window frame using a dry brush or sponge. Apply as much as you like to get an effect you like. I like seeing some black through the burnt umber, which gives the piece a vintage or distressed look. Set aside to dry.
-
Build Layers 1 and 2 Use DAP RapidFuse to adhere layer #1 on top of layer #2. Clamp and set aside to dry. Once dry, adhere Relics and Artifacts to the front of the piece using DAP RapidFuse. Set aside to dry. Paint the Relics and Artifacts black, let dry, and then stipple burnt umber. This should make the relics and artifacts look like they were “carved” in to the same wood as the window frame. Highlight the ridges of the relics and artifacts pieces with Liquid Gold.
-
Build Layers 3 and 4 Use DAP RapidFuse to adhere layer #3 on top of layer #4. Clamp and set aside to dry. Use Scor-Tape to adhere the felt spacer on top of layer #4. It should fit snugly up against the frame created by layer #3.
-
Attach “Stained Glass” Apply Scor-Tape to the top of the felt and then adhere the faux stained glass pieces to the tape. Since you’re working from the top, be sure all the stained glass pieces are facing “good side” (e.g., the bright side) up.
-
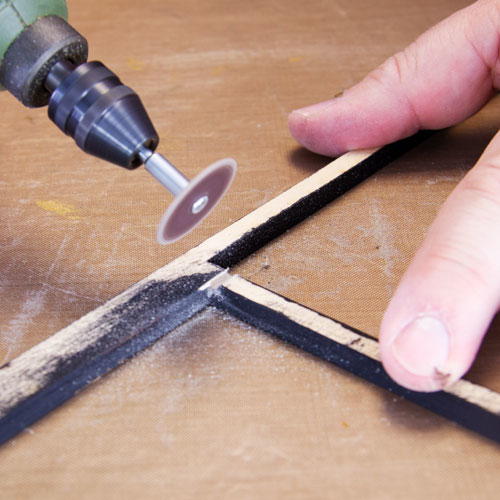
Create a Groove for the Wires Flip layer #6 over, so you are working on the back (or bottom) of that layer. Use the rotary tool to cut a shallow groove connecting the battery compartment to the window area and the window area to the stained glass area. You cutting that groove in the 4 corners of the window, parallel to the sides of the window. This lets you run the wires for the lights from the battery compartment, around the window and then up in to the stained glass area without have to squeeze the wires between layers of wood.
-
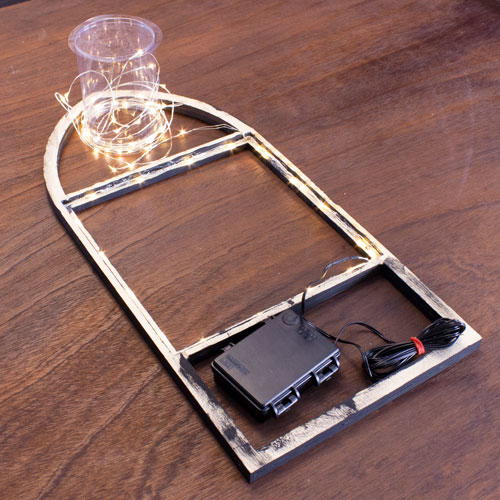
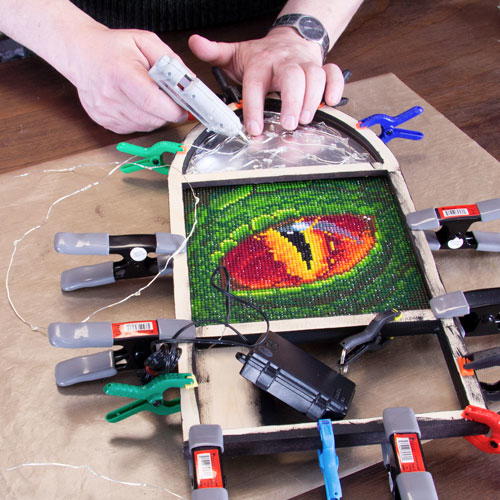
Build Layers 5 and 6 Use DAP RapidFuse to adhere layer #5 on top of layer #6. Clamp and set aside to dry. Flip the piece over and work from the back. Run the wires for the lights from the battery compartment, through the groove, around the window frame (the lights will go around the right side, top, left side, bottom and then right side again), through the groove and then up to the stained glass area. Nestle the lights as close to the outer edge and as flat against the underside of layer #5 as possible. This tucks the lights in under the frame made by layer #5, so the mechanics (i.e., bulbs and wires) aren’t very visible from the front of the finished project. Hold the wires in place with a dot of glue using the hot glue gun. Don’t worry about the lights in the stained glass area. We’ll do that section later, once layer #7 (the back) is in place.
-
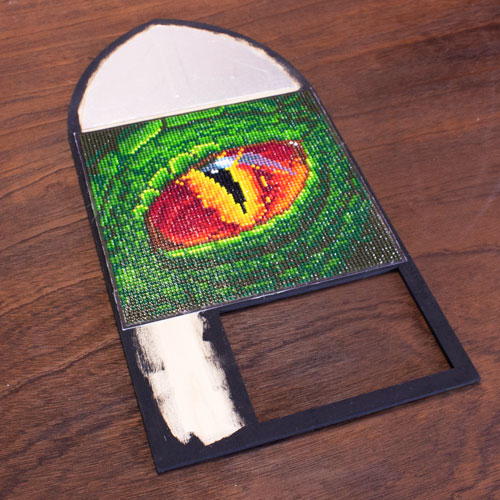
Attach Dragon Eye and Silver Reflector Use Scor-Tape to attach the dragon eye and silver reflector to the top of layer #7. To be sure the dragon eye is positioned correctly, put it in place (without adhering it) and place layer 5/6 on top, side the pieces around under layer 5/6 aligns perfectly with layer #7 and none of the diamond gems on the dragon eye are sandwiched between the layers. Then carefully lift off layer 5/6, roll back a little of the dragon eye (holding the rest in place) and put a piece of Scor-Tape under it. That will fix the dragon eye in place while you add more Scor-Tape.
-
Attach Layer 5/6 to 7 Use DAP RapidFuse to adhere layer 5/6 on top of layer #7. Clamp and set aside to dry.
-
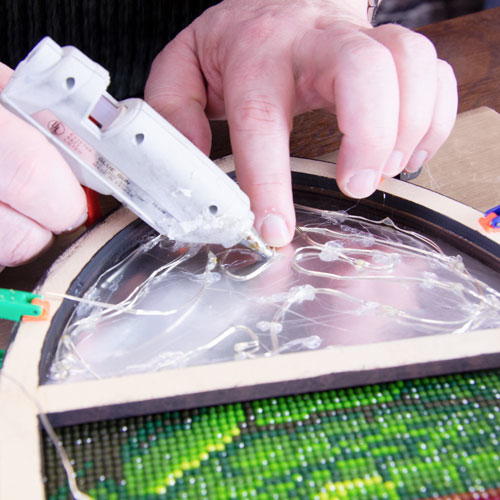
Attach Lights to Layer 7 Use hot glue to attach the lights to the silver reflector in layer 7. It’s best to work with the lights on because it makes it easier to see where some areas need more lights. Don’t worry about the path of the wires or the look of the glue spots. These lights will be behind the stained glass so the mechanics are hidden. Focus on getting the lights as evenly dispersed as possible.
-
Adhere the Saw-Toothed Hanger Carefully turn over layer 5/6/7, taking care to support the battery pack. Attach the saw-toothed hanger with the screws provided. For extra holding power, put a dot of DAP Adhesive under the hanger before you screw it in place.
-
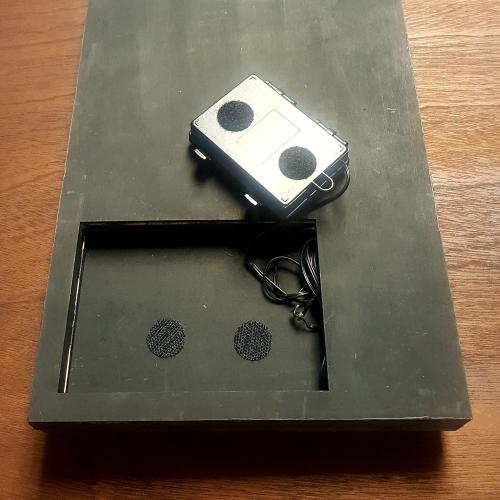
Final Assembly Use DAP RapidFuse to attach layer 1/2 to layer 3/4, being careful that the stained glass pieces remain in place. Clamp and set aside to dry. Attach layer 1/2/3/4 to layer 5/6/7. Clamp and set aside to dry. Touch up with black and burnt umber paint as needed. Use Velcro tape or dots to adhere the battery pack in its niche, against the underside of layer 2.
About Joe Rotella
Joe’s work has appeared in Scrap & Stamp Arts, Just Cards, Just Steampunk! and Somerset Studio Gallery magazines. He’s been a guest on Crafting at the Spotted Canary with Joy Macdonell and Scrapbook Soup TV. Look for him on the TV show Make It Artsy, airing nationally on PBS TV and Create TV.
He’s won Archiver’s One-of-a-Kind Wall Art contest and blue ribbons at the Ohio State Fair. He’s served on the Viva Las Vegastamps!, Want2Scrap, USArtQuest and Proxxon design teams and is currently a Brother Signature Designer and a Plaid Ambassador.
He's a regular instructor at AFCI Creativation, Artiscape, Stampaway, Memories Expo and Gen Con and has his own line of embellishments and kits. Learn more about Joe on his site, www.createNcraft.com
When he’s not designing paper art projects, he works as Chief Marketing Officer (CMO) at Delphia Consulting. He frequently speaks at AFCI events and delivers AFCI webinars.

Read NextGame of Thrones mixed media Lamp