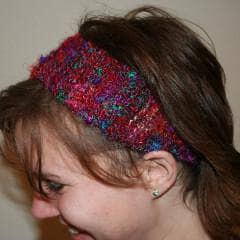
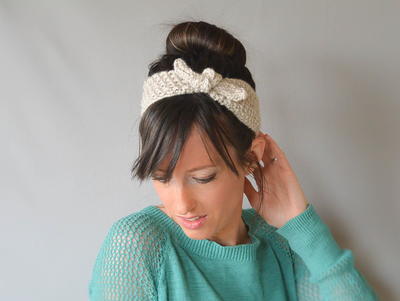
Knit Recycled Headband
This free knit pattern calls for knitting needles along with two double pointed needles to make an i-cord. This is a great green craft to recycle old yarn you have laying around. Just one ball of yarn can create two headbands.
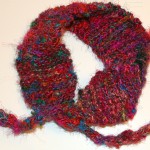
Materials:
- 1 ball of Darn Good Yarn's Premium Recycled Silk Yarn ( you can make two headbands from just 1 100g ball)
- Size US 5 knitting needles
- 2 Size US 5 Double pointed Needles (to make i-cord)
Instructions:
- On DPNs or circulars, CO 3 and make an i-cord for about 4 inches (or however long you want the tie tails to be and how you’re going to tie it in the back). Remember, as you break the silk in and wash it, it will stretch a little so if you’re not sure, go shorter.
- After you have the first side of the tie done, you’ll start some very simple increases by making one at the first stitch and last stitch of the row for every row until you have the desired width. I brought mine out to 11 stitches. You can increase in your favorite fashion. Your hair will cover it up probably so don’t worry too much. I like KFB (knit front and back).
- Now, here is where you get to be creative and you should think about how many stitches you should have on your needles now. You can go straight garter (all knit stitches) or you can really play around with the stitch pattern. Remember to account for the number of stitches you have on your needle. For example, double moss stitch (which is fun and easy and doesn’t allow for too much stretching) is created in multiples of 4’s so you would only want 12 stitches on your needles.
- If you started on DPN’s and you haven’t moved your work onto straight needles you can do that now. If you’re on circulars, you can keep the work on there. You’re not joining the work in any way but working back and forth as you would on straight needles.
- Put your work down for a second and measure your head. Where are you going to wear your headband toward the front of your hairline, behind your bangs? Measure it from the middle of your left ear, over your head, the the middle of your right ear. This is a great approximation of how long the body of your work should be. Again, remember, there will be some breaking in over time so while it seems short, it’s not.
- About 12-13 inches will do though in case you don’t have a tape measure handy.
- So after you’ve knitted the body up, start decreasing one the first and last stitch of the row down to where you have three stitches. Straight needles users, put your work onto DPN’s and circular needle. Make up that i-cord for the same length you made the first one. Bind off and weave in any ends of course.
Read NextBeginner Hat Knitting Pattern
Your Recently Viewed Projects
lhamilton123 80227 49
Mar 19, 2012
Knit Recycled Headband is totally hot & unique from all(!) patterns I searched. I have Raynaud Phenomena which causes the inside of my ears to get cold. With the a/c I definetly have to cover my ears but have been searching for patterns that can be worn with lighter clothing during the hot southern summers without making it obvious meant for winter. I am going to start tonight knitting one for my great niece & one for "Aunt Lowee"-me! I'm growing hair out too & due to another med condition can't wear the plastic headbands yet I love 'em. I plan on having alot of fun with this pattern...yarns & colors(!), needles, widths, ties, etc. Yes, the simpler things in life are often free & fun !
charlottecevans 01 21744
Apr 03, 2011
I love knitting and crocheting! Each has different textures and different uses. This headband I made for Christmas gifts for the women in my family. I used grograin ribbon on either end to tie the headbands on. This is a great way to use leftover yarn into a useful, fun project to knit quickly and gift to others. I just sent one to Germany :)
Report Inappropriate Comment
Are you sure you would like to report this comment? It will be flagged for our moderators to take action.
Thank you for taking the time to improve the content on our site.

