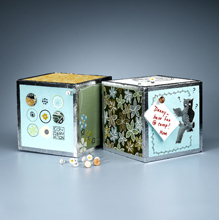
Modern Memo Cube
Aluminum tape edges create a sense of industrial cool on this clever, cork-covered modern memo cube. The embellishments can be customized to make this cube a look that is all your own. This craft looks great in the kitchen for leaving messages to your busy family.

Materials:
- 8" cube of STYROFOAM™ Brand Foam
- Acrylic paints: soft yellow; white; light green; apple green; aqua blue; ochre
- Assorted fabric scraps
- Assorted cardstock scraps
- Assorted decorative paper scraps
- Scrapbooking embellishments of choice (stickers, charms, rub-ons, etc.)
- Vintage images (designer used vintage magazines and clip art CDs)
- Cork sheet, 3/32" x 18" x 24"
- Aluminum foil tape, 3/4" wide (available at hardware stores)
- Scissors
- Stencils: alphabet; 1/2" circle (optional)
- Foam and rubber stamps, assorted
- Dye ink pad, black
- Pencil
- Black permanent markers: fine; medium
- White paint pen, Fine-point
- Flat-head push pins
- Wooden items: toothpicks; craft sticks, two
- Paintbrushes: flat; round; liner
- Ruler
- Craft knife with sharp blade
- Circle punch, 1/2" (optional)
- Low temperature glue gun and glue sticks
- White, thick craft glue
- Specialty adhesives: metal; glass; plastic foam; spray
Instructions:
-
Cut six 8" squares from cork sheet. Use plastic foam glue to adhere cork square to one side of foam cube; spread glue evenly all the way to edges using craft stick. Place cube cork side down until dry; place heavy book on top of cube to ensure good bond. Repeat for each side of cube.
-
Measure and cut fabric scraps to cover one or more cube sides. Spray cork with adhesive and cover with fabric; trim excess.
-
Paint cork on one or more sides of cube as desired; let dry completely.
-
Refer to photo to decorate cube sides using stamps, stencils, punched paper circles, vintage images, and more. Embellish cube sides with paint pen, markers, and paint.
-
Cut twelve 8" lengths from tape. Fold each strip in half lengthwise, adhesive side out, to crease. Remove backing and press to one side of cube, aligning crease with vertical cube edge; smooth tape over corner to second side. Repeat for each vertical cube edge, then each horizontal cube edge.
- Embellish ends of push pins with desired elements, using metal and glass glue as needed. Apply rub-on transfers and stickers as desired. Position small flowers on top of push pins, wrapping stems around pins and curling ends with toothpick.
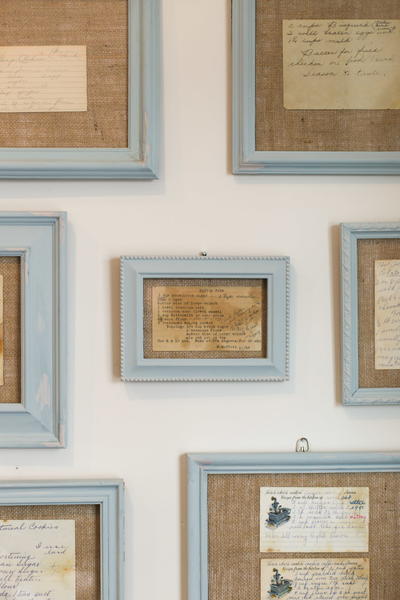
Read NextHeirloom Recipes DIY Framed Wall Art