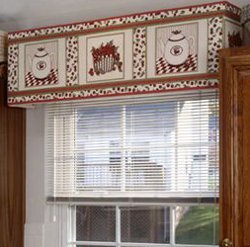
Cheery Cherry Kitchen Cornice
Here's a fun, inexpensive, no-sew makeover for any window in your home. Simply glue batting and fabric to cornice sections cut from foam sheets. How versatile!

Materials:
-
STYROFOAM Brand Foam:
- Sheets, 36" x 12" x 1", two
- Cotton print fabrics, 45" wide, 2 yds. each: pillow panel (8" tall motif); coordinating small print
- Unbleached muslin, 90" wide, 3/4 yd.
- Quilt batting, crib size or 45" wide, 1-5/8 yds.
- Iron-on adhesive: 17" x 1-5/8 yds.; 3/8" and 7/8" wide, one package each
- Grosgrain ribbon to match fabrics, 3-1/8 yds. each: color A, 3/8" and 7/8" widths; color B, 3/8"
- Floral supplies: t-pins, six; wooden picks with wires removed, 3" long, 35
- Angle brackets with screws, 5", two
- Serrated knife
- Candle stub or paraffin
- Fine-line black permanent marker
- Yardstick or ruler
- Scissors
- Straight pins
- Iron and ironing board
- Low-temp glue gun and glue sticks
- Glue for plastic foam
- Pattern
Instructions:
-
Wash and dry fabrics without fabric softener; press.
-
Refer to cutting layout to draw cornice sections onto one foam sheet; label sections. Wax serrated knife with candle stub or paraffin. Cut sections from foam.
-
Use glue gun to glue three floral picks, equally spaced, halfway into short end of one TOP. Apply foam glue to foam edge around picks. Use glue gun to glue protruding pick ends into short end of remaining TOP, so sections fit tightly together. Finished cornice top should measure 5" x 38".
-
Refer to Fig. 1 to join sides to top. Use glue gun to glue three picks into each short end of cornice top, leaving 3/4" pick end protruding from foam. Apply foam glue to foam edge. Use glue gun to apply glue to protruding pick ends. Press upper 5" edges of ENDS flush with cornice top as shown. Top of cornice should measure 5" x 40".
-
Repeat Step 3 to join FRONT to remaining foam sheet along one 12" edge. Refer to Fig. 2; picks are indicated by short black lines. Finished cornice front should measure 12" x 40".
-
Use glue gun to glue remaining picks halfway into front edge of top/sides assembly, spacing picks about 3" apart. Apply foam glue to foam edge around picks. Gently press cornice front onto pick tips. Using glue gun, spot glue foam edges between picks. Quickly and firmly press cornice front flush with cornice top/sides assembly. Let dry completely.
-
Cut one 23" x 57" rectangle from batting. Center cornice front on batting. Smooth batting over outside of cornice, allowing excess to overlap bottom and back edges (where cornice will rest against wall). Pin batting to outside of cornice to secure. Wrap batting smoothly around cornice edges to inside, trimming and mitering corners as needed. Pin to secure. Trim excess batting, allowing 1-1/2" overlap inside each edge. Use glue gun to secure batting to inside of cornice. Let dry completely. Remove pins.
-
Cut one 23-1/2" x 57-1/2" rectangle from muslin. Repeat Step 7, gluing muslin over batting.
-
Cut one each from small-print fabric for cornice lining: 5-1/2" x 60" (inside top and sides); 11-1/2" x 39" (inside front). Press 1/2" hem in both short and one long edge of 60" fabric piece. With fabric right side out, pin long hemmed edge inside cornice, 3/4" from back open edge. Use glue gun to glue fabric to inside of muslin-covered cornice. Remove pins. Smooth lining with hands. Press 1/2" hem in all sides of front lining piece. Use glue gun to glue fabric, right side out, to inside cornice front, covering raw edge of top/side lining.
-
Cut vertical row of panels from pillow panel fabric. Using photo as guide, center fabric over cornice front and sides; pin to secure. Cut two fabric strips for top and bottom borders if needed, each approximately 3" x 56". Pin borders to front and sides of cornice.
-
Cut ribbon lengths to fit and position as desired along top and bottom panel and cornice edges, hiding raw fabric edges, and around panel motifs. Pin to secure. Note: Model pictured uses wide green ribbon, narrow green ribbon, and narrow red ribbon to complement fabrics. For upper and lower panel borders, center narrow ribbon over wide ribbon as shown.
-
When pleased with arrangement, carefully transfer fabric pieces and ribbon to work surface. Following manufacturer's instructions, apply iron-on adhesive to wrong side of fabric and ribbon lengths. Beginning with panel, remove paper backing from fabric and iron on to cornice. Trim excess length and spot glue to back edge of cornice. Repeat for borders and ribbon lengths.
- Follow manufacturer's instructions to attach brackets to top back edges of cornice.
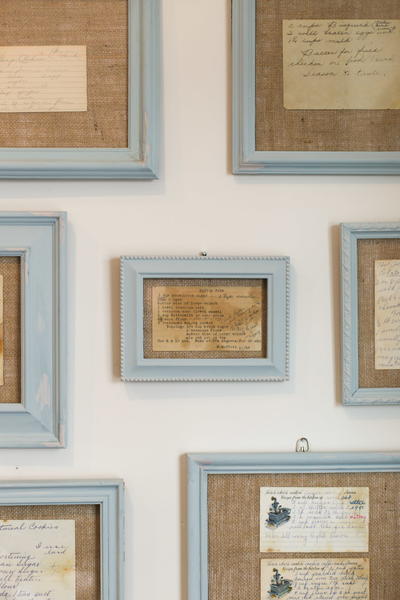
Read NextHeirloom Recipes DIY Framed Wall Art