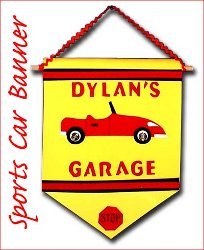
Boy's Sports Car Banner
Decorate your little boy's room with this cute sports car banner. Use craft foam for this fun project. Your little one can even help you make it. He'll love it hanging on his wall.

Materials:
- CRAFTFOAM GLUE
- GEM-TAC GLUE
- 12” X 18” sheet yellow craft foam
- 1⁄2 sheet red craft foam
- 1⁄2 sheet black craft foam
- Small scraps of white craft foam
- 2 white buttons, 3⁄4”
- 2 silver buttons, 1⁄2”
- 2’ red rickrack or other cording
- 14” dowel, 3/8”
- 1 1⁄2” alphabet stencil
- Black fine point permanent marker, straight edge, craft knife or rotary cutter, measuring tape or ruler, scissors, pen
Steps:
- Make a point on one end of the yellow foam. Find the center on a 12” side and measure 4” up on each side. Place straight edge on 4” mark and on center mark then cut with craft knife or rotary cutter (You may also draw any of the lines in this project and cut with scissors.)
- Using a straight edge with knife or cutter, cut two 1” X 12” strip and one 3” X 12” strip from the black foam. Cut two ½” X 12” strips from the red foam.
- Apply CRAFTFOAM GLUE to one side of each strip following bottle instructions. Using the photo as a guideline, glue one 1” black strip across the banner base and one strip 8” up from the first. Place red strips in the centers of the black strips and glue together.
- Fold top edge of foam banner around dowel to back. Glue 3” black strip across folded foam and back of banner, securing dowel pocket in place. Tie rickrack to ends of the dowel with double knots.
- Using patterns, trace and cut car and stop sign from the red foam. Trace and cut tires, windshield and door handle from the black foam. Trace abd cut bumpers and light from the white foam. (For smoother edges on foam, cut with long, even stroke. Turn the foam, not the scissors.)
- Trace name and GARAGE letter onto the red foam with alphabet stencils to the wrong side for tracing. (By tracing letters in reverse, all pen marks will be on the wrong side of the foam.) Cut out the letters.
- Apply CRAFTFOAM GLUE to all letters and car parts, following bottle instructions. Press letters into place by working from the center out to each side. Center car on banner and add windshield, handle, bumpers, headlight & tires. Glue stop sign next to bottom point.
- Use the black marker to add details, dash lines to red strips, to outline sign and write STOP.
- Attach buttons to tires with GEM-TAC. Glue and stack white then silver buttons onto centers of each tire.

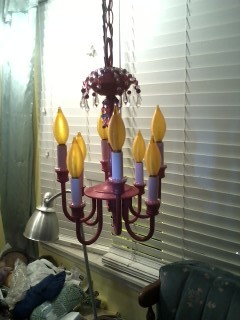
Read NextThrifty Princess Chandelier