Fun Circus Table

If you've been wanting to learn how to make a table that will drop jaws, this tutorial is for you. Once you see how cool this Fun Circus Table looks in your house, you may just be inspired to take on other painting projects similar to this. You will have so much fun making this table that it truly lives up to its name. Making a table into a cute new piece of furniture is very enjoyable. Take your plain and worn table and turn it into a Fun Circus Table to freshen up the room.

Materials:
- Acrylic craft paint (choose your color palette – think of a few main colors (red) plus black, white, and cream and then think of a few accent colors (gold))
- Gold paint pen
- Glossy varnish
- Optional sand paper
- Assorted brushes (1/2″ and 3/4″ flat brushes and small round brush)
- Painters Tape (for stripes)
- Pencil with new eraser (eraser used for polka dots)
- Q-tips (for smaller polka dots)
Instructions:
- First be sure to clean your table up.
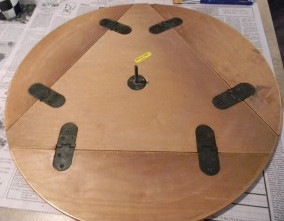
- Dismantle part of the table for easy painting. Remove the top first and the sides.
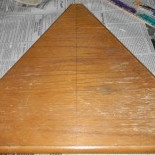
- Mark the middle of the center table piece. Then working out from that middle mark, place marks every 3/4″ in both directions and draw lines to create checkerboard.
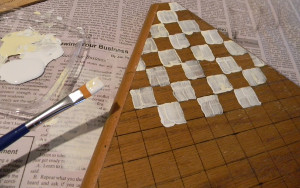
- Squeeze some white onto a plate or lid (Recycled yogurt lids work great.) Then add a bit of cream paint next to the white.
- Dip your brush in white and then on dip the side into a little of the cream paint.
- This two-tone techniques looks great and closely resembles the checkerboard on my authentic Mackenzie Childs tea pot.
- Paint in all the white/cream squares.
- Once the white/cream squares dry, add the black.
- With the black you need to be a little more careful and stay in the lines.
- You can also add a tad bit of cream with the black for a more subtle two tone affect.
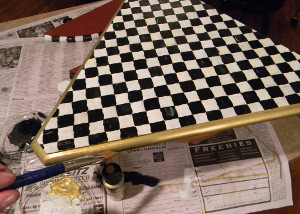
- Once the black is dry add gold to the edges, which you cannot see when it is complete and the sides are up.
- Put two coats of red on the side pieces of the table top.
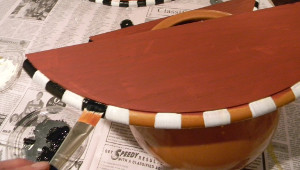
- Using you 1″ flat brush, add some stripes to the side with cream/white and then black.
- Another TIP… elevating the piece on a bowl or cookie jar works great to paint the edges.
- Add polka dots to the red tops by dabbing the end of pencil into gold paint.
- Leave the legs on to paint.
- Paint the bottom of the legs with two coats of red.
- Place a ruler in the center of the sides of the table and make 1/2″ marks starting at the center.
- TIP- Make an odd number of marks if you are using 2 colors and want the same color to end up on both ends.
- Once the legs are dry, take the table apart so you can paint the checkerboard and gold on the bottom flat surface and add gold polka dots to the bottom part of legs with Q-tips.
- Lightly wet the end of the Q-tip to make sure there aren’t any fuzzys sticking out.
- Dab the Q-tip in the gold paint and then on the table leg. Prop up and let dry.
- Reassemble bottom of table when the gold dots have dried.
- Paint the top of the main spindles gold and the corners of the sides gold.
- I also painted the top of the bottom spindles black.
- Using the end of a paint brush add black dots to the gold corners.
- When table is all painted and stripes and polka dots are all added and completely dry add one layer of glossy varnish!
Read NextDyed Glass Mason Jars