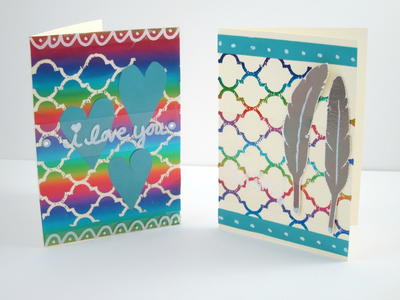
Creating Your Own Floral Greeting Card
Create a unique card from Jacquard Products using ExtravOrganza and Castaway with a photo printed on your inkjet printer.

Materials:
- Castaway Stamp Pad
- ExtravOrganza - 1 sheet
- Pearl Ex - in the color of your choice
- Pearl Ex Stamp Pads - in the color of your choice
- Gum Arabic
- Cardstock in the color of your choice
- Good quality paper with at least 25% cotton (I used 24 lb. Fine Business Paper by Southworth)
- rubber stamps (I used "Antique Glaze #w101" by Toybox and "Swirls" #2630 by Hampton Art Stamps)
- Computer with image editing software and inkjet printer
- glue
- scissors
Steps:
- Cut and fold the cardstock to the size you want for your card.
- Stamp an all-over pattern with a stamp and Pearl Ex Stamp Pad of your choice on the outside of the card, front and back.
- Clean your stamp then use it with the Castaway Stamp Pad to stamp once on the inner, left side of the card. Allow the stamped design to soak into the paper and then iron with a dry iron (on cotton setting). Watch how the image magically appears! Isn’t that cool?!
- On some scraps of cardstock, stamp the same design a few more times with the Castaway and iron as above. You’ll use these to cut up for accents in a later step.
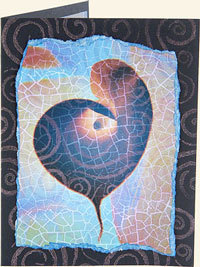
- Create the main image in a software program of your choice. I started with a digital photo of calla lilies. Then I ‘tweeked’ it in Photoshop, changing the settings in the Color Balance and the Hue/Saturation from the Image/Adjustments menu. Be bold! Create something abstract! When you are happy with your image, print it out on the Fine Business Paper. Let’s call this the Feature Image.
- Use a large texture stamp to stamp Castaway over the Feature Image. Let it absorb into the paper, then iron with a dry iron (on cotton setting) to bring out the stamped design.
- Overstamp the Feature Image with the stamp and Pearl Ex Stamp Pad from step 2.
- Tear the edges of the Feature Image to create some interest and to fit on the front of the card. Mix 1 part Gum Arabic to 3 parts Pearl Ex and add water to a consistency you like. Paint the torn edges with this mixture.
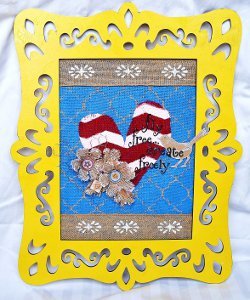
- Glue the Feature Image to the front of the card.
- Re-open the Photoshop document from step 5 and add the sentiment of your choice. Test on a plain piece of paper to check for size and text placement, then print on ExtravOrganza following the instructions on the package. Trim to fit the inside of the card and peel off the paper backing.
- Now remember those extra designs we stamped on the cardstock in step 4? Cut out some small part of the design so that you have 4 pieces and use them to glue down each corner of the ExtravOrganza from step 10 to the inner, right side of the card.
Read Next64 Handmade Cards for Every Occasion