Creepy Halloween Place Cards
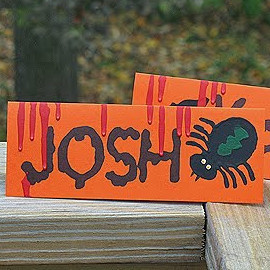
These Creepy Halloween Place Cards are great Halloween party ideas for the banquet table. With a little paint and some patience, these place cards will truly come to life. This is especially a good Halloween party idea for kids. They can each make a spooky craft to take home and use while they're at the party. If you sit them down to work at the beginning of the party, these Creepy Halloween Place Cards will be ready to go by the time dinner rolls around.
Primary TechniquePainting

SeasonFall
Materials:
- Foam stamps (spider, bat, etc)
- 5″x7″ card stock, one for each place card
- Acrylic craft paint: black, white, yellow, red
- Pencil or pen
- 2 black Sharpies, one fine and one medium point
- Halloween letters
Instructions:
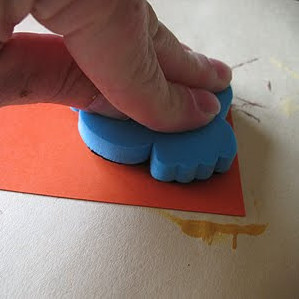
- Fold the card stock in half lengthwise, crease neatly. Choose a foam stamp for your place card.
- Coat it generously with black paint.
- Press it, paint side down, onto one of the upper corners of your place card. To remove, lift straight up so that you don’t smear any paint. You will need to let this dry before moving on to the next step.
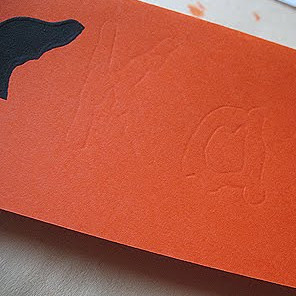
- Print out these fonts, enlarge them on your printer if needed. You can either cut out the letters that you need, or just move the paper around as needed. Place the lettered paper over your place card and position them where you want them to appear on the card. Use a pen or pencil to trace around the letters.
- This will create an indent in the card underneath. Now use your fine tip Sharpie to trace the indented lines. Use the medium point Sharpie to fill in the letters.
- Now you will need to check the consistency of your paint. In my experience, most acrylic paints are at good consistency when new but will begin to thicken as they get older. To test your paint, put some in a paint palette and dip your paintbrush in. Pull the brush out and hold it up. Most paints will be thick enough that it will not drip off the brush. You want it a little thinner, as you do want it to drip, but not quickly. Thin the paint with a little water and keep testing until the paint slowly drips off the brush.
- Stand the place card up on its ends and place a heavy drop of red paint at the crease, leaning toward the front of the card. If it doesn’t drip, just add a little bit more onto the first drop until it begins to drip down the front of the card. Repeat until you have the effect that you want.
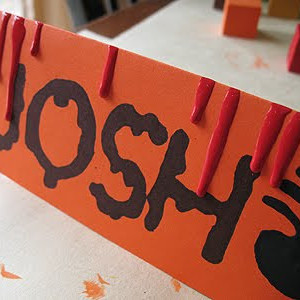
- When the drips are all dry, this will take several hours, you can use a toothpick to add eyes to you card’s creatures.
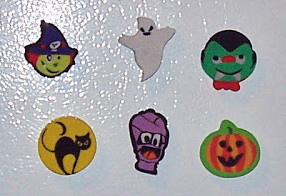
Read NextDIY Easy Halloween Magnets