Smiling Pumpkin Pals
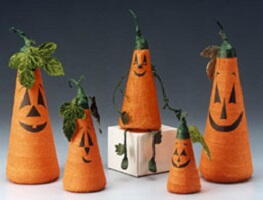
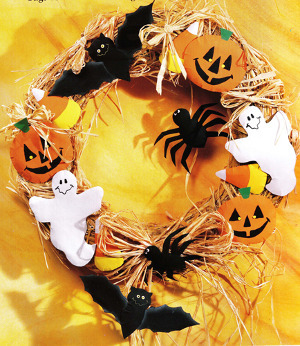
These Jolly jack-o-laterns will send some spooky smiles your way for Halloween. Made from orange crepe paper and curly crowns of stems, these easy Halloween decorations for outside or inside fun will have your guests haunted by your talent.

Materials:
- STYROFOAM Brand Products:
- Cones: assorted 4", 6", and 9" for pumpkin faces; 6" for poseable pumpkin
- Crepe paper streamer, orange
- Masking tape
- Dark green floral tape: 1/2" width for pumpkin faces; 1" width for poseable pumpkin
- Scrapbook paper, solid black
- Glue stick or white craft glue
- Scissors
- Ruler
- Small green velveteen leaves (optional)
- 24-gauge aluminum wire
- 1/4" black bead for nose
- Wooden skewer
- Matte decoupage medium
- Flat paintbrush, medium
Steps:
Pumpkin Faces
- For each pumpkin face, push end of crepe paper streamer into center bottom of cone with a wooden skewer and glue to secure. Wind crepe paper around cone to cover, overlapping edges 1/2". Gently stretch lower edge of streamer as you wrap to achieve a smooth surface. Note: If paper tears, tape torn edge to foam and then glue new end of crepe paper over it. Hold your thumb over this area as you wrap until secure.
- Trim crepe paper at top of cone. Push end into tip of foam and glue.
- Wrap top of cone with floral tape, gently stretching tape to promote adhesion. If desired, tape stems of velveteen leaves to top of cone at same time (refer to photo). Continue wrapping tape a short distance above foam to form a stem. Curl top by wrapping tape around itself a few times, trimming, and then twisting the end until it curls back onto itself.
- Using photo as a guide, cut facial features from black paper and glue to cone pumpkin. Vary faces for added interest.
Poseable Pumpkin
- Follow Steps 1 through 2 to cover cone with crepe paper. Apply a coat of decoupage medium to entire cone and allow to dry. Note: Wrinkles in wet crepe paper will smooth out as medium dries.
- Follow Step 3 to wrap top of cone with floral tape and form a thin straight stem.
- From wire, cut two 6" arms and two 6" legs. Form a 1/2" loop at one end of each leg for a foot, twisting wire to secure. Wrap arms and legs (including feet) with floral tape.
- Using pattern, cut four leaves from 1" dark green floral tape. Adhere a leaf near one end of each arm for hands and anywhere on each leg.
- Tightly twist a 4 1/2" length of floral tape, leaving 1 1/2" untwisted at one end. Continue twisting until tape curls back onto itself. Tape curled vine to an arm (refer to photo). Add additional vines to arms and legs as desired.
- Glue and insert arms and legs into cone pumpkin (refer to photo). Bend wires to pose as desired.
- Using photo as a guide, cut eyes and mouth from black paper and glue to cone pumpkin. Cover nose bead with a small square of floral tape, gathering edges of tape at back and twisting tightly. Poke a small hole in pumpkin to attach nose. Squeeze glue in hole and then push twisted tape portion of nose bead in hole with a wooden skewer.
®™ Trademark of The Dow Chemical Company ("Dow") or an affiliated company of Dow. For more project ideas, please see styrofoamstyle.com.

