Braided Pom Pom Headband DIY
DIY headbands like this one are great because they're no sew projects, and pom poms are so trendy!

Are you looking for a fun no-sew project to brighten up your spring and summer outfits? This headband is the perfect accessory! Add a pop of color and (bonus!) keep your hair out of your face. You can wear it on the beach, in the garden, or anywhere else!
The materials are easy to find at your local craft store or online, and you can make it in any colors you prefer. Plus, there’s no need to get out the sewing machine- so you can even craft outside on a nice day!
Time to CompleteIn an evening
Primary TechniqueNo Sew Project

Project TypeMake a Project
Materials List
- 1/2” (inch) wide twill tape, approximately 17’ (feet) long in a color of your choosing (you’ll only need continuous lengths of 65” though). * Twill tape is a narrow woven fabric ribbon that comes in a variety of colors and widths and is usually made of cotton or a blend. It’s the perfect material for this project because it’s inexpensive, sturdy, and widely available.
- Small skeins of acrylic yarn, medium thickness, in 2-3 colors of your choosing
- A small piece of cardboard to create a pom pom maker
- Fabric scissors
- Fabric glue (optional)
- Measuring tape (the flexible kind for sewing)
- Liquid seam sealant (like Fray Check by Dritz) (optional)
No-Sew Fashion: Twill Tape Braided Headband with Yarn Pom Poms
Here are the steps to make your own twill tape pom pom headband:
-
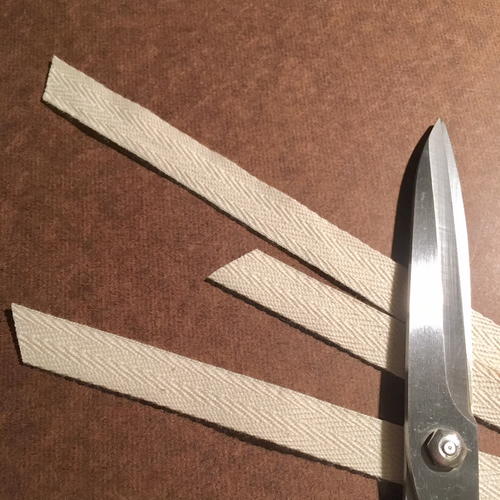
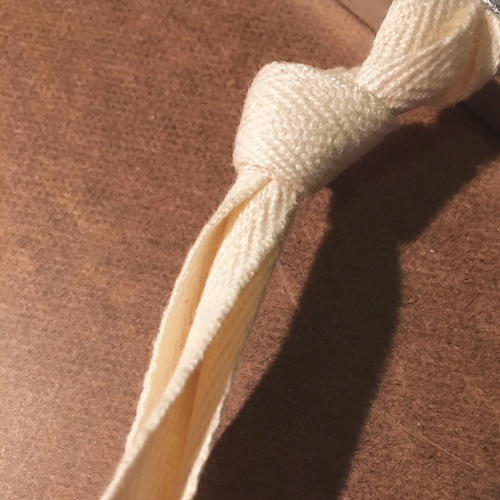
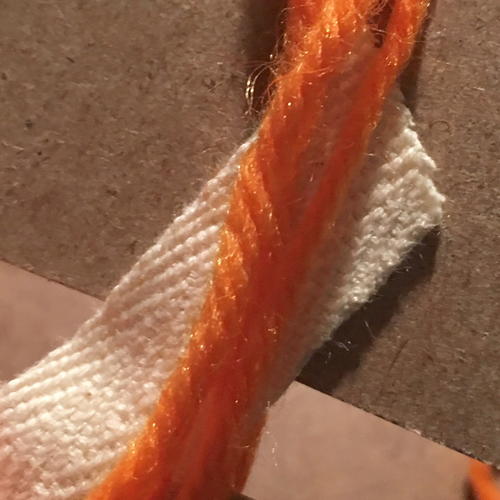
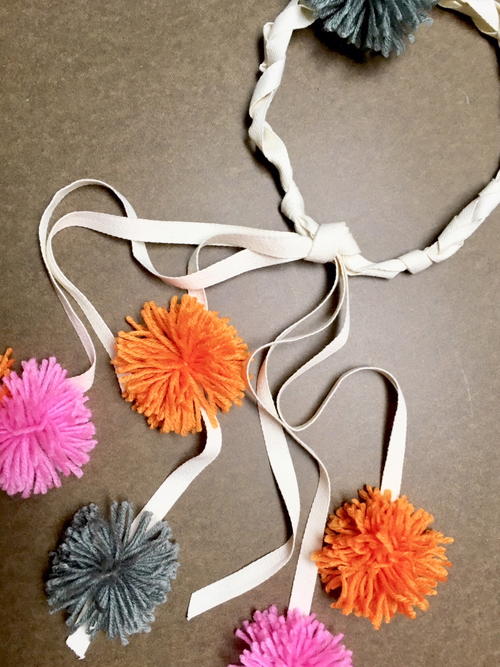
First you’ll need to make the braided twill tape part of your headband. Cut the twill tape into 3 separate 65” long pieces, placing them all together so they line up.
-
Make a secure knot with all three pieces of twill tape about 20” from one end. This will become the beginning of the braided part of your headband.
-
Measure your head where you would wear the headband and write down this number (my measurement was 23” long). You want it to fit well but not be too tight on your head. Use this measurement to determine how long your braid should be by subtracting about 1.5” from each side to account for the space to tie the stands together. For this tutorial, my braided section was about 20” long.
-
Now you can braid the three pieces of twill tape! Clip it or weigh down the end so you can work easily, and don’t make the braid too tight or too loose (go with what looks natural for your twill tape). If you have any areas that curl up and look uneven, flip that part of the twill tape around when you are braiding so that it lays the other way.
-
Knot your braid at the “end” found using the length of the final measurement from Step 3. Now you can put the headband on your head to double check the length and the look of the braided section. You don’t want the two knotted ends to cross where it ties or it will be too bulky in the back of your head, so make sure this isn’t happening. Do a final check of the braid to make sure you are happy with it before moving on.
-
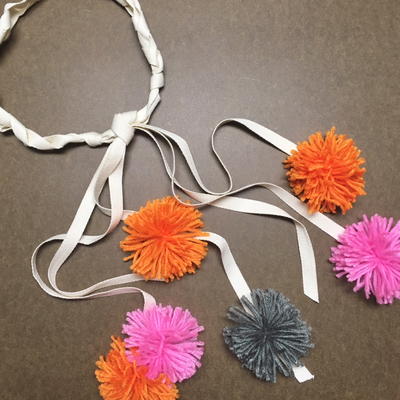
Leave the excess twill tape on the ends of the braided part (about 18-20” long for each strand is ideal). You can cut them into an angle at the end if you’d like, but keep them long for now. Some of the poms will be attached at the ends of a few of the twill tape strands, and others you can tie on halfway up.
-
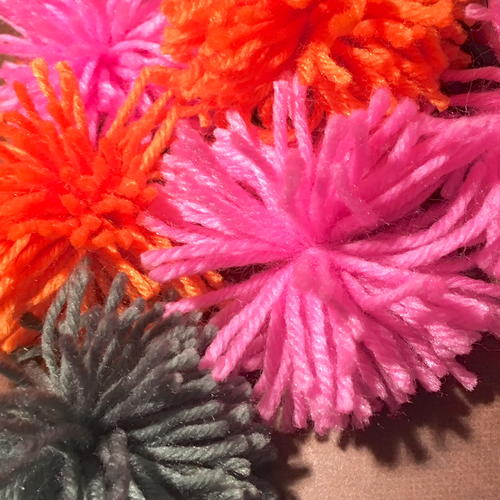
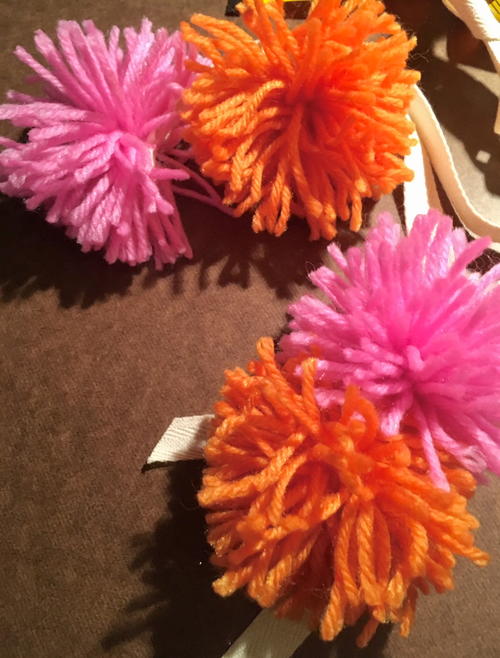
Now it’s time to make the yarn pom poms that will go on your twill tape strands! Choose a few colors to go with your twill tape. You’ll need to make about 2 or 3 poms in each color for this project.
-
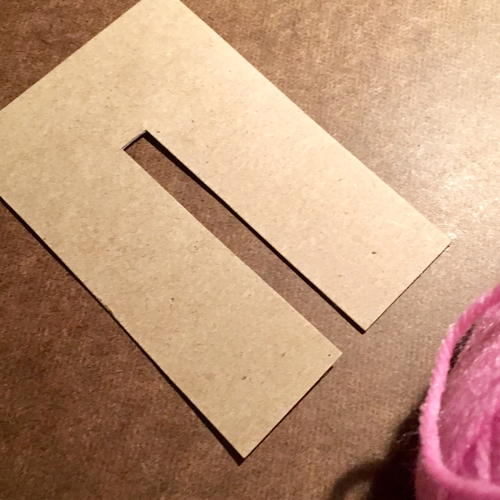
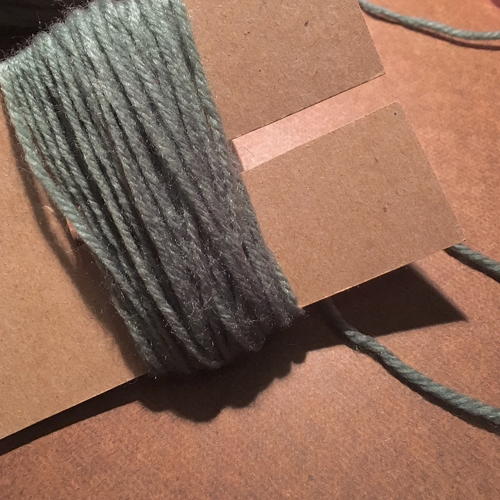
For this project you'll need to create a pom pom maker out of cardboard. This is mainly because you’ll have to insert the twill tape ends, but you can use a plastic pom pom maker for the poms that get tied on in the middle if you prefer. The cardboard rectangle should be approximately 2.5” by 4” with a long rectangle cut out of the center on one side (see photo). Use sturdy cardboard so it doesn’t collapse when you wrap the yarn around it.
-
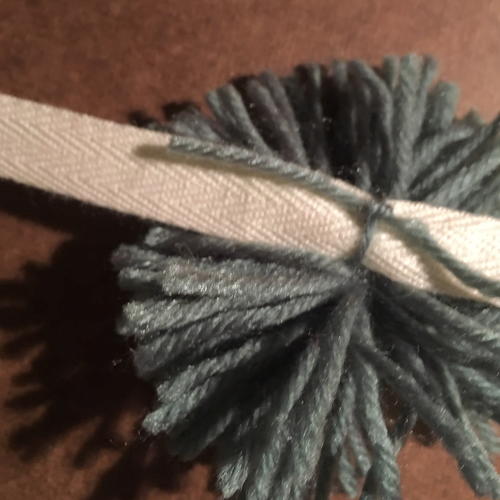
Begin each pom by placing the end of the yarn at the top of your cardboard pom pom maker. If this is a pom that will be at the end of a twill tape strand, place that end directly into the cardboard maker at an angle, wrapping the yarn around it (see photo). This will secure the end when it gets tied into the pom, and you are literally making the pom right on the twill tape.
-
Wrap the yarn around the pom tool about 55 times (or a little more depending on how full you want your poms). Do it loosely with your hand (so the cardboard doesn’t bend) while keeping the yarn together in a clump. Cut the end once you’ve wrapped it around 55 times.
-
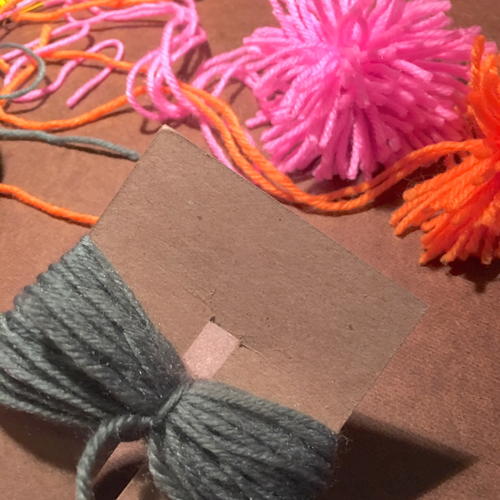
Cut a 12” piece of the same yarn to tie the middle. Bring this yarn though the small open space on one side of your wrapped yarn, then around the other side and tie it tightly. I’ve found that rotating the cardboard piece helps the knots stay more effectively. Turn the cardboard maker over and tie a knot again in the center, making sure it’s not too loose.
-
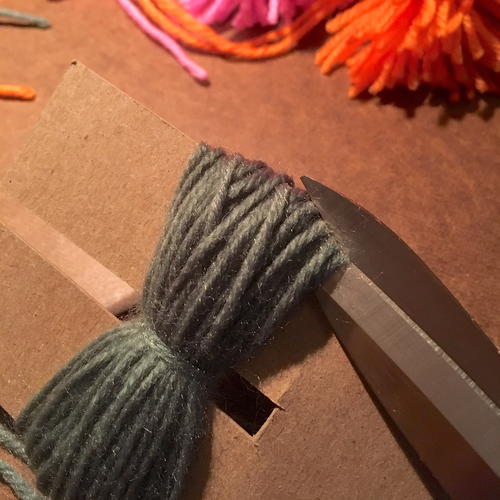
Now you can cut the pom pom off of the maker! Slowly clip the ends on each end of the cardboard, then slide it off. Tighten the knot again and give it a little shake to fluff the pom. You may need to trim a few of the yarn pieces to make it more even and round.
-
If you want to attach a few poms in the middle of the strands, tie then on and then place a tiny bit of glue on the knot. Be careful not to let the glue get on the rest of the yarn, and allow it to dry before wearing.
-
Your pom pom headband is almost finished! Do a final check for any yarn that needs to be trimmed down, cut the visible twill tape ends at a nice angle, and make sure the knots are tight at the ends of your braided sections.
-
If the twill tape is coming unraveled at the ends you can apply a tiny bit of liquid sealant, allowing it to dry for a while before wearing.
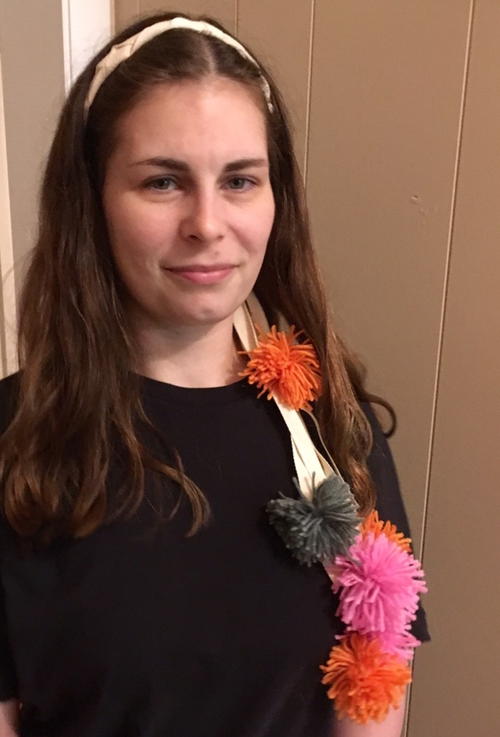
I wear all the pom poms and strands over one shoulder, but there are so many ways to style this headband! You may want to leave it tied when you’re not wearing it and just loosen the strands to take it on and off.
Have fun wearing your new headband!


What is the best thing about pom poms?
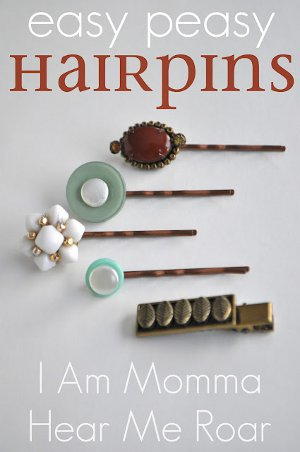
Read NextEasy Peasy Hairpins