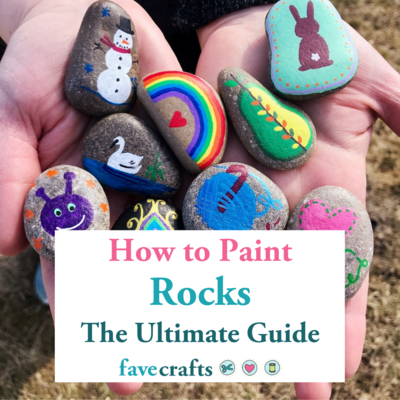
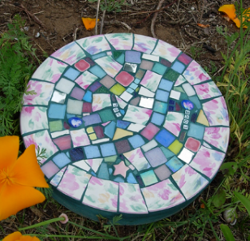
Mosaic Stepping Stone
Brighten up your garden with a homemade Mosaic Stepping Stone from Heidi Borchers. Mosaic craft projects are easy enough to make at home but look so fancy and fun! Repurpose old, scratched plates from your cabinet and add them to your project!
Scroll to bottom for video tutorial!
Materials:
- Concrete garden stepping stone
- Aleene’s Outdoor Adhesive
- Plates, tiles, stained glass pieces, alphabet letters
- Wheeled tile cutter
- Protective eyewear
- Foam board (to place on worksurface to turn stepping stone)
- Craft stick
- Wire cutters to cut craft stick to size for stained glass pieces
- Grout
- Water, bowl and sponge
- Plastic gloves
- Paper towels
- Cotton swabs
- Hair dryer
- Windex
Instructions:
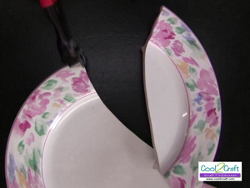
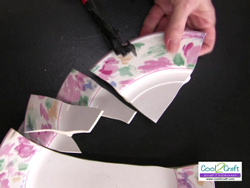
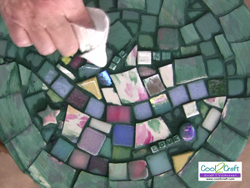
- I like to collect plates from garage sales and thrift stores. With this plate, I can use the patterned border and the inside white portions. There are several different types of tile nippers available. I prefer the wheeled nippers.
- When cutting plates and tiles, always wear protective eyewear. To use the nippers, place the edge of the plate between the wheels and squeeze the nipper handles. A section of the plate will break off.
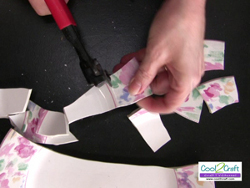
- You can then continue to cut the pieces into smaller pieces. In this step, I am cutting them into about 1″ wide.
- Next, I cut off the white sections from the patterned borders.
- When selecting your concrete stepping stone, look for a smooth surface. On this stepping stone, I am using the underside (or back side) because the top had a decorative detail that would not work for mosaic. Also, I suggest that you place your stepping stone on a piece of foam board on your work surface. This will make it easier to turn the stepping stone while you are working on it.
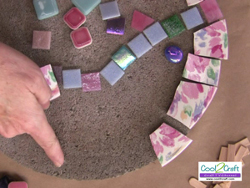
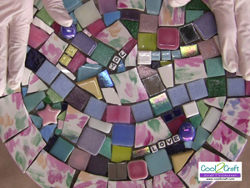
- Lay out your plate pieces along the edge of the stepping stone. I like to leave just a small space between all my mosaic pieces.
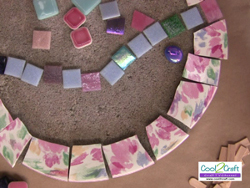
- Glue them in place by applying Aleene’s Outdoor Adhesive to the raised back edges of the plate pieces.
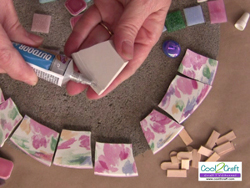
- Determine the pattern for your mosaic tile and stained glass pieces. Hint: most times, your stained glass pieces will be about 1/2 as thick as the plate pieces so you will need to raise them.
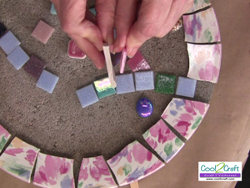
- In order to raise your stained glass pieces, cut and glue a piece of craft stick to the back of the tile or directly onto the stepping stone. (You can see my cut piece of craft stick along the right edge in this photo.)
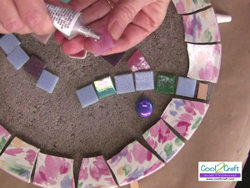
- Continue gluing your plate, tile, mosaic pieces until entire top surface is covered. Let set several hours or until pieces are firmly glued in place. You do not want your pieces to move during the grouting step.
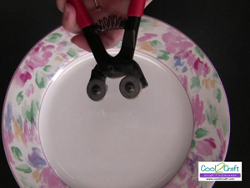
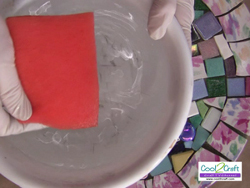
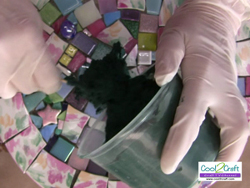
- In preparing your grout, you will need a foam sponge, bowl and water. It is also best to use plastic gloves to protect your hands when applying the grout.
- Pour grout into plastic container. I like to leave a bit of excess grout in a separate container just in case I need it to create the correct consistency in my grout mixture.
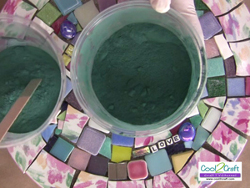
- Dip your sponge in the water and wring the water into the grout. Continue to add water and mix with craft stick. The grout should be the consistency of oatmeal or peanut butter.
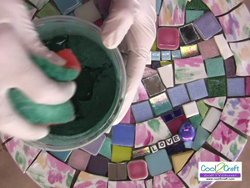
- Use the craft stick to scoop the grout onto the tiles.
- Gently use your fingers to smooth the grout over the surface of the tiles. I like to gently press down to apply the grout rather than a wide sweeping motion. Remember you have cut most of these tiles and they do have sharp edges so a sweeping motion is not suggested.
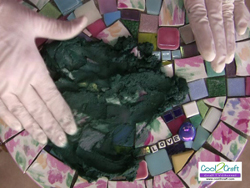
- Once you have gently pressed the grout over the entire surface. Carefully scoop up any excess grout and return it to the plastic container. (DO NOT pour any excess grout down your drain!)
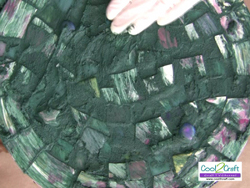
- Using the foam sponge, gently wipe over the surface of the tiles. Wipe excess grout from sponge into plastic container and gently rinse sponge in water in bowl. Repeat until just a thin layer of grout remains on the surface of the tiles.
- I like to use my hairdryer at this step to accelerate the drying time of the grout on the tile tops. This step should only take 3 – 5 minutes until the grout lightens in color on the tiles.
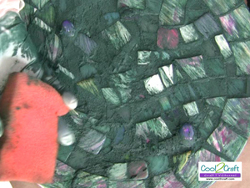
- The grout on the tiles is now a thin chalky consistency and the grout between the tiles is slightly darker. (It will take overnight for the grout between the tiles to dry completely.)
- Using a paper towel, gently wipe chalky grout away from top of tiles. It is best if you do this one tile at a time. To help remove the grout from the alphabet letters, dip a cotton swab into water and rub over letters. Set stepping stone aside to dry overnight and use Windex to clean remaining grout from tiles. Let dry several days and apply grout sealer according to package directions.
Video:
Read NextDIY Flower Pot with Pom Poms


Thanks for your comment. Don't forget to share!
Hannah
Aug 23, 2017
I am starting to like mosaics. I would really want to try making mosaics for my house. I just need more patience and some creativity.
Marilyn B
Jan 23, 2017
Made this a different way with a five gallon bucket as a form, filled with cement or plaster of Paris and cut to a two inch or so depth so you can get several out of one bucket, use wax paper on bottom to peel or cut away. Just imbed your music pieces, marbles, buttons, silk flowers, glass bits into the wet material, level off, and let set to dry! Lots of fun, way faster!
Report Inappropriate Comment
Are you sure you would like to report this comment? It will be flagged for our moderators to take action.
Thank you for taking the time to improve the content on our site.