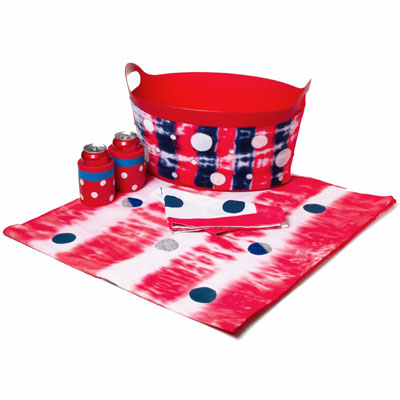
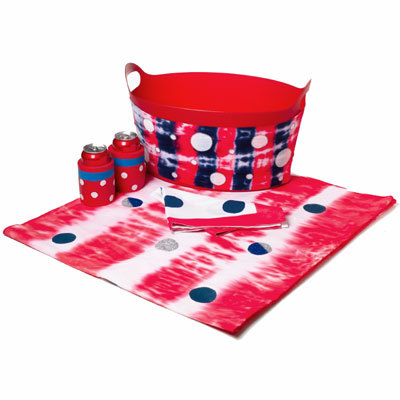
Patriotic Tie Dye Picnic Set
Create a patriotic picnic set in red, white and blue tie-dye. The tie-dye set from I Love to Create includes napkins, tablecloth, cup holders and an ice bucket. Tie-dye this polka-dot set for the 4th of July.
Materials:
- Tulip® One-Step Fashion Dye™
Blue
Red
- Tulip® Fashion Glitter™
23550 Silver Fine Jewel
23557 Royal Blue Jewel
- Tulip® 3D Fashion Paint
65023 Royal Blue
65089 Silver
- Tulip® Soft Fabric Paint™
BI15784 Glacier White
BI15790 Crimson Red
BI15796 Marine Blue
BI15825 Royal Blue
- Tulip® Fashion Glitter Bond
- Aleene's® Platinum Bond™ 7800 All-Purpose Adhesive
- Scissors
- Permanent marker
- Low tack masking tape
- Foil
- Ruler
- Bucket
- Plastic trash bags
- Wedge cosmetic sponges
- Foam cup holders, red
- Tablecloth and napkins,100% cotton, white
- Self-adhesive shelf paper
- Fabric, ½ yard 100% cotton, white
- Cup with 3” round opening
- Iron
Instructions:
- Prewash tablecloth, napkins and fabric to remove sizing. Do not use fabric softener or dryer sheets. Iron to remove wrinkles.
- Cover work surface with trash bags.
- Wearing rubber gloves, add water to dye bottles. Replace caps tightly. Shake until dye is dissolved.
Tablecloth
- Lay tablecloth onto work surface. Fold tablecloth like an accordion. Wrap rubber bands around tablecloth to create 4” sections.
- Squeeze Red Dye onto every other section.
- Cover fabric with trash bag. Let set 4 to 6 hours. Wash in a large load of water with a small amount of laundry soap. Line dry. Iron.
- Place cup upside down onto shelf paper. Trace circle around cup, using marker. Trace a lot of circles, leaving at least 3” between them.
- Cut out around circles, leaving 1 ½” margin. Cut out inside of circles to make a stencil. Remove backing. Apply a random pattern of stencils onto white sections of tablecloth. Refer to photo for placement.
- Shake bottles of paint well. Squeeze a puddle of Marine Blue onto foil. Tap sponge into paint. Tap excess paint onto foil. Pounce paint into every other circle. Let dry.
- Squeeze a puddle of Glitter Bond onto foil. Sponge glue into one unpainted circle. Sprinkle Silver Glitter onto half of circle and Blue Glitter onto other half. Repeat procedure for remaining circles. Let dry. Gently shake tablecloth to remove excess glitter.
Napkins
- Apply a line of masking tape 2” from each edge of napkin.
- Squeeze a puddle of Crimson Red onto foil. Tap sponge into paint. Tap excess paint onto foil. Pounce paint onto edges of napkin. Let dry. Remove tape.
- Repeat procedure in Steps 4 and 5 for tablecloth to make and apply circle stencils.
- Repeat procedure in Step 6 for tablecloth to paint each circle. Let dry.
- Start flow of 3D paint on foil, using even pressure on bottle for a smooth line. Outline each circle, alternating Silver and Royal Blue. Refer to photo. Let dry.
Cup Holders
- Apply tape to create a 1” stripe at top of cup holder. Refer to photo.
- Pounce Royal Blue inside lines of tape, using sponge. Remove tape right away. Do not wait for paint to dry.
- Draw small circles onto shelf paper. Cut out around circles, leaving 1” margin. Cut out inside of circles to make a stencil. Remove backing. Apply a random pattern of stencils onto cup holder. Refer to photo for placement.
- Repeat procedure in Step 6 for tablecloth, using Glacier White to paint all circles. Remove stencil right away.
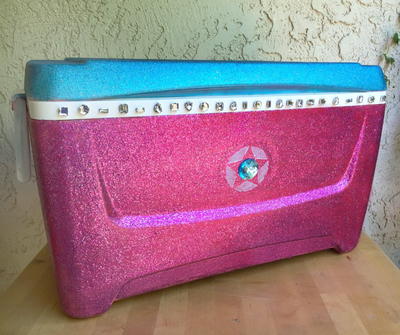
Bucket
- Lay fabric onto work surface.
- Fold fabric like an accordion. Wrap rubber bands around fabric to create 2” sections.
- Squeeze Red Dye onto every other section and blue dye onto alternate sections.
- Cover fabric with trash bag. Let set 4 to 6 hours. Wash in a large load of water with a small amount of laundry soap. Line dry.
- Follow Steps 4 and 5 for tablecloth to make circle stencils. Apply a random pattern of stencils onto fabric. Refer to photo.
- Squeeze a puddle of Glacier White onto a piece of foil. Pounce paint into circles, using sponge. Let dry. Remove stencil.
- Squeeze a thin line of 7800 All-Purpose Adhesive around outer edge of back of fabric. Place fabric right side out to cover outside of bucket, wrapping edges to inside. Secure with tape until dry. Remove tape.
- Wait 72 hours to wash. Machine wash warm on gentle cycle. Do not use harsh detergents or bleach. Remove promptly and line dry. To iron, turn garment inside out, being careful not to touch design with iron. Do not dry clean.
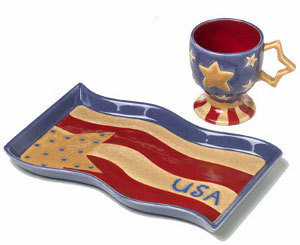
Read NextStar Spangled Coffee Server Set
Your Recently Viewed Projects
Thanks for your comment. Don't forget to share!
jadeana42
May 26, 2016
My family doesn't go on picnics... But this will make an AWESOME gift idea... And I'm ALWAYS looking for those. FaveCraftsTieDie
Report Inappropriate Comment
Are you sure you would like to report this comment? It will be flagged for our moderators to take action.
Thank you for taking the time to improve the content on our site.