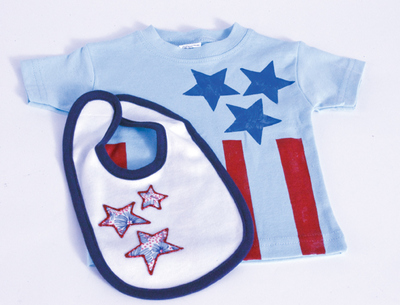
My First 4th Baby Bib and Baby Shirt
Help your baby celebrate the Fourth in style. This My First 4th Baby Bib and Baby Shirt Fourth of July craft project is easy to make and will look adorable on your little one.

Materials:
Brand Supplies
- 25405 - Fashion ® Dimensional Fabric Paint - Glitter - Ruby
- 4405 - FolkArt ® Fabric™ Paint - Brush On - Engine Red
- 4421 - FolkArt ® Fabric™ Paint - Brush On - Brilliant Blue
Other Supplies
- Plain baby bib
- Red, white, and blue printed fabric scrap
- Fusible webbing
- Iron
Instructions:
Baby Bib
- Cut a piece of lightweight fusible webbing to fit the backside of the red, white and blue fabric. Use a dry hot iron to adhere the webbing to the fabric. (Make sure you follow the instructions for the brand of webbing you purchase).
- Keeping the paper portion of the webbing attached, cut 3 stars from the fabric. Peel the paper from the back and place the design in the desired position on the bib. Attach with a dry hot iron by ironing over the fabric appliqué on the right side of the fabric.
- Slide a piece of cardboard under the bib. Seal the edges of the fabric stars with dimensional fabric paint. Paint around the stars making sure you get each edge.
- Allow the paint to dry overnight.
Stars and Stripes - Baby T-Shirt
- Place a piece of wax paper inside the t-shirt to prevent the paint from bleeding through. Working on the lower portion of the t-shirt, apply a strip of blue painters tape across the t-shirt at the point where you want your stripes to begin. Apply more strips of tape in an up-and-down fashion across the t-shirt to mask off where the paint won’t hit.
- Working with a foam paintbrush, apply the red paint to the stripes section. Working with a semi dry brush will help prevent paint from seeping under the tape.
- Apply the blue paint to the foam stamp with a paintbrush. Press the stamp in 3 spot on the upper portion of the t-shirt. Press firmly and gently lift. Reload the paint as needed.
- Allow the paint to dry and heat set with an iron.
Read NextFourth of July Cooking Utensils