3 Awesome DIY Wreaths
Give your home a new look with these 3 Awesome DIY Wreaths. With ideas that are suitable for any time of year, these wreath making ideas are great for crafters of all skill levels. Hang these wreaths either indoors or outdoors to welcome guests to your home or help add a splash of color to your living room or entryway.

Materials:
- Flower Lever Punch (Medium)
- Oopsie Daisy Squeeze Punch (Large)
- 1/8" Circle Hand Punch
- 1/16" Circle Hand Punch
- Pinking Paper Edger
- Pinking Shears (9")
- Ergo Control Rotary Cutter (45 mm)
- Micro-Tip® Scissors (No. 5)
- Crafting Rotary Paper Trimmer (12")
For Ruffle Wreath
- Wire
- Felt (in colors of your choice)
- Cardstock
- Marker
For Floral Wreath
- Foam wreath
- Sewing pins
- Spray paint
- Teal cardstock
For Rainbow Wreath
- Chipboard
- Crepe streamers
- Sewing machine
- Hot glue gun
Instructions:
-
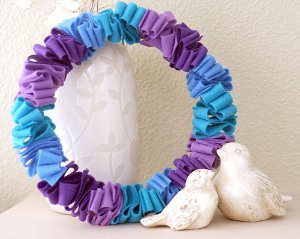
This felt wreath uses two materials, wire and felt. Create a circle from sturdy wire or a wire hanger. Begin by cutting one inch strips of felt in assorted colors using a rotary cutter with acrylic ruler on a cutting mat. Mine are 12 inches long, but any length will work as long as it is an even number.


-
Next punch a 1/16 inch hole one inch from the side and then every two inches along center of strip. When your length is an even number, your last hole will automatically end up one inch from the end as well. To make this process super simple, I created a 1x12 inch template from cardstock and punched holes using a 1/8 inch hole punch.

-
Place template over strip and mark each hole with a marker as a punching guide.

-
Once all holes are punched, all that is left to do is thread the felt strips onto wire form using an accordion pattern.

-
Twist the wire ends together. The wreath can be left like this, or I decided to twist the felt randomly for a more playful feel.

-
Covering a wreath form with punches adds lots of texture easily.

-
I like the look of monochromatic texture, so I set out to create a teal floral wreath. I began with a pre-made foam wreath and short sewing pins. I spray painted both with an indoor/outdoor paint to keep everything the same color. Place the pins into spare foam or packaging to spray. By altering the wreath base color, I am able to pin the flowers all over without worrying about another color showing through the gaps.

-
Next, get punching. Punch lots of flowers from teal cardstock. Try varying shades of teal for added interest. Pin the flowers onto wreath form to complete. Gently fold up flower petals for added texture.

-
This final wreath is definitely a party wreath. I wanted to create a colorful wreath I could bring out for any party. You could change up the colors to fit any event.

-
I cut out a base from chipboard (think cereal box) using the Super Sized Circle Templates as a guide. You can make it any size you wish. Paired with party streamers for the main material, this wreath is very inexpensive to make. Cut strips of crepe streamers long enough to wrap the perimeter of your wreath base. Cut four of each color and sew down the center.

-
Fold each sewn stack in half and trim off edges with pinking scissors or shears. I keep a pair of pinking shears just for paper projects since I use them so often. Fringe-cut the strips at each valley of pinked border as shown.

-
Ruffle out the strips by hand to give them fluff and volume.

-
Using hot glue at a low temp, adhere your first color around the outer edge of wreath base and the last color around the center as shown.

-
Continue with layers from each side until the middle is reached.

-
Do a final fluffing of the layers and you are ready to party!

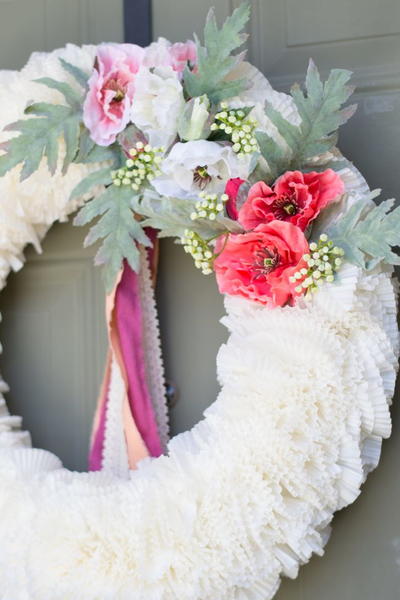
Read NextFaux Flower Cupcake Liner Wreath


Thanks for your comment. Don't forget to share!
ladybrr 0883638
Aug 14, 2013
Can you tell me why I do not have pictures to view when I examine a craft project?
Report Inappropriate Comment
Are you sure you would like to report this comment? It will be flagged for our moderators to take action.
Thank you for taking the time to improve the content on our site.