Honeycomb DIY Storage Box
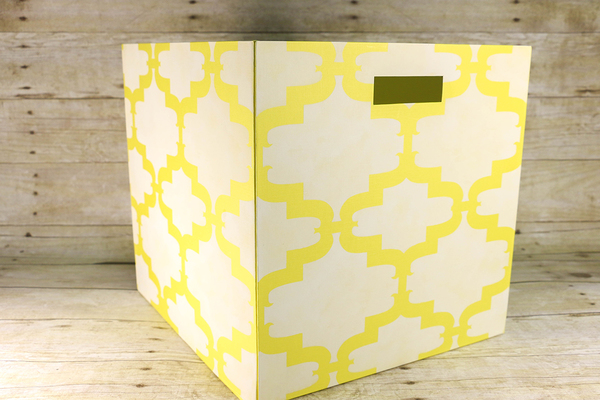
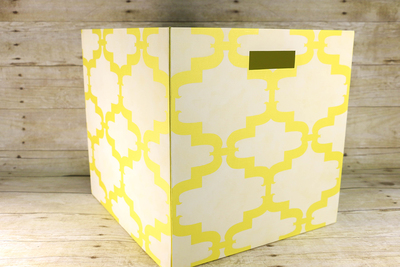
This Honeycomb DIY Storage Box will put an end to your lack of organizing ideas. Who said organization had to be boring? The honeycomb pattern on this storage craft makes for a delightful accent in any space, and it's really an easy painting project. DIY home decor doesn't have to be frustrating at all, especially when all you have to learn is how to stencil and paint. For crafters, sometimes, organizing tips can be just about putting supplies in DIY storage boxes in order to declutter your home.
Primary TechniquePainting

For more great home decor craft projects from Stencil Ease®, check out 13 DIY Home Decor Ideas.
Materials:
- Stencil Ease® Kenitra Wall Painting Stencil
- Stencil Ease® Repositionable Adhesive Spray
- Ikea® TJENA Box, yellow
- DecoArt® Americana® Acrylic Paint, White Wash
- Shurtape Technologies LLC Frog Tape®
- Stencil Ease® 5/8” Stencil Brush, White Bristle
- Paper Towels
- Paper or Plastic Plate
- Spray the back of the Stencil Ease® Kenitra Wall Painting Stencil very lightly with the Stencil Ease® Repositionable Adhesive Spray and let the adhesive dry.
- Apply the stencil to the surface of the Ikea® TJENA Box (it is easier to do this painting project before you put the box together).
- Adhere Frog Tape® to the box under each triangle registration mark and mark them.
- Pour some of the DecoArt® Americana® White Wash Acrylic Paint onto the plate.
- Load your Stencil Ease® 5/8” White Bristle Stencil Brush with White Wash DecoArt® Americana® Acrylic Paint and then swirl the brush onto your paper towel until it seems like all of the paint is removed. This creates a dry brush and leaves the perfect amount of paint on your bristles. Using a dry brush prevents paint from seeping under the cut-outs of the stencil. This part of the process is essential if you would like clean/ crisp lines when you lift your stencil.
- Either stipple (lightly tapping over the stencil cut-outs) or swirl the paint onto the table.
- You can immediately remove the stencil and line up the registration marks for your next repeat, either vertically or horizontally. The instructions on how to use the registration mark system are included with your stencil.
- Repeat this process until you have completely covered the box.
- Allow the box to dry completely overnight.
For more information about Stencil Ease® or to purchase Stencil Ease® products, please visit www.stencilease.com.
Read NextRustic Stenciled Dresser Makeover

