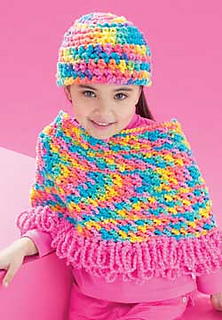
Fun Circles Hat and Bag
Attached circles form the brim of the fun cap in this hat crochet pattern from Patons with matching bag. Make this bag and hat for a child around six years of age.

Materials:
- Yarn: Patons® Astra (50 g/1.75 oz) Cap (Bag-Set)
Main Color (MC): (Dark Pink) 1 (1-2) ball(s)
Contrast A: (Pink) 1 (1-1) ball
Contrast B: (Lilac) 1 (1-2) ball(s)
- Crochet Hook: Size 5 mm (U.S. H or 8) crochet hook or size needed to obtain tension.
- 1/4 yd (0.25 m) of lining fabric for Bag.
Sizes:
Cap: To fit child 6 yrs old.
Bag: Approx 7 ins [18 cm] wide by 10 ins [25.5 cm] tall.
Gauge:
131/2 sc and 15 rows = 4 ins [10 cm].
1 Motif = 21/2 ins [6 cm] in diameter.
Abbreviations:
Approx = Approximately.
Beg = Beginning.
Ch = Chain.
Dc = Double crochet.
Rep = Repeat.
Rnd(s) = Round(s).
RS = Right side.
Sc = Single crochet.
Sl st = Slip stitch.
Sp(s) = Space(s).
Tog = Together.
WS = Wrong side.
Instructions:
Motif I
With MC, ch 2.
1st rnd: 8 sc in 2nd ch from hook. Join A with sl st to first sc. 8 sc.
2nd rnd: With A, ch 1. 2 sc in each sc around. Join with sl st to first sc. 16 sc.
3rd rnd: Ch 1. 2 sc in same sp as last sl st. *1 sc in next sc. 2 sc in next sc. Rep from * to last sc. 1 sc in last sc. Join B with sl st to first sc. 24 sc.
4th rnd: With B, ch 1. 1 sc in each sc around. Join with sl st to first sc. Fasten off leaving an end approx 6 ins [15 cm] long for sewing.
Motif II
Work as given for Motif I, substituting A for MC, B for A, and MC for B.
Motif III
Work as given for Motif I, substituting B for MC, MC for A, and A for B.
CAP
Make 3 each of Motifs I, II and III (9 in total).
Crown: With MC, ch 2.
1st rnd: 8 sc in 2nd ch from hook. Join A with sl st to first sc. 8 sc.
2nd rnd: With A, ch 1. 2 sc in each sc around. Join with sl st to first sc. 16 sc.
3rd rnd: Ch 1. 2 sc in same sp as last sl st. *1 sc in next sc. 2 sc in next sc. Rep from * to last sc. 1 sc in last sc. Join B with sl st to first sc. 24 sc.
4th rnd: With B, ch 1. 2 sc in same sp as last sl st. *1 sc in each of next 2 sc. 2 sc in next sc. Rep from * to last 2 sc. 1 sc in each of last 2 sc. Join with sl st to first sc. 32 sc.
5th rnd: Ch 1. 2 sc in same sp as last sl st. *1 sc in each of next 3 sc. 2 sc in next sc. Rep from * to last 3 sc. 1 sc in each of last 3 sc. Join with sl st to first sc. 40 sc.
6th rnd: Ch 1. 1 sc in each sc around. Join with sl st to first sc.
7th rnd: Ch 1. 2 sc in same sp as last sl st. *1 sc in each of next 4 sc. 2 sc in next sc. Rep from * to last 4 sc. 1 sc in each of last 4 sc. Join MC with sl st to first sc. 48 sc.
8th rnd: With MC, as 6th rnd.
9th rnd: Ch 1. 2 sc in same sp as last sl st. *1 sc in each of next 5 sc. 2 sc in next sc. Rep from * to last 5 sc. 1 sc in each of last 5 sc. Join with sl st to first sc. 56 sc.
10th rnd: As 6th rnd.
11th rnd: Ch 1. 2 sc in same sp as last sl st. *1 sc in each of next 6 sc. 2 sc in next sc. Rep from * to last 6 sc. 1 sc in each of last 6 sc. Join with sl st to first sc. 64 sc.
12th rnd: As 6th rnd.
13th rnd: Ch 1. 2 sc in same sp as last sl st. *1 sc in each of next 7 sc. 2 sc in next sc. Rep from * to last 7 sc. 1 sc in each of last 7 sc. Join A with sl st to first sc. 72 sc.
14th rnd: With A, ch 1. 1 sc in each sc around. Join with sl st to first sc.
15th and 16th rnds: As 14th rnd. Join B with sl st to first sc at end of 16th rnd.
17th to 20th rnds: With B, as 14th rnd.
Join MC with sl st to first sc at end of 20th rnd.
21st rnd: With MC, ch 1. 1 sc in each sc around. Fasten off.
FINISHING
With RS of work facing, arrange 9 Motifs alternating Motifs I, II and III. Sew Motifs tog through 1 sc of last rnd to form a circle (see picture).
With MC, sew circle of Motifs to lower edge of Crown through 1 sc of last rnd.
BAG
Make 6 each of Motifs I, II and III as given for Cap (18 in total).
Base: Work as given for Crown of Cap.
FINISHING
With RS of work facing, arrange 9 Motifs alternating Motifs I, II, and III. Sew Motifs tog through 1 sc of last rnd to form a circle. Rep for second set of 9 Motifs.
Sew circles of Motifs tog through 1 sc of last rnd where they meet (see picture).
Sew bottom circle of Motifs to top edge of Base through 1 sc of last rnd.
Top: Join MC with sl st to top of any Motif in top rnd.
1st rnd: Ch 1. 1 sc in same sp as last sl st. (Ch 7. 1 sc in top of next Motif) 8 times. Ch 7. Join with sl st to first sc.
2nd rnd: Ch 1. (1 sc in next sc. 1 sc in each of next 7 ch) 9 times. 72 sc. Join A with sl st to first sc.
3rd rnd: With A, ch 1. 1 sc in each sc around. Join with sl st to first sc.
4th to 6th rnds: As 3rd rnd. Join B with sl st to first sc at end of 6th rnd.
7th rnd: With B, as 3rd rnd.
8th rnd: Ch 3 (counts as dc). Miss first sc. 1 dc in next sc. 1 dc in each sc around. Join with sl st to top of ch 3.
9th rnd: Ch 1. 1 sc in each dc around. Join with sl st to first sc.
10th rnd: With B, as 3rd rnd. Fasten off.
Drawstrings (make 2)
Cut 1 strand each of MC, A and B 64 ins [162.5 cm] long. With 3 strands tog hold one end and with someone holding other end, twist strands to the right until they begin to curl. Fold the 2 ends tog and tie in a knot so they will not unravel. The strands will now twist themselves tog.
Beg at side of Bag, thread first Drawstring through dc rnd, over and under 3 posts. Knot ends tog. Beg at opposite side, thread second Drawstring in same manner and knot ends tog.
Lining: Cut lining fabric 8 ins [20.5 cm] by 24 ins [61 cm]. Sew short ends tog using French Seam. Press 1/2 inch [1.5 cm] to WS along top and bottom edges. Sew top and bottom edges of Lining to inside of Bag having top edge just below dc rnd.
With WS tog stitch a seam 1/2 inch [1.5 cm] from edge. Trim this seam to 1/8 inch [3 mm] and press to one side.
Fold fabric with RS tog along seam line and press. Stitch a seam 1/4 inch [6 mm] from fold.
Your Recently Viewed Projects

Thanks for your comment. Don't forget to share!
nargis
May 15, 2010
Hello, I love this bag. I am tried to make it. I need some help crocheting sides. My base or the bottom work seems spreading outward when I started switching from base to sides. It does not maintain the shape . Can some one help me how to switch from base to siding in order to maintain the side shape. Thank you, Nargis
Report Inappropriate Comment
Are you sure you would like to report this comment? It will be flagged for our moderators to take action.
Thank you for taking the time to improve the content on our site.