This project was submitted by one of our readers, just like you.
Santa's Christmas Cowboy Boot

Santas Christmas Cowboy Boot
"A crocheted applique that can be used as an ornament, decorative present tag or even a piece of holiday jewelry. Made of cotton crochet thread from a simple written word pattern with a symbol diagram and photo of individual steps. Two inches tall in crochet thread, it would be larger in yarn and make a nice trivet, potholder or small throw rug. Use two with craft stuffing and create a cute pillow. It takes under an hour to make depending on your personal crochet speed."
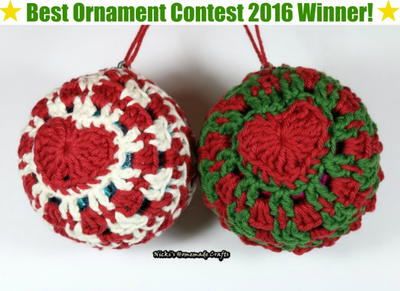
This was a Top Ten Ornament in the Best Ornament Contest 2016! Check out the top ten winners here, and be sure to check out all of the amazing ornament tutorial entries.
Estimated CostUnder $10
Time to CompleteIn an evening
Primary TechniqueCrochet

HolidayChristmas
Project TypeMake a Project
Materials List
- Cotton crochet thread size 10, small amounts of red, black and white
- Lamé crochet thread, small amount of gold color
- Steel crochet hook size 9 (1.75mm)
- Smaller size blunt end tapestry needle
- White craft glue
- Small plastic bristle craft paint brush
- Card stock, small piece of black or red (or your preference)
- Weighted non stick object
- Small, sharp scissors
- Click here for Santa boot chart
Instructions
Heel/Sole – Black
-
chain (ch) 9
-
skip the two stitches closest to hook, single crochet (sc) once in each of next 6 chains, ch2 turn
-
sc in each of next 6 sc, ch11, end off, leave a length of tail approximately twice length of the entire sole for weaving in ends
Boot Body – Red
-
Join new thread in last ch of black
-
ch2, sc in each of next 3 chs, half double crochet (hdc) in each of next 2 chs, work hdc decrease (hdc dec) over next 2 chs , double crochet (dc) in each of next 3 chs, 2dc in next ch, dc in each of next 6 sc of previous row (black), ch3 turn
-
dc in each of first 8 stitches (sts), hdc in each of next 2 sts, hdc dec over next 2 sts, sc in each of next 4 sts, slip stitch (slst) in last st, ch1 turn
-
sl st in first sc, sc in each of next 3 sts, sc dec over next 2 sts, hdc in next st, hdc & dc in next st, 2 dc in next st, dc in each of next 7 sts, ch3 turn
-
rows 7-9: dc in each of first 9 sts, ch3 turn
-
dc in each of each of the 9 sts, end off, leave a length of tail approximately twice width of the entire boot for weaving in ends
Cuff – White
-
Turn piece, join new thread in top ch of ch3 in step 9 of red boot body
-
ch3, 2 dc in same st as joined thread, dc in each of next 8 sts, 3 dc in last st, ch3 turn
-
dc in each of first 3 sts, hdc in next st, sc in next st, sl st in each of next 2 sts, sc in next st, dc in each of next 3sts , ch3, sl st to next st, end off, leave a length of tail approximately twice width of the entire boot for weaving in ends
Strap - Black
-
Join new thread into last st at end of Row 6
-
ch11, sl st to start of Row 6, turn
-
slst in each of next 11 chs just worked, end off, leave a length of tail approximately twice length of the strap for weaving in ends
Buckle – Gold
-
Join new thread in the 4th dc in Row 5
-
sl st in a straight line in each of next rows across boot (see photo and chart) turn 90 degrees
-
Rows 2-4: sl st in next 3 sts as row 1 forming a small open square around a section of the strap (see photo and chart), end off, leave a length of tail approximately twice length of the buckle for weaving in ends
-
Using a smaller size tapestry needle weave in all loose tails
Finishing
-
Using a smaller size tapestry needle weave in all loose tails
-
With white craft glue, lightly paint the back side of appliqué with a small plastic bristled craft paint brush. Place the appliqué glue side down onto a piece of card stock in a color of your choosing ( I used black, but red would work well too). Lay the card onto a flat surface. Place a weighted object with a non stick surface such as a plastic notebook or dinner plate on the exposed, unglued face of appliqué. Allow to dry. Carefully trim away excess card with small, sharp scissors.
NotesFinished height: 2”
Altering size of hook or thickness of thread/yarn will affect size of finished piece, but not proportions.

Your Recently Viewed Projects
Thanks for your comment. Don't forget to share!
mulberrygalprinces s
Nov 26, 2017
I thought this was a full size Christmas stocking! I couldn't imagine doing it in thread. Then I read thru it! It's an adorable little stocking for de oration. I have a kids sweater to crochet that this will bo just perfectly on. I just need to change colors. Thanks for sharing.
andrealuxton 00859 53
Dec 04, 2016
What a gorgeous, cute and amusing little pattern. I am definitely going to make a number of these with which to decorate the house this Christmas. I am going to save this pattern too because these little boots, minus the Christmas colours, would be perfect for decorations for our annual fancy dress ball. Its always a challenge to find little decor items in the "career or what do u do for a living?" genre!
Kaylee Renae
Nov 22, 2016
What a pretty little boot! This would look great hanging on a themed tree for sure.
cecilira 8229201
Nov 18, 2016
Here's a photo of the card.Screenshot2016-11-18-18-32-25kindlephoto-2599 == 6702
Report Inappropriate Comment
Are you sure you would like to report this comment? It will be flagged for our moderators to take action.
Thank you for taking the time to improve the content on our site.