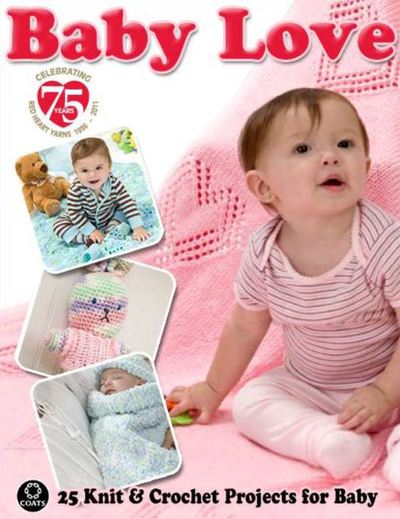
Light Pink Victorian Jacket
How adorable would your baby girl look in this light pink Victorian jacket? It's great for Easter Sunday. It's an intermediate crochet pattern that would also make for a nice baby shower gift. Great to make in any color, this crocheted jacket is perfect for little tots of all ages. This crochet pattern makes for a fun and challenging project for a beginner and a quick and easy project for those who are more skilled in crochet. Your little lady is sure to love showing off her brand new crocheted sweater!

Materials:
Directions are for size 6 months; changes for 12 and 18 months are in parentheses. (Sample is size 12 months)
- 2 balls Red Heart® “Soft Baby Steps™” yarn in Baby Pink (MC)
- 1 ball Red Heart® “Soft Baby Steps™” yarn in White (CC)
- 5mm [US H-8] crochet hook
- 8 Split ring markers
- Yarn needle
- 1 yard of ½” wide satin ribbon
- One ½” button
Gauge: 14 hdc = 4”; 9 rows = 4”. CHECK YOUR GAUGE. Use any size hook to obtain the gauge.
Measurements:
- To Fit Chest: 18 (19, 21)”.
- Finished Chest: 22 (23, 24)”.
- Length from shoulder: 12½ (13½, 14½)”.
Instructions:
Jacket is worked in one piece from the neck edge down. Sleeves are worked in rounds from the armhole to cuff edge. Ch2 for turning ch does not count as hdc.
Body
- With MC, ch 44.
- Row 1 (Right Side): Hdc in 3rd ch from hook and in each ch across; turn – 42 hdc. Place markers for raglan shaping-Row 2: Ch 2, hdc in first 7 hdc, * 2 hdc in next hdc placing a marker on last hdc, 2 hdc in next hdc placing a marker on first hdc *, hdc in next 3 hdc, repeat from * to * once, hdc in next 14 hdc, repeat from * to * once, hdc in next 3 hdc, repeat from * to * once, hdc in last 7 hdc; turn – 50 hdc. 8 Markers have been placed.
- Move markers for each subsequent row to increased hdc, as before.
- Rows 3-10: Ch 2, * hdc in each hdc to marker, [2 hdc in marked hdc] twice; repeat from * 3 times more; hdc in each hdc to end; turn – 114 hdc at end of Row 10.
- Row 11: Ch 2, hdc in each hdc to end of row placing markers in same hdc as previous row; turn.
- Row 12: Ch 2, * hdc in each hdc to marker, [2 hdc in marked hdc] twice; repeat from * 3 times more; hdc in each hdc to end; turn.
- Sizes 12 and 18 months ONLY: Repeat last 2 rows (1, 2) times more. All Sizes: 122 (130, 138) hdc.
Divide Body
- For underarms, with right side facing, join MC to marked hdc at end of Right Front, ch 3; join with sl st to first marked hdc at beginning of Back; fasten off.
- Repeat on opposite underam, beginning in last marked hdc at end of Back and joining to first marked hdc at beginning of Left Front.
- Row 1 (Right Side): Ch 2, hdc in first 18 (19, 20) hdc (Left Front), hdc in next 3 ch, hdc in next 36 (38, 40) hdc (Back), hdc in next 3 ch, hdc in last 36 (38, 40) hdc (Right Front); join CC; turn – 78 (82, 86) hdc.Row 2: With CC, ch 1, sc in first 38 (40, 42) hdc, sc2tog, sc in last 38 (40, 42) hdc; turn – 77 (81, 85) sc.
- Row 3 (Eyelet Row): Ch 4, skip first 2 sc, * dc in next sc, ch 1, skip next sc; repeat from * to last sc; dc in last sc; turn.
- Row 4: Ch 1, sc in each dc and ch-1 sp across dec 1 (2, 0) sts evenly spaced, ending with sc in 4th and 3rd ch of turning ch; join MC; turn – 76 (79, 85) sc.
- Row 5: With MC, ch 1, sc in first sc, * ch 5, skip next 2 sc, sc in next sc; repeat from * across; turn.
- Row 6: Ch 5, * sc in next ch-5 lp, ch 3; repeat from * across ending with sc in last ch-5 lp, ch 2, dc in last sc; turn.
- Row 7: Ch 1, sc in first dc, 2 sc in ch-2 sp, * sc in next sc, 3 sc in next ch-3 sp; repeat from * across ending with 2 sc in turning ch, sc in 3rd ch of turning ch; turn.
- Row 8: Ch 3, dc in next sc, * ch 1, skip next sc, dc in next 2 sc; repeat from * across; turn.
- Row 9: Ch 5, * sc in next ch-1 sp, ch 5; repeat from * across ending with sc in last ch-1 sp, ch 2, skip next dc, dc in top of ch-3; turn.
- Repeat Rows 6-9 three times more. Cut MC.
- Next Row (Right Side): Join CC to 3rd ch of ch-5 at beginning of last row; ch 1, sc in same sp, * 3 dc in next sc, sc in next ch-5 lp, ch 3, skip next sc, sc in next ch-5 lp; repeat from * across ending with 3 dc in last sc, sc in last dc. Fasten off.
Sleeves
- Rnd 1: With right side facing, join MC to rem lp of center ch at underarm, ch 2, hdc in same sp, hdc in next lp, hdc in next 25 (27, 29) hdc around sleeve, hdc in last lp; join with a sl st to top of ch 2 – 28 (30, 32) hdc.
- Next Rnd: Ch 2, hdc in each hdc around; join. Repeat last rnd until sleeve measures 3 (3½, 4)” from joining rnd, inc 2 (inc 0, dec 2) sts evenly around last rnd – 30 hdc.
- Next Rnd: Ch 3, dc in next hdc, *ch 1, skip next hdc, dc in next 2 hdc; repeat from * to last hdc; ch 1, skip last hdc; join with a sl st to top of ch-3.
- Next Rnd: Ch 1, sc in same st as joining, * ch 5, sc in next ch-1 sp; repeat from * around ending with ch 5. Fasten off.
- Next Rnd: Join CC to any ch-5 lp; ch 1, sc in same lp, * 3 dc in next sc, sc in next lp, ch 3 **, skip next sc, sc in next lp; repeat from * around end at **; join with a sl st to first sc. Fasten off.
Finishing
- Body Edging-Row 1: With right side facing, join MC to lower corner of Right Front; ch 1, work sc evenly up to corner of neck edge, 3 sc in corner, sc in each rem lp of foundation ch to opposite corner, 3 sc in corner, sc evenly down Left Front edge; turn. Place a marker for button loop ½” above eyelet row on Right Front edge.
- Row 2: Ch 1, sc in first sc; * ch 3, sl st in last sc – picot made; sc in next 3 sc *; repeat from * to * to marker; ch 2, skip next 2 sc for button loop, sc in next 2 sc; repeat from * to * to end of row. Fasten off. Fold lapels of Fronts to right side and tack corners in position. Sew on button to correspond to button loop. Weave ribbon through eyelet row. Trim ends.
Read NextBaby Pullover Sweater
Your Recently Viewed Projects

Thanks for your comment. Don't forget to share!
FireFightersMoM
Aug 25, 2017
I am not sure which is more precious the baby girl or the sweater. The combo makes this pattern perfect! This little Victorian sweater is so adorable. I can see it in so many single colors, but also combo's I can't wait to start this for a friends little girl
disco dotty
Mar 30, 2010
I made this sweater over the weekend, I used all one color of shaded pink and it came out great. I did have some difficulties with some of the wording and had to modify my piece somewhat. I am not sure it this is a testiment of my ability or the pattern itself....but all in all, it made a beautiful baby shower gift. blessings, dotty
Report Inappropriate Comment
Are you sure you would like to report this comment? It will be flagged for our moderators to take action.
Thank you for taking the time to improve the content on our site.