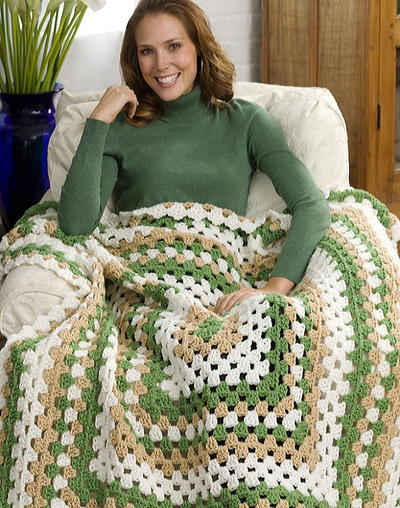
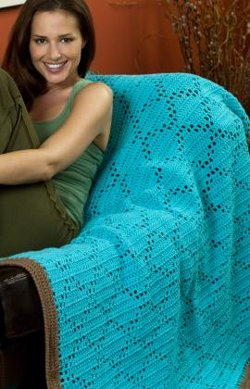
Millionaire's Afghan

Looking for the ultimate crocheted afghan pattern? Look no further than the Millionaire's Afghan. With a wide variety of yarn colors and crochet stitches, this colorful crocheted afghan will brighten up any room in your home. This is also a great project for trying new crochet techniques and practicing your crochet skills.
Absolutely lovely and honestly a little time-consuming, this crochet afghan pattern is worth the extra effort. The final result is a complicated and creative project that will look at home in any room in your house. The eclectic design of mismatched squares allows it to blend in to multiple styles and makes it a great project for using all types of yarn left overs.
Crochet HookH/8 or 5 mm hook
Yarn Weight(4) Medium Weight/Worsted Weight and Aran (16-20 stitches to 4 inches)
Crochet GaugeOne large square measures 4"/10cm across
Finished SizeThrow measures approximately 40"x56"
Materials List
- 2 skeins Naturally Caron Country yarn in Green Sheen (A)
- 2 skeins Naturally Caron Country yarn in Loden Forest (B)
- 2 skeins Naturally Caron Country yarn in Claret (C)
- 2 skeins Naturally Caron Country yarn in Spruce (D)
- 2 skeins Naturally Caron Country yarn in Chocolate Truffle (E)
- 2 skeins Naturally Caron Country yarn in Gilded Age (F)
- 2 skeins Naturally Caron Country yarn in Deep Purple (G)
- 1 skein Naturally Caron Country yarn in Sunset (H)
- 1 skein Naturally Caron Country yarn in Soft Sunshine (I)
- 1 skein Naturally Caron Country yarn in Black (J)
- US H-8 (5mm) crochet hook, or size to obtain gauge
- Removable stitch markers
- Yarn needle
- Diagram
Instructions:
Notes:
-
Throw is worked in five long strips. Each strip is worked from the lower edge upwards, and is made from rectangles, small squares, and large squares. After all five strips have been made, the strips are single crocheted together. If desired, all pieces (rectangles, small squares, and large squares) can be made separately, arranged as shown in assembly diagram and sewn or single crocheted together.
-
Refer to the assembly diagram frequently. The assembly diagram shows the order in which squares and rectangles are made in each strip. The diagram also shows the colors used when making each piece.
-
Large and small squares are worked in joined rounds, with RS facing at all times. A "join-as-you-go" technique is used to join the squares to the top of the partially completed strip and previous squares. Squares are joined to previous pieces while working the last round (joining round). When the first piece in a strip is a square, the square is not joined to any previous pieces.
-
Rectangles are worked back and forth in rows. The first row of most rectangles is worked directly onto the top edge of the partially completed strip. When the first piece in a strip is a rectangle, the first row is not worked directly onto the edge of previous pieces. Instead, a traditional foundation chain and row of single crochet stitches is worked.
-
To change color, work last stitch of old color to last yarn over. Yarn over with new color and draw through all loops on hook to complete stitch. Proceed with new color. Fasten off old color.
Strips
Refer to the assembly diagram for arrangement of each strip. Make each strip from the lower edge upwards. For example, strip #1 begins with a rectangle, then 4 small squares are made and joined to the top of the rectangle, 4 more small squares are made and joined to the previous 4 small squares, 2 large squares are then worked and joined to the previous small squares, and so on.
-
Strip #1: Strip #1 is the left most strip. Begin by working a beginning rectangle (instructions below), working 6 rows with I and 6 rows with D. Continue strip by working and joining small squares, large squares, and rectangles in the order and color combinations shown in assembly diagram.
-
Strip #2: Begin by working a beginning large square (instructions below), working 2 rounds with C and 2 rounds with J. Continue strip by working and joining large squares, rectangles, and small squares in the order and color combinations shown in assembly diagram.
-
Strip #3: Strip #3 is the center strip. Begin by working a beginning rectangle, working 2 rows with H, 2 rows with B and 2 rows with F. Continue strip by working and joining large squares, rectangles and small squares in the order and color combinations shown in assembly diagram.
-
Strip #4: Begin by working a beginning rectangle, working 3 rows with A, 2 rows with C, 2 rows with D, 2 rows with G and 3 rows with I. Continue strip by working and joining small squares, large squares, and rectangles in the order and color combinations shown in assembly diagram.
-
Strip #5: Begin by working a beginning large square, working all 4 rounds with F. Continue strip by working and joining large squares, rectangles, and small squares in the order and color combinations shown in assembly diagram.
Beginning Rectangle
Follow these instructions when working first rectangle of strips #1, #3 and #4 only. For all other rectangles, follow the instructions in the Joined Rectangle section.
-
Ch 32.
-
Row 1 (RS): Sc in 2nd ch from hook, sc in each remaining ch across, turn—31 sc.
-
Row 2: Ch 3 (counts as dc here and throughout), dc in each st across, turn.
-
Row 3: Ch 1, sc in first dc, *FPdc around next dc, sc in next dc; repeat from * across, turn.
-
Refer to assembly diagram for number of rows to be worked in this rectangle. Repeat Rows 2 and 3 until one less row than specified in assembly diagram has been worked.
-
Last Row: Ch 1, sc in each st across.
-
Fasten off.
Joined Rectangle
-
Row 1: With RS facing, join yarn with sc in first corner of partially completed strip, work 31 more sc evenly spaced across the top edge of the strip.
-
Beginning with Row 2, complete rectangle as for beginning rectangle.
Joined Small Square
-
With first color, ch 4; join with sl st in first ch to form a ring.
-
Round 1 (RS): Ch 3 (counts as dc here and throughout), 2 dc in ring, ch 3, [3 dc in ring, ch 3] 3 times; join with sl st in top of beginning ch—12 dc and 4 ch-3 sps. Fasten off first color. Note: If the same color is used for Rounds 1 and 2, do not fasten off.
Mark Joining Locations
-
Before joining first small square to top of partially completed strip, place 17 stitch markers evenly spaced across the top edge. Place the first marker in one corner and the last marker in the opposite corner. Space the other 15 markers evenly between the first and last marker. These markers indicate the joining locations for the 4 small squares that will be joined to the top edge.
-
When joining the edge of the 2nd, 3rd and 4th small squares to the edge of the previous small square, the joining locations are the corner ch-1 sps, and the 3 ch-1 sps across the edge. Place markers in these locations on the previous small square, if desired.
-
Work one of the following Round 2 joining rounds, as appropriate. When instructed to make-join, insert hook in next joining location (marked location on top of strip, or next joining ch-sp on edge of previous square).
Joining First Small Square to Top of Strip
-
Round 2 (joining round): With RS facing, join 2nd color with sc in top of beginning ch, ch 1, sk next dc, sc in next dc, ch 1; join next edge of current square to top of strip, as follows: (sc, ch 1, make-join, sc) in next ch-3 sp, ch 1, make-join, sc in next dc, ch 1, make-join, sk next dc, sc in next dc, ch 1, make-join, (sc, ch 1, make-join, sc) in next ch-3 sp; complete unjoined sides, as follows: *ch 1, sc in next dc, ch 1, sk next dc, sc in next dc, ch 1, (sc, ch 1, sc) in next ch-3 sp; repeat from * around, ch 1; join with sl st in first sc. Fasten off.
-
Joining 2nd, 3rd and 4th Small Square to Top of Strip and Previous Small Square
-
Round 2 (joining round): With RS facing, join 2nd color with sc in top of beginning ch, ch 1, sk next dc, sc in next dc; join next edge of current square to side edge of previous square, as follows: ch 1, (sc, ch 1, make-join inserting hook in top corner ch-1 sp of previous square, sc) in next ch-3 sp, ch 1, make-join, sc in next dc, ch 1, make-join, sk next dc, sc in next dc, ch 1, make-join, (sc, ch 1, make-join inserting hook in same joining location as corner of previous square, sc) in next ch-3 sp; join next edge of current square to top of strip, as follows: ch 1, make-join, sc in next dc, ch 1, make-join, sk next dc, sc in next dc, ch 1, make-join, (sc, ch 1, make-join, sc) in next ch-3 sp; complete unjoined sides, as follows: *ch 1, sc in next dc, ch 1, sk next dc, sc in next dc, ch 1, (sc, ch 1, sc) in next ch-1 sp, ch 1; join with sl st in first sc. Fasten off.
-
Join 2nd row of small squares in same manner, joining into the ch-1 sps and corner ch-3 sps of the previous row of small squares. Join the inner corner to the corresponding corner of the square diagonally across from the current square.
Beginning Large Square
Follow these instructions when working first square of strips #2 and #5 only. For all other large squares, follow the instructions in the Joined Large Square section.
-
Ch 4; join with sl st in first ch to form a ring.
-
Round 1 (RS): Ch 4 (counts as dc, ch 1), [dc in ring, ch 1] 11 times; join with sl st in 3rd ch of beginning ch—12 dc and 12 ch-1 sps.
-
Round 2: Ch 3, beg-Cl in first ch-1 sp, *ch 3, Cl in next ch-1 sp; repeat from * around, ch 1, hdc in beg-Cl (forming last ch-sp)—12 clusters and 12 ch-sps.
-
Round 3: Ch 1, sc in first ch-sp (formed by ch-1, hdc at end of last round), *ch 5, sc in next ch-3 sp; repeat from * around, ch 2, dc in first sc (forming last ch-5 sp)—12 sc and 12 ch-5 sps.
-
Round 4: Ch 1, sc in first ch-5 sp (formed by last ch-2 and dc of previous round), ch 5, sc in next ch-5 sp, ch 1, (5 dc, ch 3, 5 dc) in next ch-5 sp (corner made), *ch 1, sc in next ch-5 sp, ch 5, sc in next ch-5 sp, ch 1, (5 dc, ch 3, 5 dc) in next ch-5 sp; repeat from * around; ch 1, join with sl st in first sc. Fasten off.
Joined Large Square
Mark Joining Locations
-
Before joining first large square to top of partially completed strip, place 9 stitch markers evenly spaced across the top edge. Place the first marker in one corner and the last marker in the opposite corner. Space the other 7 markers evenly between the first and last marker. These markers indicate the joining locations for the 2 large squares that will be joined to the top edge.
-
When joining the edge of the 2nd large square to the edge of the first large square, the joining locations are the corner ch-3 sps and the center ch-5 sp across the edge. Place markers in these locations on the previous large square, if desired.
-
Begin Square: Work same as beginning large square, through Round 3. Work one of the following Round 4 joining rounds, as appropriate. When instructed to make-join, insert hook in next joining location (marked location on top of strip, or next joining ch-sp on edge of first square).
Joining First Large Square to Top of Strip
-
Round 4 (joining round): Ch 1, sc in first ch-5 sp, ch 5, sc in next ch-5 sp, ch 1, join next edge of current square to top of strip, as follows: (5 dc, ch 2, make-join, ch 1, 5 dc) in next ch-5 sp, ch 1, sc in next ch-5 sp, ch 3, make-join, ch 2, sc in next ch-5 sp, ch 1, (5 dc, ch 2, make-join, 5 dc) in next ch-5 sp; complete unjoined sides, as follows: *ch 1, sc in next ch-5 sp, ch 5, sc in next ch-5 sp, ch 1, (5 dc, ch 3, 5 dc) in next ch-5 sp; repeat from * around; ch 1, join with sl st in first sc. Fasten off.
-
Joining 2nd Large Square to Top of Strip and First Large Square
-
Round 4 (joining round): Ch 1, sc in first ch-sp, ch 5, sc in next ch-5 sp, ch 1; join next edge of current square to side edge of first square, as follows: (5 dc, ch 2, make-join inserting hook in top corner ch-3 sp of first square, ch 1, 5 dc) in next ch-5 sp, ch 1, sc in next ch-5 sp, ch 3, make-join, ch 2, sc in next ch-5 sp, ch 1, (5 dc, ch 2, make-join inserting hook in same joining location as corner of first square, ch 1, 5 dc) in next ch-5 sp; join next edge of current square to top of strip, as follows: ch 1, sc in next ch-5 sp, ch 3, make-join, ch 2, sc in next ch-5 sp, ch 1, (5 dc, ch 2, make-join, ch 1, 5 dc) in next ch-5 sp; complete unjoined sides, as follows: *ch 1, sc in next ch-5 sp, ch 5, sc in next ch-5 sp, ch 1, (5 dc, ch 3, 5 dc) in next ch-5 sp; ch 1, join with sl st in first sc. Fasten off.
-
Join 2nd row of large squares in same manner, joining into the corner ch-3 sps and side ch-5 sps of the previous row of large squares. Join the inner corner to the corresponding corner of the square diagonally across from the current square.
Finishing
-
Using yarn needle, weave in all ends. Block strips.
-
Seam Strips: Holding WS of strip #1 and strip #2 together (RS facing you) and working through both thicknesses, join E with sc at beginning of strips, sc evenly across to join strips together. Fasten off. Repeat to join strip #3, #4, and #5.
Edging
-
With RS facing, join E with sc anywhere in edge of throw.
-
Round 1: Sc evenly spaced around all edges, working 3 sc in each corner; join with sl st in first sc.
-
Round 2: Ch 1, working in back loops only, sc in each sc around, working 2 sc in each corner; join witih sl st in first sc. Fasten off.
Abbreviations
- beg-Cl: Beginning cluster
- Yarn over, insert hook in indicated ch-space and draw up a loop, yarn over and draw through 2 loops on hook; yarn over, insert hook in same ch-space and draw up a loop, yarn over and draw through 2 loops on hook; yarn over and draw through all 3 loops on hook.
- Cl: Cluster
- Yarn over, insert hook in indicated ch-space and draw up a loop, yarn over and draw through 2 loops on hook; [yarn over, insert hook in same ch-space and draw up a loop, yarn over and draw through 2 loops on hook] twice; yarn over and draw through all 4 loops on hook.
- FPdc: Front-post double crochet
- Yarn over, insert hook from front to back and then to front again around post of stitch, yarn over and draw up loop, [yarn over and draw through 2 loops on hook] twice.
- make-join
- Drop loop from hook, insert hook from front to back in next joining location of top of strip or neighboring piece, return dropped loop to hook, draw the dropped loop through the stitch or space
What do you think of the Millionaire's Afghan?
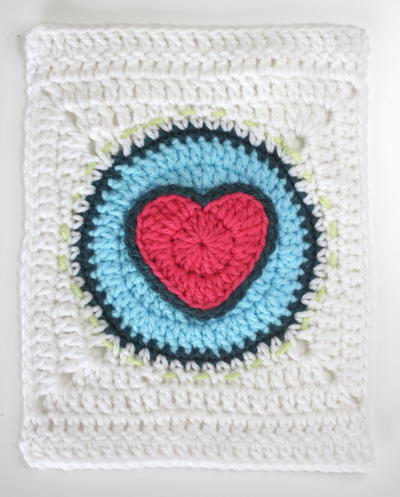
Read NextSpread the Love Granny Square
Your Recently Viewed Projects
Thanks for your comment. Don't forget to share!
Dorie 1612
Apr 11, 2021
I love this project so I researched the yarn. I find that Naturally Caron Country yarn comes in 3 oz skeins. I saw nothing larger for that exact kind. I am highly sensitive to color dye lot errors and always be sure to buy enough when making a purchase, even when buying the "NO DYE LOT " yarns as I know they are not always the same. I query if the recommended yarn allotment will actually be sufficient or if a larger skein was used. It would be so helpful if the yarn that is recommended for a project was also listed by ounces (oz) and/or yards.
MccfamschoolMom
Dec 24, 2019
Can I find images of the suggested colorways of the original yarn (Caron Country) for this project? I will be substituting a different yarn, but would like to match the original colors as closely as I can.
Editor Dana
Dec 30, 2019
Hi there! What I would suggest doing is a Google Image Search for each colorway and pulling those images to match your colors. I hope that helps and I apologize for the inconvenience! Yarnsub.com is also a fantastic resource. Good luck!
MccfamschoolMom
Dec 30, 2019
Google Image Search is what I ended up doing for the individual colors however, I had hoped that I could find a Caron Country color card online (maybe via Wayback Machine?) which would display all the colors, much as Yarnspirations.com does for yarns which are still in production. I've tried Yarnsub.com for yarn substitutions, but didn't know they had color "cards" for yarns in their database I'll have to check them again. Thanks for the suggestions!
Editor Dana
Dec 30, 2019
Good news! I found many of the colorways on Ravelry! Here is the URL: https://www.ravelry.com/yarns/library/naturallycaroncom-country I hope that helps!
MccfamschoolMom
Dec 30, 2019
I saw that too unfortunately, I currently only have limited access to Ravelry, since I cancelled my Ravelry account this past summer. So I could probably print the "popular colorways" shown on the main page for Caron Country, but can't access the link to where the complete list of colorways Ravelry members have shared information/pics on is.
princess6860504
Jun 26, 2018
It would be quite an undertaking to actually take on this afghan project. WOW. I can't even comprehend how much work and how long it will take me to put this together. And something like seventeen skeins of yarn! The colors are like harvest colors, so it is indeed a "rich"afghan!
jkzehr 5044441
Jul 16, 2016
The yarn recommended for this project has been discontinued. What is recommended to replace it?
Kaylee
Jul 18, 2016
@jkzehr 5044441 So long as you use the same weight of yarn as the pattern recommends you should be good to go! Hope that helps! -Kaylee, Editor of FaveCrafts
MccfamschoolMom
Dec 24, 2019
Yarnspirations.com (via the Ravelry page for this pattern) suggests substituting Caron Simply Soft. I collected a bunch of skeins of Berroco Comfort Worsted (from DBNY and eBay) that I plan to use for this pattern. Or check Yarnsub.com for their suggested substitutions for Caron Country.
Zeemer
Jul 05, 2016
The name of this afghan is very appropriate. With the high level of challenge in making this, it should really be called the millionaire's afghan. Good luck. Here's the pattern
ldybgchef14 273150 2
May 13, 2016
I'd love to make this, but I'm having a difficult time finding the yarn! If I can't find Naturally Caron Country yarn, what can I substitute?
Kaylee
Jul 18, 2016
@ldybgchef14 273150 2 So long as you use the same weight of yarn as the pattern recommends you should be good to go! Hope that helps! -Kaylee, Editor of FaveCrafts
beadyeyelover
May 08, 2016
I'm probably blind, but where is the assembly diagram that I'm supposed to consult regularly? I don't see it... Help!
Kaylee
May 09, 2016
@beadyeyelover 1633 879 if you click on the link in the materials list that says "Diagram" you should be able to download it from there. Hope that helps! -Kaylee, Editor of FaveCrafts
Zeemer
Mar 22, 2016
I'll probably make this as my next project after this original design I'm making. This afghan is one of the best I've seen so fat. The name is very appropriate. I will come back to show my finished product.
andigrams 1253
Mar 17, 2016
I SO wanted to make this gorgeous afghan. Even after reading how much trouble some were having with it, I was not deterred -- foolishly thinking hey, I'm a very experienced crocheter, this shouldn't be a problem. Oh, how wrong I was. I have tried NUMEROUS times to get the hang of these directions, but the bottom line is I can't make head nor tail of them. Found myself wondering if they were written by someone of another nationality who uses different terms than we do? I keep hunting YouTube with the hope that someday I'll find a tutorial for this afghan on there because surely someone SOMEWHERE will figure this thing out. In the meantime, I have given up on it. And from reading these comments, sadly it looks like I'm not the only one.
cherrygriffin 4341 977
Apr 12, 2016
I too had trouble with working out these instructions. English crochet is written differently but I've worked it out and almost finished it. Its been great to do, addictive and I am using up all my DK yarn collected over the years. But, my thumbs have suffered as its quite difficult sometimes working the stitches. Its such fun sorting out different colours, I did not use the pattern's colours but did the the various motifs and stripes. The pattern needs altering a bit and I am putting the strips together a little differently. I shall miss doing this wrap! Going on to knitting as its easier on my poor thumbs!
BerylSkog
Dec 27, 2015
Hi All Ok so I am on the second panel and think I have finally mastered the make join I think the trick is to put the hook through the base piece every time you read make join and then complete the stitch double crochet or single or chain It helps to consistently hold the yarn in back of the piece as well as the small or large square you are joining The square to be joined must abut the base piece--i e not on top of but next to the place where it will be positioned The other thing to note when joining the small squares is that in Round directions after completing the sc ch make join sc in next ch space which is a corner ch make join sc in NEXT dc next dc refers to the stitch which is in the corner space then skip the next…Read More dc which leaves only one more dc to Make join in before going to the next corner Hope this helps see px which reflect the first set of small squares in Strip -I'll post some additional px in a separate post as you are only able to post at a time For some of the Rectangles I found it easier to carry the color along when the pattern used the same color every other row for example strip joined rectangle-- FCBFA DDFAFH I kept F color along with me while crocheting with A color rather than cutting off and reconnecting less ends to pull in Also in terms of the colors just follow the chart joining as you go along
gracefullikeagazel le
Sep 25, 2015
??HAS ANYONE SUCCESSFULLY COMPLETED THIS STUNNING PIECE OF ART??
jwro199000 7993114
Aug 25, 2015
I think I might try that too. the other way is not working and does not look right either. thank you
Pdaniel
Aug 25, 2015
I agree with all of you and I have been crocheting for years. I too have all the yarn. So I am making the squares and rectangles and sewing them together like you would a granny square afghan. I hope this helps!
Nibit2U
Aug 07, 2015
This is the most complicated pattern I've ever seen! And I am an expert crocheter. Such a frustrating mess. Sad.
jwro199000 7993114
Jul 08, 2015
I have not worked on afghan since my last post. Have all my yarn waiting to go ahead but does not look like joining in picture. Pattern instruction does not match sqs for joining. Help appreciated.
teenrapord 9484067
Jul 07, 2015
This has been the hardest pattern I believe that I have ever tried to follow. The instructions say that you can do all the parts and then add which would be much easier but then the small square which is the very next part of the afghan does not have clear instructions after row 2 except for joining and still is not clear. Is there another pattern for this beautiful piece of work and if not is there not a way to simplify it. I have bought all the yarn and now am stuck with an pattern that only annoys me.
jwro199000 7993114
Jun 14, 2015
i'm still not sure on how to connect sqs now joining lg sq even more confusing. Anyone completed this afghan if so any help is appreciated would really like to make this.
jwro199000 7993114
Jun 10, 2015
cannot catch on to make-join. wrong sides together small sq in front? the join does not appear to be right. Can anyone help?
annalizestrauss 19 58591
Jun 08, 2015
I've decided to crochet this afghan for my mom and dad for their 50th wedding anniversary - an afghan each! I bought the yarn it is the most amazing colours, but now I can not get a grip on the pattern!! Is there anyone that started yet that can explain to me how this worked? I thought that I am a skilled "chrocheter" but apparently not!
johnlillie789 1413 246
Jun 02, 2015
I clicked on diagram and it was there. As far as I can see the instructions are all there. I'll find out when I start on this pattern for sure. I do love the look! So many beautiful patterns and not enough time...
melann14334 133103 4
Dec 31, 2014
I order to do this pattern you need a the instructions for each smaller blocks?? It checked the link that was added and went to a page and said that they could find it? I like this pattern and would love to make it, can anyone help with the COMPLETE instructions. Thanks Melann
PatchesNE
Oct 03, 2014
The yarn for this has been discontinued. What other yarns could be used with similar colors?
FaveCrafts Editor JL
Oct 06, 2014
Hi there, I found Naturally Caron yarn for sale on Amazon.com. If you're looking for something similar, I suggest Red Heart Super Saver Yarn. Thanks! - Julia from FaveCrafts
chaggerty 9155063
Jul 15, 2014
I just love this afghan... the colors are perfect for my best friend's house. I cannot find the Caron country yarn in stores or on line - can someone tell me where I can get the yarn Thanks!! :)
jejmde 1546428
Jun 26, 2014
I would like to make this but no assembly diagrams were included nor instructions on any shapes except rectangles and large squares. Thank you. Joan
FaveCrafts Editor JL
Jun 27, 2014
Hi Joan, Hi there, Here is the original pattern - as you can see, they do not provide these diagrams or further shape instructions. Hope this helps! http://bit.ly/1rqHyNj
Linda S 9618850
Jun 20, 2014
Where are the patterns for each of the small blocks? I have the Diagram, but no patterns.
FaveCrafts Editor JL
Jun 23, 2014
Hi there, Here is the original pattern - as you can see, they do not provide patterns for each block. Hope this helps! http://bit.ly/1rqHyNj
elzaguerra1947
Oct 02, 2013
Demais!!! Adorei!! Quem sabe um dia possa faz-lo? Obrigada!! Elza Guerra from Brasil
jcassady 2892704
Sep 22, 2013
Thank you! Today I received the pattern WITH the diagram attached. I am really looking forward to completing this beautiful project.
jcassady 2892704
Sep 20, 2013
There is no "Materials Needed" list on the pattern I found online. The Assembly Diagram must have been omitted from the favecrafts.com website. I really want to be able to make this beautiful afghan.
jcassady 2892704
Sep 20, 2013
"Refer to the assembly diagram frequently." HELP: Where can I find this assembly diagram??
mw05
Aug 18, 2013
Where is the diagram? I want to make this exciting pattern with my left over baby yarn.
Instar Inspiration s
Jul 14, 2013
this is perfect for my car afghan. Use up all my stash so I can tell my DH we need to go get more!
SallyLeeFl60
Jul 06, 2013
Perfect way to use up all that left over bits and pieces. I can't wait to start this one. This is definitely going on the "to make" list.
lmartin210 1507133
Jul 04, 2013
Beautiful! An updated afghan with interesting use of patterns. You could use up some of your "stash" of leftovers, too! Thank you for sharing!
Report Inappropriate Comment
Are you sure you would like to report this comment? It will be flagged for our moderators to take action.
Thank you for taking the time to improve the content on our site.