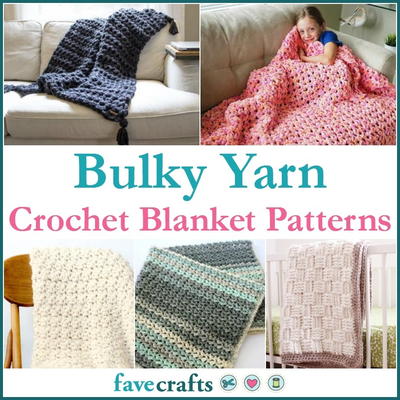
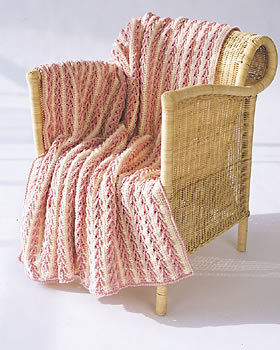
Afghan with Sleeves Crochet Pattern
This crochet snuggie pattern is just what your movie nights have been missing.

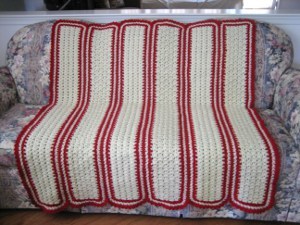
Learn to crochet a blanket with sleeves and take your binge-watching nights to the next comfortable level with this crochet snuggie pattern. Cleverly dubbed the "wrap-ghan" by Bernat yarns, the Afghan With Sleeves Crochet Pattern will not only keep you warm but also will keep your hands free to read, sip a cup of coffee/tea, or work the remote. Make your own sleeved blanket in colors to match your decor and get ready for the ultimate in relaxtion and comfort. And don't be surprised if friends and family start requesting a homemade snuggie of their very own!
NotesTo determine how many balls of yarn you'll need, if you're using different yarn for example, take the total amount of yds of yarn you'll need and divide it by the number of yds found in the yarn you'd like to use. The resulting number is how many balls of that yarn it will take to complete the project.

Crochet HookI/9 or 5.5 mm hook
Yarn Weight(4) Medium Weight/Worsted Weight and Aran (16-20 stitches to 4 inches)
Crochet Gauge12 sts and 10 rows = 4 ins [10 cm] in pat.
Finished SizeChild Size: 24-32 ins [61-81.5 cm] (1,910 yds of yarn*) // Adult Size: 34-56 ins [86.5-142 cm] (2,670 yds of yarn*)
Materials List
- 6 (8) balls of Bernat® Super Value (Solids: 197 g/7 oz) (389 m/426 yds) yarn
- Size 5.5 mm (U.S. I or 9) crochet hook or size needed to obtain gauge
Instructions for the Afghan With Sleeves Crochet Pattern:
The instructions are written for child size. If changes are necessary for Adult size the instructions will be written thus ( ).
BODY
-
Ch 136 (174).
-
1st row: (RS). 1 sc in 2nd ch from hook. *1 dc in next ch. 1 sc in next ch. Rep from * across. 135 (173) sts. Turn.
-
2nd row: Ch 3 (counts as dc). *1 sc in next dc. 1 dc in next sc. Rep from * to end of row. Turn.
-
3rd row: Ch 1. 1 sc in first dc. *1 dc in next sc. 1 sc in next dc. Rep from * to end of row. Turn.
-
Rep last 2 rows for pat until work from beg measures 33½ (44½) ins [85 (113) cm], ending with a WS row.
-
Divide for armholes: Next row: (RS). Pat across 35 (45) sts. Sl st across next 10 (11) sts. Pat across 45 (61) sts. Sl st across next 10 (11) sts. Pat across 35 (45) sts. Turn.
-
Right Back: Cont in pat on last 35 (45) sts until armhole measures 8½ (10½) ins [21.5 (26.5) cm], ending with a RS row.
-
Shape shoulder: Next row: (WS). Pat across 25 (31) sts. Turn. Leave rem sts unworked.
-
Collar: Cont in pat on 25 (31) sts until work from shoulder edge measures 3 (4½) ins [7.5 (11.5) cm], ending with a WS row. Fasten off.
-
Front: With WS facing, join yarn with sl st to center 45 (61) sts. Cont even in pat until armhole measures 8½ (10½) ins [21.5 (26.5) cm], ending with a RS row.
-
Shape shoulders: Next row: (WS). Sl st across first 10 (14) sts. Pat across next 25 (33) sts. Turn. Leave rem sts unworked.
-
Collar: Cont in pat until work from shoulder edge measures 3 (4½) ins [7.5 (11.5) cm], ending with a WS row. Fasten off.
-
Left Back: With WS facing, join yarn with sl st to rem 35 (45) sts. Cont even in pat until armhole measures 8½ (10½) ins [21.5 (26.5) cm], ending with a RS row.
-
Shape shoulder: Next row: (WS). Sl st across first 10 (14) sts. Pat to end of row. Turn.
-
Collar: Cont in pat on rem 25 (31) sts until work from shoulder edge measures 3 (4½) ins [7.5 (11.5) cm], ending with a WS row. Fasten off.
SLEEVES
-
Ch 32 (40).
-
1st row: (RS). 1 sc in 2nd ch from hook. *1 dc in next ch. 1 sc in next ch. Rep from * across. 31 (39) sts. Turn.
-
2nd row: Ch 3 (counts as dc). *1 sc in next dc. 1 dc in next sc. Rep from * to end of row. Turn.
-
3rd row: Ch 1. 1 sc in first dc. *1 dc in next sc. 1 sc in next dc. Rep from * to end of row. Turn.
-
4th row: As 2nd row.
-
5th row: Ch 1. 2 sc in first st. *1 dc in next sc. 1 sc in next dc. Rep from * to last 2 sts. 1 dc in next sc. 2 sc in last st. Turn.
-
6th row: Ch 1. 1 sc in first sc. *1 dc in next sc. 1 sc in next dc. Rep from * to last 2 sts. 1 dc in next sc. 1 sc in last sc. Turn.
-
7th row: Ch 1. 2 sc in first st. 1 sc in next dc. *1 dc in next sc. 1 sc in next dc. Rep from * to last st. 2 sc in last st. Turn.
-
8th row: Ch 3 (counts as dc). 1 sc in next sc. *1 dc in next sc. 1 sc in next dc. Rep from * to end of row, ending with 1 dc in last st. Turn.
-
Rep last 4 rows 4 (5) times more. 51 (63) sts. Cont even in pat until work from beg measures 12½ (17½) ins [32 (44.5) cm], ending with a WS row. Place markers ateach end of last row.
-
Work 4 (6) rows even in pat. Fasten off.
FINISHING
-
Sew shoulder and collar seams. Sew in sleeves placing rows above markers along unworked sts of Body. Sew sleeve seams.
Read NextArrow Stitch Crochet Afghan
Your Recently Viewed Projects

Thanks for your comment. Don't forget to share!
Sharon M
Nov 24, 2018
I am lost and confused. Is there a tutorial available for this pattern?
feaster27 6204846
Jan 27, 2026
I am confused also, did you ever get a response. I'm making it for my granddaughter and can't make out the instructions for the shoulders, neck, etc
feaster27 6204846
Jan 27, 2026
I am confused also, did you ever get a response. I'm making it for my granddaughter and can't make out the instructions for the shoulders, neck, etc
feaster27 6204846
Jan 27, 2026
I am confused also, did you ever get a response. I'm making it for my granddaughter and can't make out the instructions for the shoulders, neck, etc
Cheryl Y
Jan 27, 2018
I love the idea of this Afghan with Sleeves. I think this pattern could use a few more pictures showing how to sew the thing together. Has anyone made this and if so can you share how you put it together for the ones questioning? I haven't had the time to make it, but I'm thinking of making a child size one first to just try it. All in all I do like the stitch pattern used in this one. Thank you for sharing this one. Looking forward to seeing how it comes out..
flowergirl
May 30, 2017
This pattern is genius. Nobody would be fighting over the Afghan on the couch. I feel like you can make th de for everyone.
pquesh 9978266
Dec 11, 2016
I'm so lost on this project. Does anyone have pictures on wheat the different sections are supposed to look like?? I'm stuck on the front collar section. Also not sure how it's all supposed to fit together. Any help would be so greatly appreciated!!!
Zeemer
Dec 05, 2016
This is another project that deserves a five-star rating for its bright idea. I'm forever in awe of people who come up with new and novel ideas that make life easier and more convenient without breaking the bank or giving much effort. This Afghan with Sleeves Crochet Pattern is so beautiful and practical, you are not limited to just snuggle under an afghan when feeling cold. You can use this afghan and still be able to use your hands freely sitting or lying down on a couch. This is so lovely, it can be a perfect gift to your mom, sister, brother, grandma, any member of the family actually. Let's go and make this wrapghan.
LaurieKnitCrochet
Jan 10, 2016
This is my 'go-to' pattern for baby gifts. I bought the pattern book Red Heart's Snuggle Up! Includes 11 knit and crochet patterns in sizes for baby, youth, and extra tall. Everyone loves this unique gift of a car-seat/stroller "snugglie" that the child won't outgrow for a few years. It's intended to wear open at the back. Mine are not wide enough between the arms to wear backwards like a house-coat. Takes just under 2 balls and easy care machine wash dry. How easy is that?!
Big Gahoona
Oct 28, 2013
I want to make this for a big guy - what adjustment would I need to make to make a little wider?
rozdesigns 2377875
Sep 20, 2012
The garment is left open at the back. You could sew it up the back from the hem to the beginning of the armholes (to make sure that there is room for you to get into it) and then put buttons and small loops at the neckline and the top of the collar to close it. It is described as a blanket with sleeves, so therefore doesnt fasten at the back.
rozdesigns 2377875
Sep 20, 2012
When you are working the main part of the body, at the point where you separate the front from the back sections you work 45sts and THEN LEAVE 11 STITCHES WHICH DON'T GET WORKED ON ANY MORE. The same is done at the opposite armhole. When you have finished working the sleeves, the stitches across the top of the sleeve are matched to the armhole section from the point where you separated the front from the back sections AND THEN WORKED 26.5CM ALONG EACH SIDE OF THE ARMHOLE. The side edges of the rows worked after the markers at the upper edge of the sleeve, are matched to the stitches left unworked when you split the body into the front and back sections. The underarm seam for the sleeve is then sewn.
mendoldy 9391482
Jul 13, 2011
I should have read all the comments made here before I used a half of a ream of paper printing out the directions! I'd like to make it but I'm afraid I won't be able to finish it without someone knowledgable sitting by my side.
gprine
Oct 07, 2010
I too am confused but only when it comes to assembling the sleeves. I love the pattern of this with the combination of DC and SC. I am going to try to combine this pattern with another one I found with simpler sleeves. If any can heads or tails out of the sleeves and how to assemble them to the main body please email me @ goldieprine@sbcglobal.net Thanks
Crafter 9888249
Aug 01, 2010
I agree with Jay henderson 1/1/10. I am completely confused with the Front and Left Back. I've done the right back, but can't figure out where it goes. It makes no sense to me. I talked with 2 other people who also could not figure it out. What am I missing? Do you have any pictures of the afghan as it is being crocheted?
threads123
Jul 09, 2010
Would you tell me what "pat" means in this pattern. I would love to make it. Thank you perculator49@hotmail.com
martymedcalf 96484 58
Mar 12, 2012
Pat means continue working in the same Pattern. i.e. in this one the pattern would be doing a double crochet then single crochet across the row or as instructed.
Member 17622
May 26, 2010
I love this pattern and there are several different styles on a few other name brand sites. I'm currently crocheting one from another site and it is so easy to do. I'm making it striped in earth tones, it's coming out beautiful!
Swede E Pie
May 10, 2010
If you turned it around and made a belt wouldn't that be a bath robe?
JayHenderson
Jan 01, 2010
I am totally lost on this project At first I figured if the instructions didn't make sense they would as I saw it come together But no matter how many times i re-read them I can not make heads or tails of the second section Front With WS facing join yarn with sl st to center sts Cont even in pat until armhole measures ins cm ending with a RS row Shape shoulders Next row WS Sl st across first sts Pat across next sts Turn Leave rem sts unworked Collar Cont in pat until work from shoulder edge measures ins cm ending with a WS row Fasten off Left Back With WS facing join yarn with sl st to rem sts Cont even in pat until armhole measures ins cm ending with a RS row Shape shoulder Next row WS Sl st across first sts Pat to end of row…Read More Turn Collar Cont in pat on rem sts until work from shoulder edge measures ins cm ending with a WS row Fasten off I find the main piece to be 'blocky' with squared corners and no collar Can anyone please help explain what I am not seeing Are there pictures of how these parts look
CSPotter
Dec 27, 2009
I made this for my youngest daughter for Christmas. It came out beautiful. She requested that I make a belt for it so she can wear it with the opening in the front and be able to walk around in it. I tried it on and realized I have to make one for myself. But first I have to make one for my other daughter. She is due for her third child in February and thought that it would be perfect to keep warm during late night feedings
Tweety out in nowh ere land in N Neva da
Oct 18, 2009
This is a wonderful pattern. It works up easy, and so much better then those things you can buy "as seen on tv" for $20 each.....My family is going to love these for Christmas. The great thing about this pattern, is I have a lot of tall people in my family over 6'5", and now with this pattern I can add rows to make them longer to actually cover them up while there sitting. The "As seen on tv" ones, only came down to right above my husbands knees. lol, now how is that going to keep the rest of his legs and feet warm? HMMM great pattern. Thanks to who ever shared this with us! Forever grateful for this pattern.
Report Inappropriate Comment
Are you sure you would like to report this comment? It will be flagged for our moderators to take action.
Thank you for taking the time to improve the content on our site.