Decoupage Wooden Coat Hangers [3 Ways]
With this tutorial, you'll be hanging in style with decoupage!

If you've never learned how to decoupage on wood, this is an excellent tutorial to follow. Not only will you make something wildly useful---who doesn't need pretty hangers?---but you'll learn how to work with a few different kinds of paper to make the hangers: colored tissue paper, stamped tissue paper, and napkins.
To decoupage tissue paper, you have to be very careful! Even learning how to decoupage with napkins can be tricky, and there are some excellent tips below to do so with success. Learn how to make decoupage wooden coat hangers three ways with this tutorial.
From the Designer: "Decoupage is the kind of craft that seems to know no bounds. Basically, every plain, non-flexible surface can become a possible project—including the humble wood clothes hanger!"
Decoupage Tips Before You Begin
- Set up your work space in an area away from air vents, fans or other sources of moving air to prevent tissue and cut paper napkin pieces from flying around.
- Work on one side of the hanger at a time. Flip over when completely dry.
- Once the tissue or napkin piece has been placed onto the hanger and begun to bond, do not lift edges or remove.
- When wrapping pieces around the contour and edges, use gentle finger pressure instead of the brush.
- Decoupage medium dries very fast and becomes tacky quickly! Wipe fingers with wet towel between steps to avoid tearing the pieces.
- If a piece begins to tear during the application process, the glue on the brush or plate may have started to set and become tacky. Dip brush in water and add a few drops to the decoupage medium on the plate to correct this. Replace water in container often so it remains clean.
![Decoupage Wooden Coat Hangers [3 Ways]](http://irepo.primecp.com/2017/07/338678/Decoupage-Wooden-Coat-Hangers-3-Ways_Large600_ID-2327786.jpg?v=2327786 "Decoupage Wooden Coat Hangers [3 Ways]")
Colorful Torn Tissue Collage Wooden Hanger
When choosing tissue colors, keep in mind that tissue paper is translucent. This means tissue colors will be dramatically affected by the colors of anything beneath the tissue. For example, yellow tissue will take on a distinct green tinge if glued onto a tissue layer or an item that is blue. To avoid “surprise” color changes, make sure to choose tissue colors that harmonize or are part of the same color family. Examples include “yellow-orange-red” or “yellow-green-blue”. Dark surfaces will also affect tissue color by adding a dark grey tone to the color value. When using dark wood finish hangers, it is advisable to paint them white or another light, neutral color and allow to dry completely before gluing on images.

Materials:
- Wood hanger
- Light tack or painter’s tape
- Tissue paper in colors of your choice
- Plaid Enterprises: Mod Podge®️ Gloss Waterbase Glue and Sealer (or decoupage medium or glue and sealant of your choice)
- 3/4”-1” Taklon paint brush
- Styrofoam plate or other non-porous palette
- Non-stick teflon coated mat or mats placed side by side
- Wet towel
- Bowl with clean water
Instructions:
- Gently wrap the metal hanger portion with light-tack tape.
- Tear each color into a variety of shapes (strips, squares, rectangles) and sizes (from 1/4” pieces to 2” x 3” strips).
- Pour about a tablespoon of decoupage medium onto styrofoam plate.
- Brush a thin coat of decoupage medium onto the large center section of the hanger.

- Working quickly, pick up a piece of tissue with the brush and place it on the glued section of the hanger. Gently brush additional medium onto the piece to attach and smooth.

- Pick up a second tissue piece with the brush. Overlapping edges slightly, position and attach, wrapping carefully around hanger edge and around the metal hanger area.

- Repeat steps 3 through 6, applying medium to hanger and attaching tissue pieces until entire side of hanger is covered. Dry completely.
- Turn hanger over. Repeat steps again on remaining side. Hang to dry completely.
- Brush on additional thin coats of decoupage medium, applying to one side at a time and drying in between sides and coats. Allow to dry completely 3-4 days before hanging clothing.
Butterfly Fantasy Stamped Tissue Wooden Hanger
Transform simple white tissue paper into a bright, colorful print that can be decoupaged onto a plain wood hanger!

Materials:
- Wood hanger
- Light tack or painter’s tape
- White tissue paper
- Impression Obsession Rubber Stamps: Butterfly 3 #C7782, Daisy Cluster D7810
- Clearsnap Holdings: Colorbox Archival Dye ink pads (Geranium, Coral, Grape Slushy) or other permanent, water-fast ink
- Plaid Enterprises: Mod Podge®️ Gloss Waterbase Glue and Sealer (or decoupage medium or glue and sealant of your choice)
- 3/4”-1” Taklon paint brush
- Styrofoam plate or other non-porous palette
- Non-stick teflon coated mat or mats placed side by side
- Wet towel
- Bowl with clean water
- Place to hang the decoupaged hangers during drying process
Instructions:
- Stamp a random overlapping pattern on the tissue. Dry several hours.

- Gently wrap the metal hanger portion with light-tack tape.
- Position hanger on stamped tissue.

- Allowing for a 1” allowance all around plus overlap, trace hanger shape for both sides. Cut out shapes, including smaller sections to fit on the curved areas.


- Pour about a tablespoon of decoupage medium onto styrofoam plate.
- Brush a thin coat of decoupage medium onto one half of the large center section of the hanger.
- Working quickly, pick up a piece of tissue with the brush and place it on the glued section of the hanger. Gently brush additional medium onto the piece to attach and smooth.

- Pick up a second tissue piece with the brush. Matching pattern and overlapping edges slightly, position and attach, wrapping carefully around hanger edge and around the metal hanger area.

- Repeat steps 5 through 7, applying medium to hanger and attaching tissue pieces until entire side of hanger is covered. Dry completely.
- Turn hanger over. Trim where needed.

- Repeat steps again on remaining side. Hang to dry several hours or overnight.
- Brush on additional thin coats of decoupage medium, applying to one side at a time and drying in between sides and coats. Allow to dry completely 3-4 days before hanging clothing.
Tropical Flower Paper Napkin Wooden Hanger
Images cut out from colorful paper napkins can also be used to jazz up a plain wood hanger. The key is choosing prints that are easy to cut and have multiple elements that can be arranged to fit the shape of the hanger. Similar to putting a puzzle together, elements can be spaced or overlapped as you desire. Making placement decisions prior to gluing will make the process a breeze to complete!

Materials:
- Wood hanger
- Light tack or painter’s tape
- White tissue paper
- Printed paper napkins of your choice
- Shown: Amscam (Day in Paradise)
- Plaid Enterprises: Mod Podge®️ Gloss Waterbase Glue and Sealer (or decoupage medium or glue and sealant of your choice)
- 3/4”-1” Taklon paint brush
- Styrofoam plate or other non-porous palette
- Non-stick teflon coated mat or mats placed side by side
- Wet towel
- Bowl with clean water
- Place to hang the decoupaged hangers during drying process
Instructions:
- Cut flower and leaf images (or images of your choice) from the paper napkin, making sure to cut through both layers. Include whole images, as well as half or portions of images to fit along edges and fill in spaces on the hanger. Decide on your placement. When satisfied, take a photo, if desired. Remove images in order and place the pieces on your work table.
- Gently wrap the metal hanger portion with light-tack tape.
- Pour about a tablespoon of decoupage medium onto styrofoam plate. Note: you will need to work quickly with steps 4 though 8!
- Brush a thin coat of decoupage medium onto the large center section of the hanger.
- Place your center napkin flower right side down on the edge of your styrofoam plate. Apply medium to the back of piece, making sure the plain backing layer bonds with the printed layer. Working quickly, pick up the flower with the brush and place carefully onto the glued section of the hanger.

- Gently brush additional medium over the flower to attach and smooth.

Use a CLEAN fingertip to smooth wrinkles and gently wrap around the hanger contour and edges.
- Repeat steps 4 through 6 with additional flower and leaf images, overlapping as desired wrapping carefully around hanger edges and around the metal hanger area. Dry completely.


- Turn hanger over. Repeat steps again on remaining side.

Hang to dry completely.
- Brush on additional thin coats of decoupage medium, applying to one side at a time and drying in between sides and coats. Allow to dry completely 3-4 days before using for clothing.

What experiences have you had working with delicate materials like napkins and tissue paper for crafting?
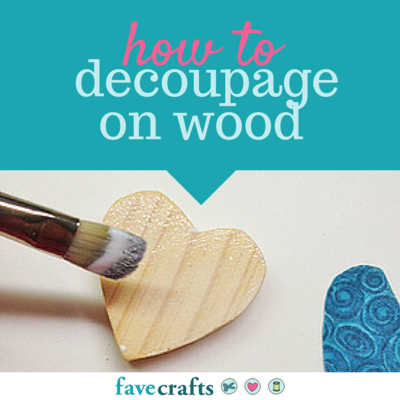
Read NextHow to Decoupage on Wood
Your Recently Viewed Projects
![Decoupage Wooden Coat Hangers [3 Ways]](http://irepo.primecp.com/2017/07/338694/Decoupage-Wooden-Coat-Hangers-3-Ways-2_Large400_ID-2327997.jpg?v=2327997)

Thanks for your comment. Don't forget to share!
Report Inappropriate Comment
Are you sure you would like to report this comment? It will be flagged for our moderators to take action.
Thank you for taking the time to improve the content on our site.