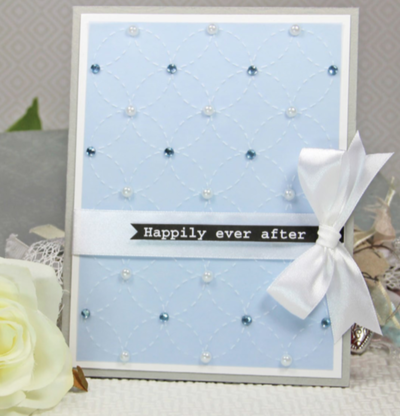
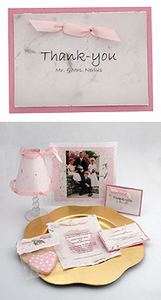
Vellum Wedding Ring Card
Everyone wants the wedding of their dreams, so why not have the DIY wedding card to match?

If you want your wedding to be the event of the season, then you need every element to be perfect. Start your wedding planning the right way with this simply stunning DIY wedding card design by Scrapbook Adhesives by 3L! With a sleek ribbon bow, shiny pearls, and glitzy rhinestones, this homemade wedding card idea is just what every bride-to-be needs in her budget-friendly book of designs. Your guests will adore the sweet fairytale inscription on the front, and its clean yet elegant background will earn you countless compliments. Start the wedding of your dreams with a wedding card every couple can fall in love with.
Time to CompleteUnder an hour
Primary TechniquePaper Crafts
Project or Page SizeCard
Type of Paper UsedCardstock

Project TypeMake a Project
Materials List
- Scrapbook Adhesives by 3L® E-Z Runner® Permanent Fine Adhesive Dispenser
- Scrapbook Adhesives by 3L® E-Z Runner® Permanent Strips Refillable Dispenser
- Scrapbook Adhesives by 3L® 3D Foam Squares White Small Size
- Spellbinders® Paper Arts Wedding Ring Stitch Em-bossing Fold’r by Lene Lok
- Platinum Die Cutting Machine 6” Platform
- Want2Scrap Self- adhesive White Pearls and Blue Rhinestones
- Cardstock: White, Grey
- Vellum: Baby Blue
- Ribbon: Satin White
- Printed Sentiment
- Paper Trimmer
- Scissors
Instructions
-
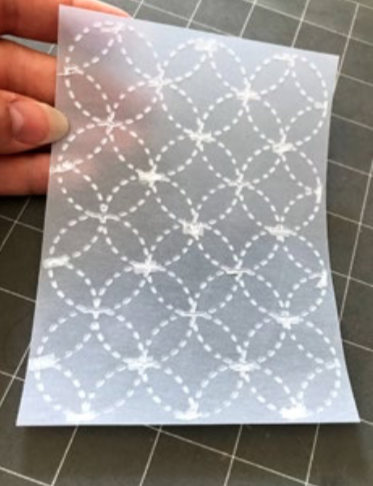
To create the vellum card panel, emboss a piece of 4 3⁄8 x 5 7⁄8-inch vellum with an embossing folder and a die-cutting machine (follow directions on your machine).
-
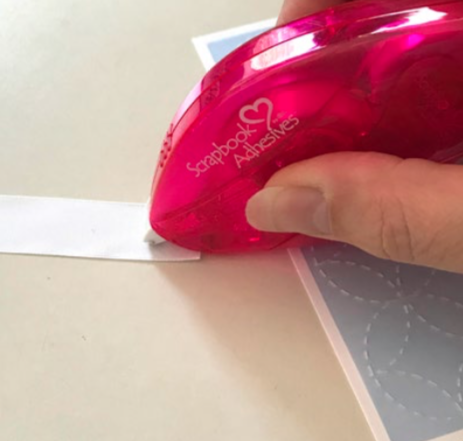
Apply E-Z Runner® Permanent Fine Adhesive Dispenser to the back of the embossed vellum. The opaque adhesive dries clear over a short time.
-
Adhere the panel to a piece of 4 3⁄4 x 6 1⁄4-inch white cardstock.
-
Cut white ribbon about one inch wider than the card. Wrap the ribbon around the card front and adhere the ends behind the white panel using the E-Z Runner® Permanent Strips Refillable Dispenser.
-
Adhere the panel to a grey card base that is slightly larger than the white card panel.
-
Print or stamp a sentiment and cut it into a banner using scissors. Adhere 3D Foam Squares Small Size to the back, remove the liners and adhere to the ribbon.
-
Make a satin bow and adhere to the card using the E-Z Runner® Permanent Strips Refillable Dispenser.
-
Finish the card by adding self-adhesive rhinestones and pearls to the card.
What color scheme would you use for your dream wedding? Let us know below in the comments!