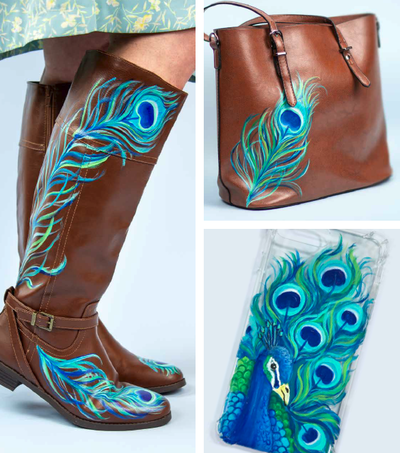
Peacock Accessories: Boots, Purse, & Phone Case
Learn how to paint a peacock and make the loveliest accessories featuring this brilliant bird.

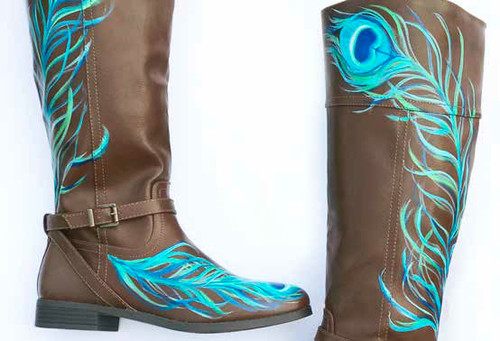
Learn how to paint a peacock and make the loveliest accessories featuring this brilliant bird. This is a great fabric painting idea for your wardrobe. Peacock feather accessories seem to be timeless. They're never too trendy nor too obsolete, making them a fantastic design for you to implement into your wardrobe. This painting project is a 3-for-1, as you'll learn how to make boots, a purse, and a matching phone case. Follow this tutorial to make one or all of these lovely accessories. If you don't consider yourself an artist, don't worry! With these helpful instructions, you'll be painting peacocks in no time.
Time to CompleteIn an evening
Primary TechniquePainting

Project TypeMake a Project
Materials List
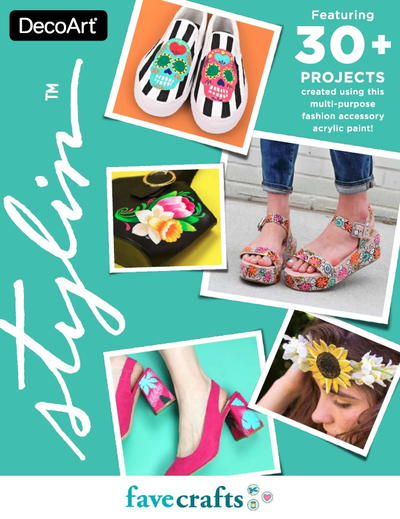
- DecoArt® Stylin™ in Black, Blue, Yellow, White, Aqua, Turquoise, Green
- Pleather Purse
- Pleather Boots
- Plastic Phone Case
- Dynasty Brushes:
- Mastadon, #12 Wave, EB721WV
- Black Gold, #6 Shader, 206S
- Black Gold, 3/8” Angle, 206S
- Black Gold, #0 Liner, 206L
Instructions
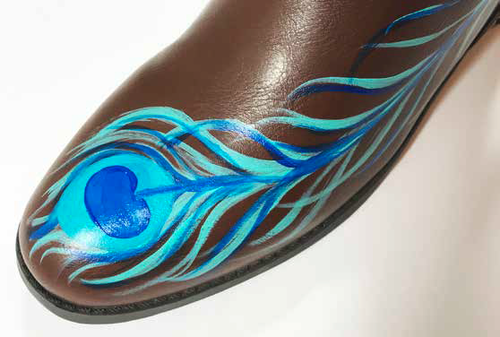
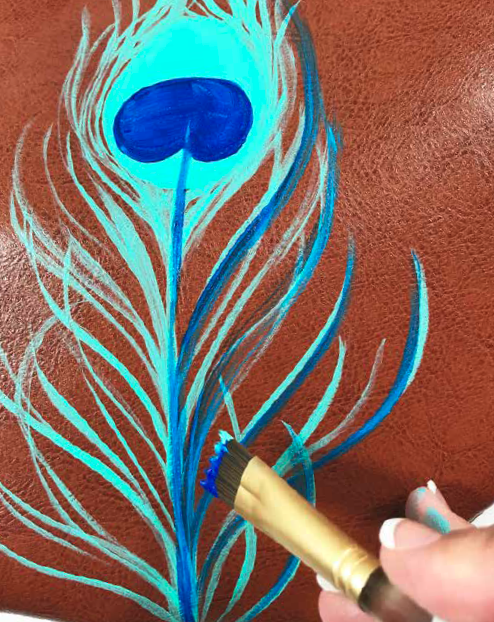
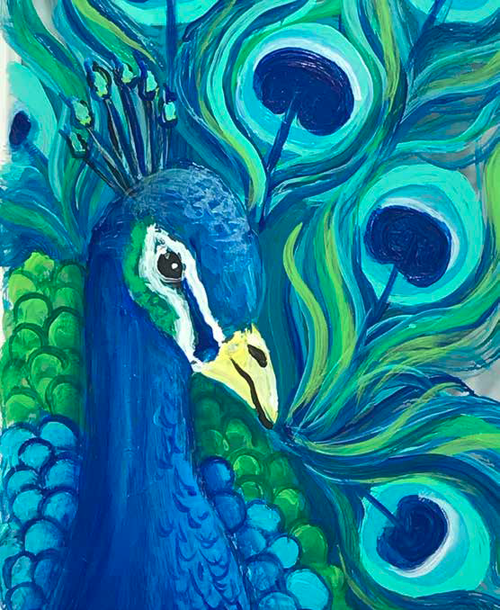
The peacock feathers are painted exactly the same on the boots, the purse, and the phone case. The only difference is that the phone case has a peacock’s head and the boots and purse have lines running through the larger oval center. There are many parts that make up the peacock feather. The oval at the top is known as the eye. The thick center is called the quill. The lines coming up from the quill are called a few different things… flues, plumules, barbs, and barbules. As to not confuse, I am just going to call them “curved lines”.
Boots:
-
Load the 3/8” angle brush with Aqua; draw a curved line for the quill and an egg shape at the end of the stem for the eye. Reload the brush; slide on the chisel edge of the brush and paint the curved lines coming from the quill and then out.
-
Reload the brush with Aqua and Blue and paint the eye again; let dry. Load the #6 shader brush with Turquoise and paint the small oval in the center of the eye. Wipe the brush off and then slide on the chisel edge of the brush from the bottom of the oval to the top. Reload the brush and repaint the Turquoise oval.
-
Load the #12 wave brush with Turquoise. Starting at the bottom and working up to the eye, slide on the chisel edge of the brush and randomly paint the lines. Slide on the chisel edge of the brush from the quill up into the Turquoise center. Leave space in between the strokes, as we’ll add more colors. Make sure to come up and around the eye on both sides.
TIP: Slide on the chisel edge of the
brush along the quill and then slide
out and up to paint the curved lines. -
Load the wave brush with Green, Yellow, and a touch of Aqua and mix on the palette. Slide on the chisel edge and paint more curved lines. Wipe the brush off. Load with Aqua and then dip one corner of the brush into Turquoise and paint more curved lines.
-
Load the angle brush with Turquoise and add White to the toe only. Float the color along the bottom of the
Turquoise oval. Wash the brush. Load only the toe with White and float the color above the top of the Turquoise oval; let dry. Load the #0 liner brush with Green, Yellow, and Aqua and mix on the palette. Paint around the Turquoise center; let dry.

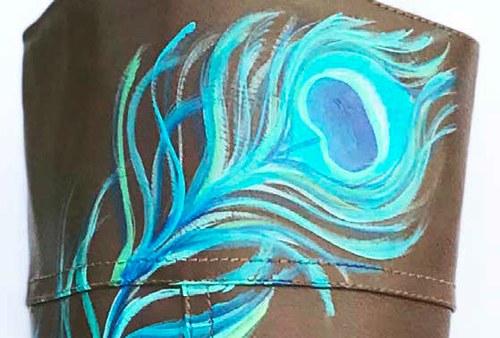
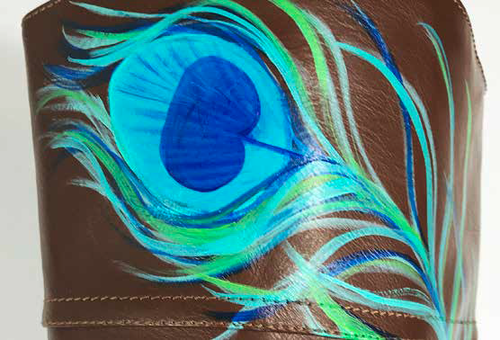
Purse:
-
The feather for the purse is painted exactly the same way as instructed for the boots. I chose to add just one feather coming up from the bottom left corner. However, you could paint several feathers and on both sides if desired.
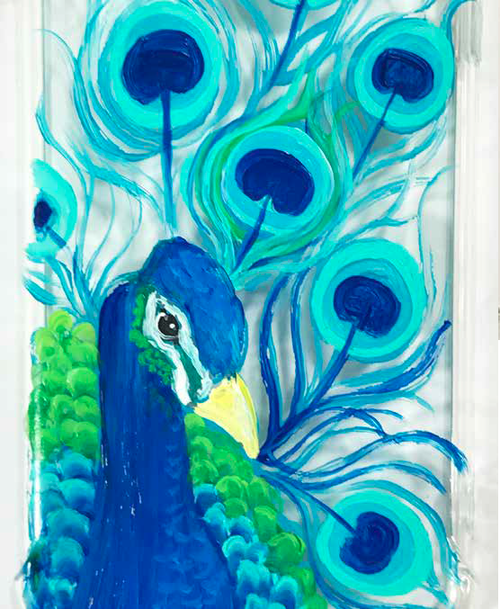
Phone Case:
-
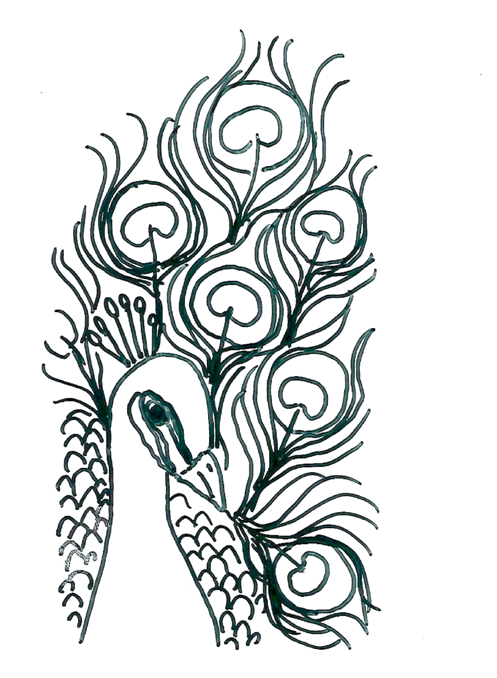
Print out the line drawing for the peacock and tape inside a clear phone case. If your phone case is a solid color, use transfer paper to transfer the design.
Note: Click the image of the peacock to enlarge it. -
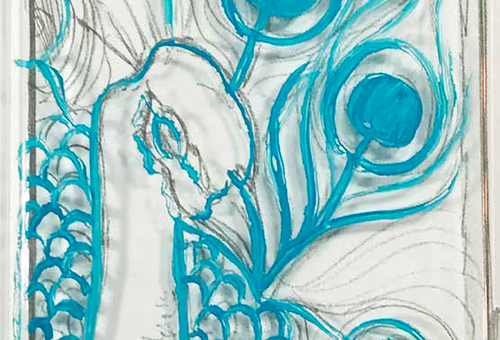
Load the liner brush with Blue and paint the outline as shown. The feathers are painted exactly the same way as instructed for the boots and purse.
-
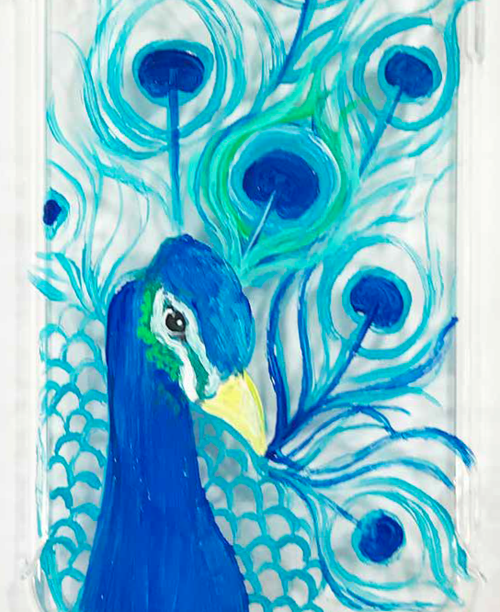
Peacock Head: Load the #6 brush with Turquoise and paint the head. Load the brush with Yellow and a touch of White; paint the beak. Load the liner brush with Green and paint the area around the eye. Load the brush with White and paint the area near the eye. Load the brush with Black and paint the eye. Load the brush with White and outline the eye, adding a small dot to highlight. Load the brush with Turquoise and White and paint small strokes from the beak to the top of the head. Repeat along the front of the neck.
-
Load the liner brush with Green, Yellow, and a touch of White and mix on the palette. Paint the half circles behind the head. Reload the brush with Blue and Aqua and mix together on the palette. Paint the half circles below the Green ones. Load the brush with Green and a touch of Turquoise and outline the Green half circles. Reload the brush with Turquoise and outline the Blue half circles. Reload the brush with Turquoise and paint small “u” shapes on the right side of the neck.
-
Load the liner brush with Turquoise and a touch of Black; paint six lines coming up from the back of the head. Then paint a small oval at the top of each line and let dry. Load the liner brush with Green, Yellow, and Aqua and dot the center of each of the little ovals. Lightly swipe the brush up
each of the lines to highlight. -
Load the liner brush with Black and paint the line on the beak and a small oval just above that.

What is your favorite bird?
Read Next17 Men’s Prayer Shawl Patterns


Thanks for your comment. Don't forget to share!
Mark
Aug 02, 2018
My favorite bird is probably the yellow finch, followed very closely by cardinals.
Report Inappropriate Comment
Are you sure you would like to report this comment? It will be flagged for our moderators to take action.
Thank you for taking the time to improve the content on our site.