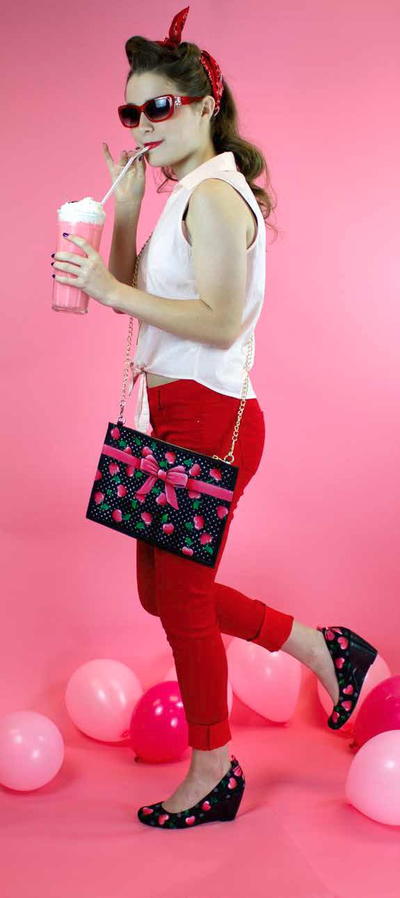
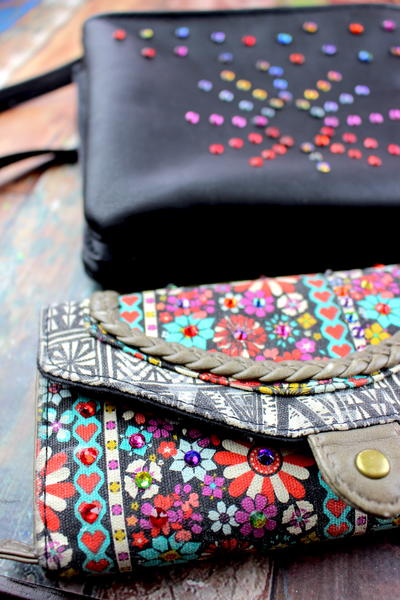
Let It Bloom Shoes & Purse

The crafting world is obsessed with flowers, and it’s for a good reason. Floral patterns never go out of style. Learn how to paint flowers while giving a second life to that plain pair of black shoes and bag hiding out in the back of your closet. The time for boring accessories is over! The Let it Bloom Shoes & Purse tutorial is the DIY shoes makeover you need to freshen up your wardrobe. You won’t believe just how easy it is to take your old accessories to the next level.
Time to CompleteIn an evening
MaterialsFabric, Paint
Primary TechniquePainting

Materials List
- DecoArt® Stylin™ in Beige, Black, Brick, Fuchsia, Green, Orange, Yellow, and White
- Shoes & Purse
- Stylus
- Medium Soft Round Brush
- Small Script Brush
- White Transfer Paper
- Tape
Instructions:
How to Paint the Let It Bloom Shoes & Purse
-
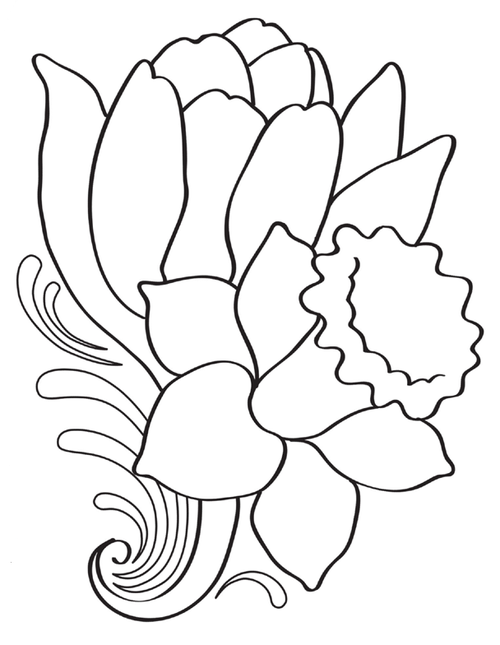
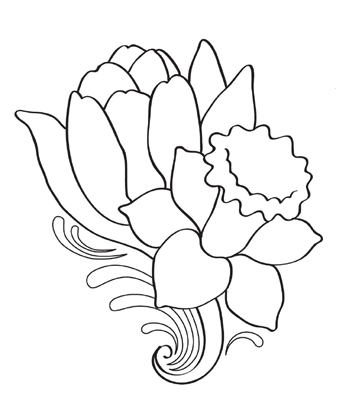
Transfer the provided pattern to the surface using the white transfer paper and a stylus. Use tape to hold it in place.
-
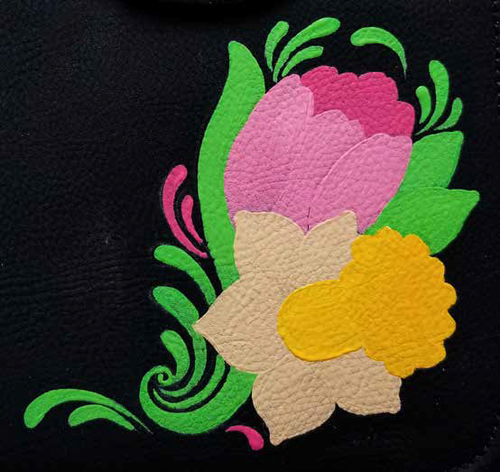
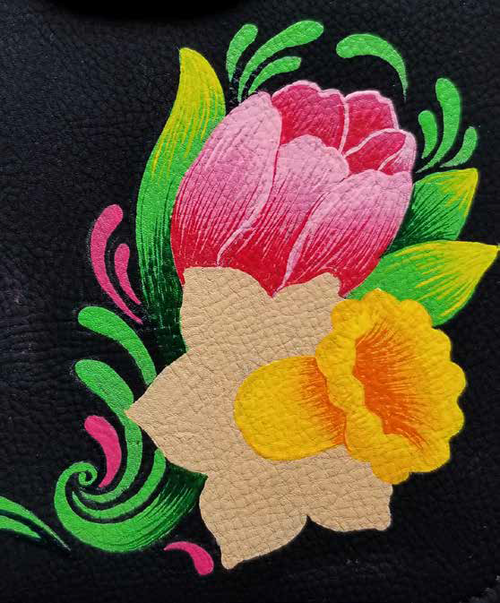
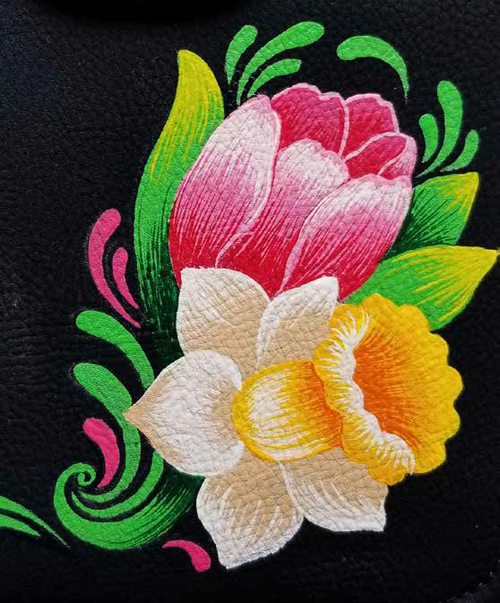
Fill in the areas of the design:
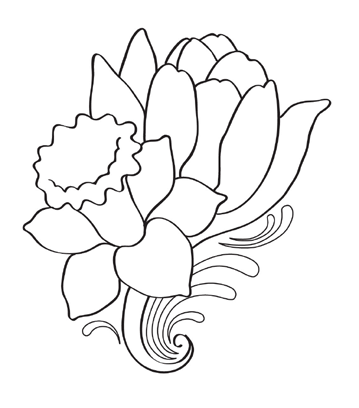
Tulip back petals – Fuchsia
Tulip front petals – mix Fuchsia + White 1:1
Daffodil bottom petals – Beige
Daffodil body – White first, allow to dry and then mix Yellow + Orange 4:1
Leaves and green strokes – mix Green + White + Yellow 1:1:1
Pink Strokes – Fuchsia -
Allow the paint to dry completely and add a second coat if needed.
-
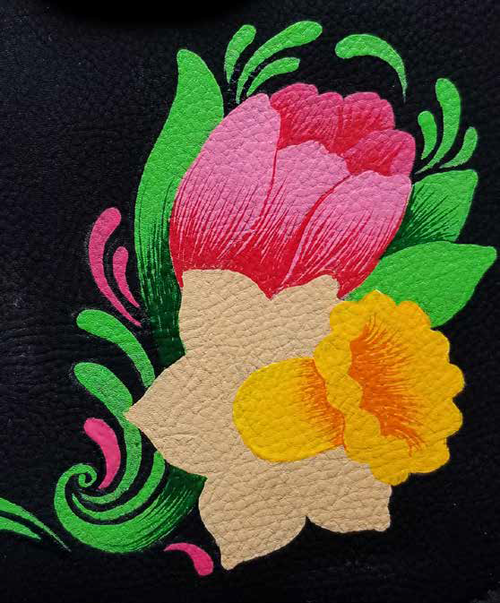
Add shadows with thin lines:
Tulip – shade with mix of Fuchsia + Brick 1:1 in the bottom of all petals.
Daffodil body - shade with Orange in the top opening and under the front ruffle.
Leaves – shade with Green + touch
of Black mix. -
Add color highlights with thin lines:
Tulip – highlight with mix of Fuchsia + White 1:2.
Daffodil body - highlight with Yellow in the center of the body and front top edges of ruffle.
Leaves – highlight tips with Yellow. -
Add white highlights with thin lines:
Tulip – highlight with White in the tops of the front petals.
Daffodil Bottom Petals - highlight with White – see photo for placement.
Daffodil Body - Highlight with White in the center of the body and top front edge of the ruffle. -
Add extra comma strokes of Green or Fuchsia to fill in empty areas of the design.
-
Let them dry completely before strutting your stuff!
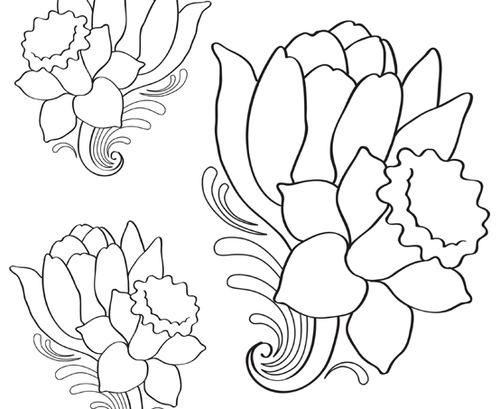
Patterns

Thanks for your comment. Don't forget to share!
Mamafernans18 3927 809
Aug 26, 2019
I love a truly creative person and this my friend is simply awesome. Love this!
Report Inappropriate Comment
Are you sure you would like to report this comment? It will be flagged for our moderators to take action.
Thank you for taking the time to improve the content on our site.