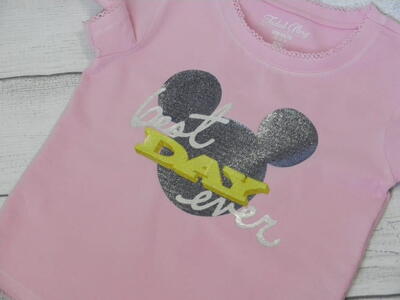
Best Day Ever Disney-Inspired Glitter Vinyl Shirt

If you've struggled with layering glitter vinyl before, this tutorial shows you how to do so effortlessly! The technique produces one darling shirt!
From the Designer: "I am going to show you that you can layer Siser Sparkle glitter vinyl. Not only is this product soft to the touch but you can actually layer it. You heard me right, you can layer glitter vinyl on top of glitter vinyl with the Sparkle line! How is this possible? Because Sparkle has a smooth surface on the top. The glitter is actually embedded into the vinyl. Also, it is so easy to cut with your Cricut! Seriously . . . when I was cutting and weeding the vinyl for this project I must have said “I love this stuff!” a dozen times."
Time to CompleteIn an evening

Project TypeMake a Project
Cricut Cutting Settings
Blade: Standard
Setting: Iron-on
Trust me! There is no need to use the special glitter vinyl settings for this product! I cut it on the exact same settings that I use for Siser EasyWeed. Speaking of which, if you have ever struggled with weeding glitter vinyl let me tell you that your troubles are gone! This was the easiest weeding ever!
Instructions
-
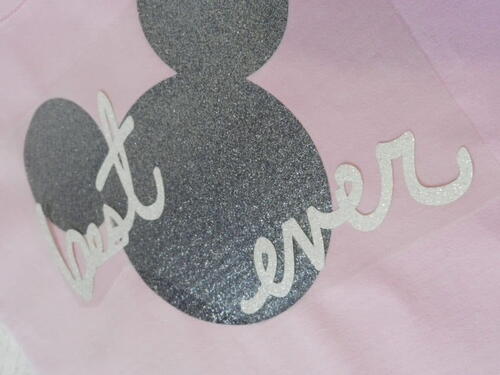
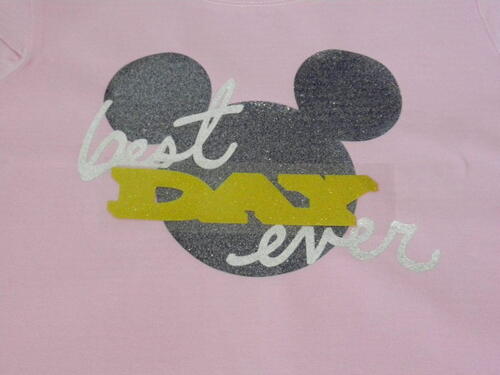
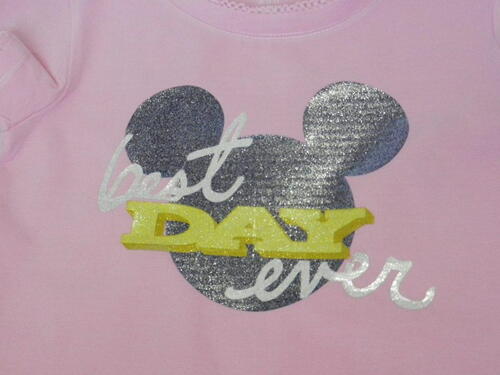
I cut the design for this shirt from images I found in Cricut Design Space. There are four layers to this image. With other glitter products, I would have probably done the Mickey Mouse image in a solid color vinyl, so that I could do the words in glitter vinyl over the top. Since I really wanted to test out layering Sparkle glitter over glitter so I cut the whole Mickey Mouse head out of the Sparkle Grapevine, which is a deep purple color.

Pressing Directions
With your Heat Press
Temperature: 305°F/150 ° C
Time: 15 seconds
Pressure: Medium
Peel: Warm
-
This would have been a cute shirt with just the Sparkle Mickey Mouse on it, but we are taking this to the next level. Now I am adding the Sparkle Snowstorm White layer, and I did this next picture to show you close up that I really am going to layer glitter vinyl over glitter vinyl.
-
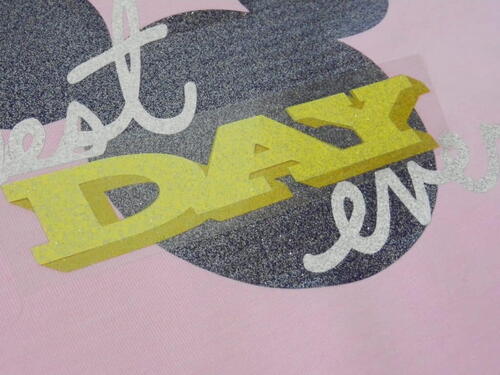
Let’s keep going with more layers of color. I did two shades of yellow for the word Day. First I pressed down the Sparkle Gold Star. As you can see that is going right over the top of the Grapevine Purple layer.
-
The last step was to add the Sparkle Buttercup Yellow to the very top. I really like that even though I have layered several colors over the top of each other, the shirt does not feel thick or stiff.
-
I would love to see how you layer Siser Sparkle glitter vinyl on your next project!
Discover More Featured Projects:
Read NextGreek Goddess Crochet Shawl Pattern