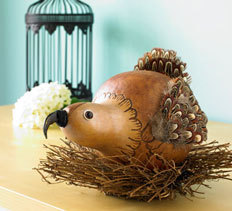
Natural Gourd Bird
Use natural materials, like a bottle gourd, to decorate your home for autumn. This unique craft uses a rotary tool and ink to create a bird from a bottle gourd. Feathers and twig wreaths add great texture. This bird would make a great decoration for your Thanksgiving gathering, too.

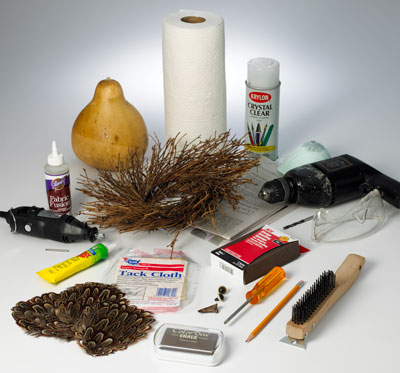
Materials:
- One bottle gourd
- Rotary tool with cutting bit*
- Ink sprays*: Vanilla Shimmer, Molasses
- Chocolate brown inkpad*
- Three feather sprays (wings, tail)
- Two 12" twig wreaths
- 2 brown 10mm doll eyes with shanks
- Talon used for beak
- 24" of black twine
- Fabric glue*
- Fast grip permanent glue*
- Optional: If gourd is not clean: bleach, water, scouring pad, sandpaper, bucket or sink
- Optional: If rotary tool not available, handsaw, drill, 1/4" bit
-
Drop cloth or newspapers, mask & eye protection, metal spoon, soft cloth or paper towels, pencil, sandpaper, tack cloth
Notes:
- Protect work surface with drop cloth or newspapers.
- Wear eye protection and a mask when handling bleach or using power tools.
- Cut and drill outdoors if possible to minimize dust.
- Follow manufacturer's directions for power tools.
- See photos for details and placement.
Instructions:
-
Clean gourd. Note: If gourd is already clean, skip to Step 2. Start with a completely dried gourd. Scrape off any dirt. Wear rubber gloves and eye protection. Mix a 20% solution of bleach and water. To protect gourd from rot and fungal molds, place gourd in mixture for 15 minutes to overnight. Remove gourd from solution. Use wire brush and sandpaper to clean outside surface (Photo A. Place gourd on a clean surface to dry thoroughly.
-
Etch gourd. Use pencil to draw design on gourd as shown (Photo B). To simulate feathers, make a scallop pattern with two or three fine vertical lines within each scallop. Note: Lines will vary depending on gourd shape. Use rotary tool to etch along drawn lines (Photo C). Use tack cloth to remove excess dust.
-
Spray gourd. Apply Vanilla Shimmer ink spray to entire gourd. Use cloth to remove excess and buff away any pencil lines. Apply Snickerdoodle Smooch to wings, ruff, and top of head (Photo D). Apply White Smooch to belly. Apply brown ink to etched lines in gourd and wipe off excess. Repeat until satisfied with look.
-
Add features. Drill holes for eyes (Photo E). Use tack cloth to remove debris around hole. Glue eyes with shanks into holes. To create a place for beak, cut channel in top of gourd. Glue beak in place and hold until dry. Wrap outer edge of beak with black twine. Glue twine ends in place. For wings, glue one spray of feathers on each side of bird. For tail feathers, glue one spray to rear of bird. Hold in position until glue sets.
- Finish. For nest, glue one twig wreath on top of the other. Place bird on nest.
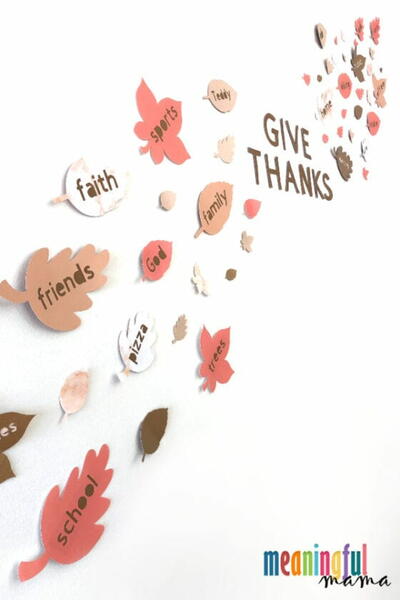
Read NextThankfulness Leaves Wall Decoration
Your Recently Viewed Projects
Thanks for your comment. Don't forget to share!
Marilyn B
Nov 14, 2017
Even though there is only one photo of the completed project, it really is quite pretty and I love e fact it was made with a gourd! I am wondering if as an alternative, you could just skip the routing and groove cutting altogether, and just use inks and also using good tacky white glue that dries clear for attaching the decorative feathers and the beak... You could replace the talon as a beak with curved construction paper that has been painted then glued to form the sharp, or molding clay. So pretty!
hphmama
Jun 01, 2010
WHERE are the photos for this project as noted in the directions (i.e., Photos A thru E)??????????????????? Thx.
Report Inappropriate Comment
Are you sure you would like to report this comment? It will be flagged for our moderators to take action.
Thank you for taking the time to improve the content on our site.