How to Dye Yarn with Icing Colors
Learn how to dye yarn with food coloring with this gorgeous step-by-step tutorial!

Learn how to dye yarn with food coloring when you pick up some icing colors at the store and follow this tutorial! Create gorgeous variegated silk or wool yarn. So long as you use natural fibers, you'll be able to create yarn in any color patterns you'd like. This tutorial shows you the most vivid yarn ever and in so many colors! It's true that, even though there are so many different yarns in stores to choose from, sometimes you want to make a color palette that is uniquely your own. It's easy and inexpensive to dye your own yarn when you employ the techniques covered in this tutorial.
From Darn Good Yarn: Let’s face it. Yarn is pretty. But sometimes even with all the delicious ombres and vibrant solid tones, it can be hard to find exactly what you’re looking for. Here’s where hand dyeing your own yarn can come into play. While it may seem scary at first (putting dye in our precious neutrals and running the risk of dyeing our whole bathroom…? Eep!), the benefits of creating your own dye lots will not only solve your color problems, but it is also incredibly satisfying.
We’ll walk you through, step by step, how to hand dye your very own yarn with pro home-dyer Caitlin from @wildwooddesignsme.
Time to CompleteWeekend project
MaterialsFood, Yarn

Project TypeLearn a Technique
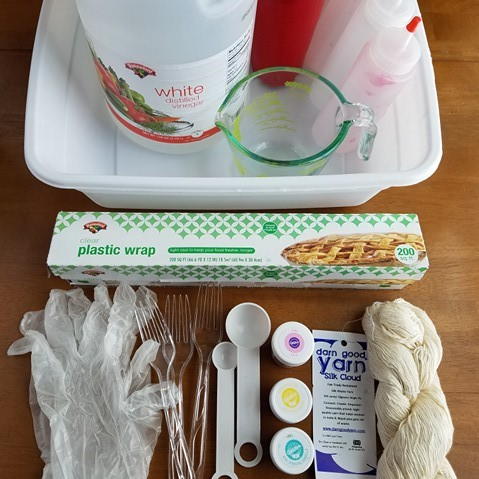
Materials List
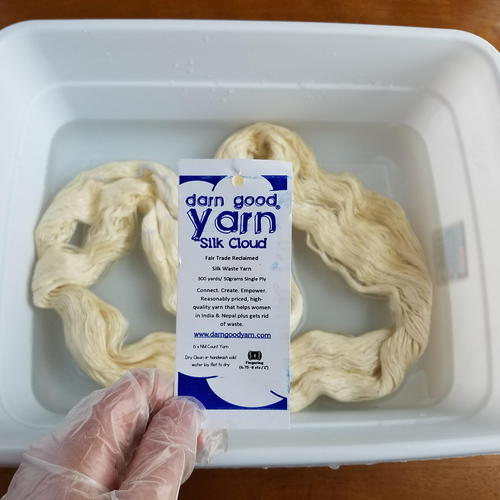
- Natural fiber yarn (We used our Lace Weight Silk, Variegated Thick and Thin Wool Yarn, and Worsted Weight Silk Yarn - Pictured here is the Lace Weight Silk)
- Dish Pan (or any large bowl)
- White Vinegar
- Cups
- Wilton Icing Colors
- Microwave safe plate
- Microwave
- Sink
- Dish soap
- Plastic wrap
- Plastic forks, spoons or anything you can mix with
- Measuring cup (optional)
- Squirt bottles (optional)
- Gloves (optional)
- Measuring spoons (optional)
Instructions
-
Gather materials.
-
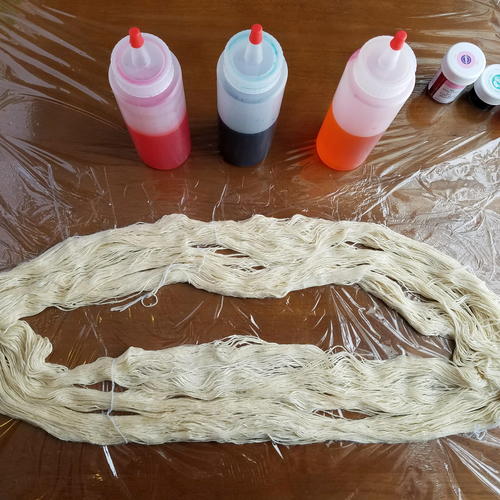
Place your yarn into the dish pan. Add enough cool water to cover the yarn and add 3 tablespoons of white vinegar. Let your yarn sit for at least 30 minutes. You want the fibers to be completely saturated.
-
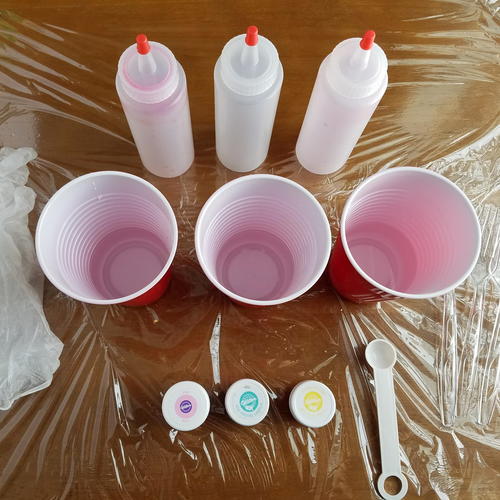
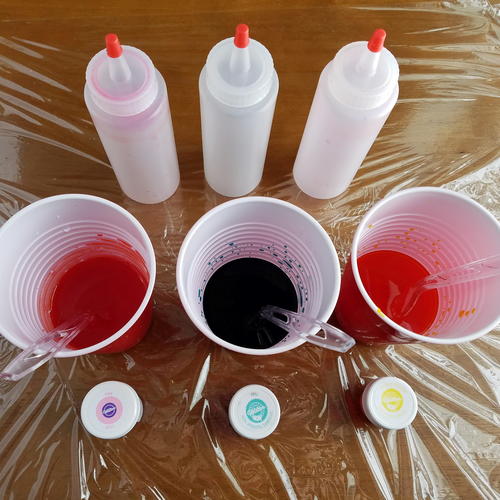
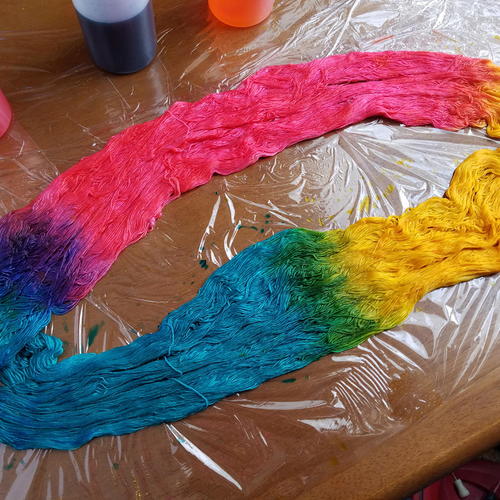
While your yarn is soaking, you can start to prep your work surface. Take your plastic wrap and cover the table (This will not only help keep your table clean, but we will also be using the plastic wrap at the end to help set the dye!) Get your icing colors, cups and squirt bottles out as well. (Tip: Squirt bottles are optional but can make applying the dye to your yarn a lot easier!)
-
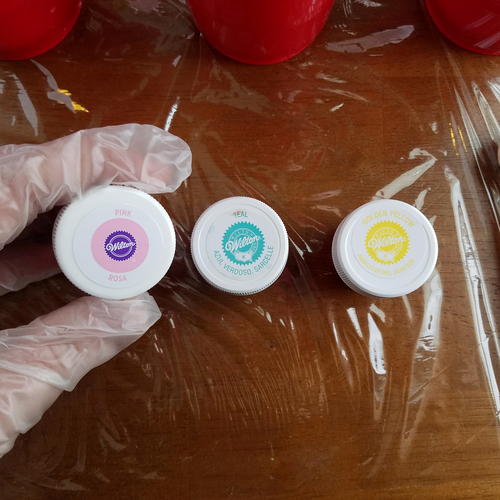
Choose your colors! For this tutorial, I will be using Wilton's Pink, Teal and Golden Yellow. You can use as few or as many colors as you'd like!
-
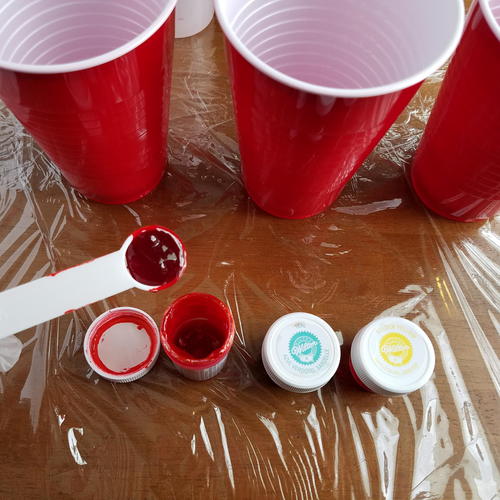
Measure out approximately 1/2 tsp of each icing color. (Tip: Measuring is optional but it is helpful if you need to make more of the color you're using, and want the shades to come out as close to the same as possible!)
-
Mix your icing colors into cups with 1/2 cup of warm water and 1 tbsp of white vinegar. The warm water helps the icing colors mix better and the vinegar helps the color set to the fiber.
-
Once you've mixed all your dye colors you can add them to your squirt bottles. If you don't have squirt bottles, you can carefully pour the dye onto the yarn directly from the cup.
-
Take your yarn out of the tub of water and squeeze out as much water as you can while still keeping the yarn slightly damp. Lay the yarn out onto your plastic wrap covered work surface.
-
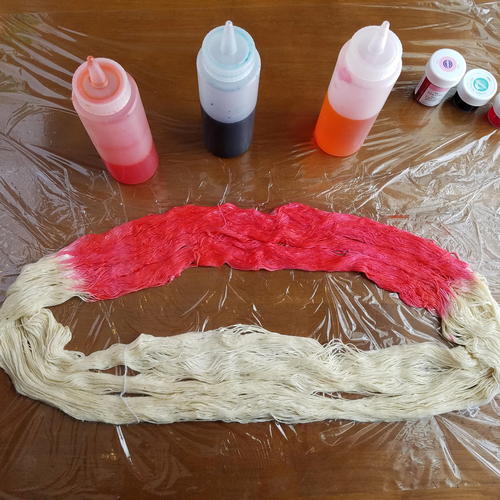
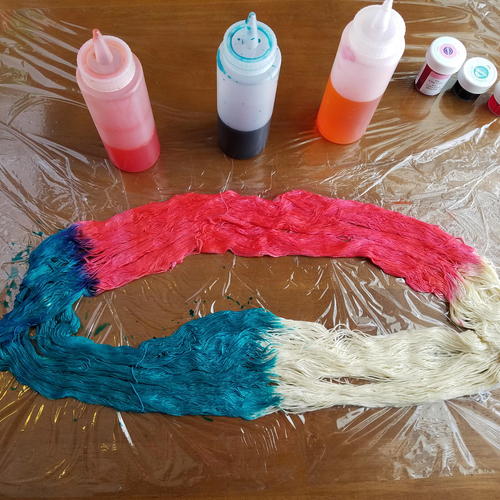
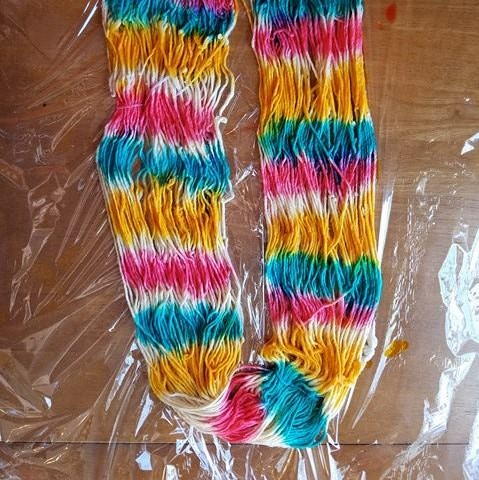
Start applying your dyes to the yarn. After you squirt out some color, use your hand to massage the dye into the fiber.
-
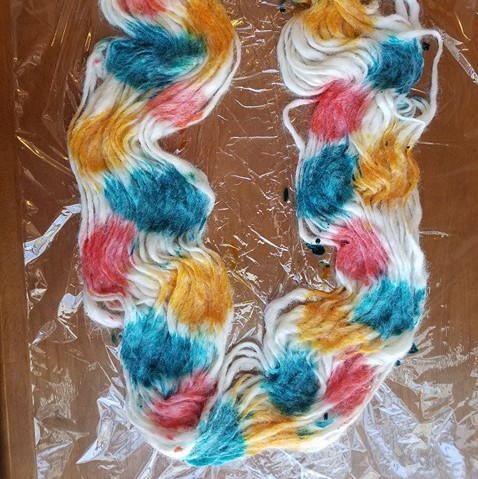
You can apply the dye in any design you'd like!
-
Add more color!
-
I decided to let my colors overlap slightly so the colors could mix
-
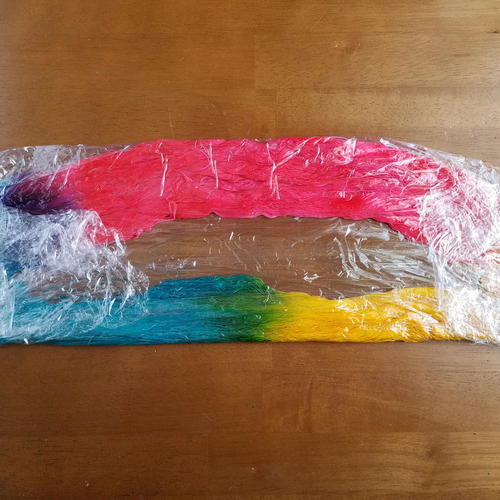
When done applying your dye, you want to wrap up your yarn with the plastic wrap you initially covered your work surface with.
-
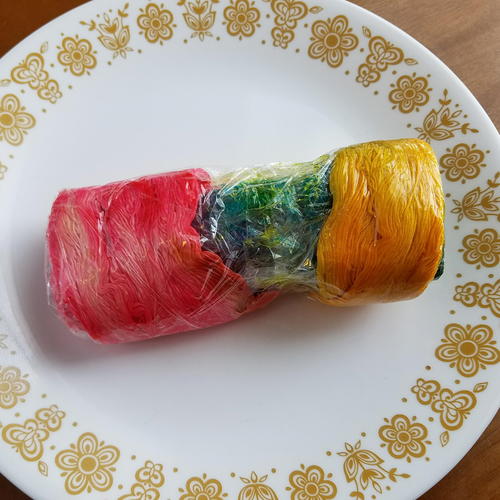
Once your yarn is completely covered in the plastic wrap, roll it up like a jelly roll. Place it on a microwave safe plate and put in your microwave. Heat your yarn for a total of 4 minutes and let sit until cooled completely.
-
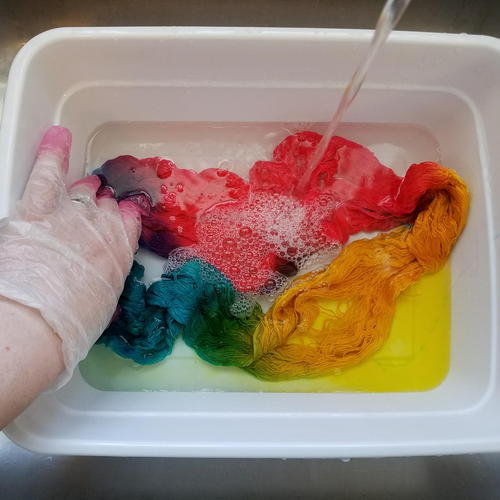
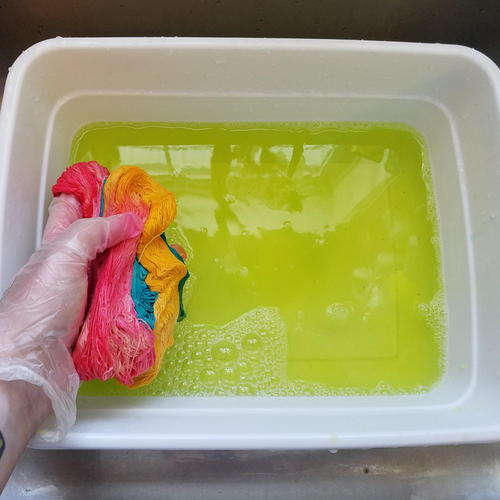
When your yarn is completely cool, add it to your dish tub inside your sink. Fill the tub with cool water and add a small amount of dish soap. (Tip: Don't wash your yarn with hot water because you risk felting your fiber, especially if you're working with wool.)
-
Gently wash your yarn, taking care not to agitate the fiber too much. Keep washing your yarn until the water runs clear.
-
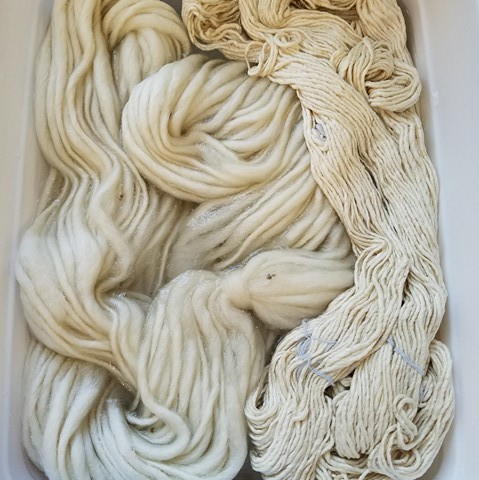
If you have more yarn, go ahead and prep it for more dyeing fun! (Pictured is our Thick and Thin Wool, and Worsted Weight Roving Silk)
-
For the worsted weight silk, Caitlin went for a striped design.
-
For the thick and thin wool, she put dots of color.
-
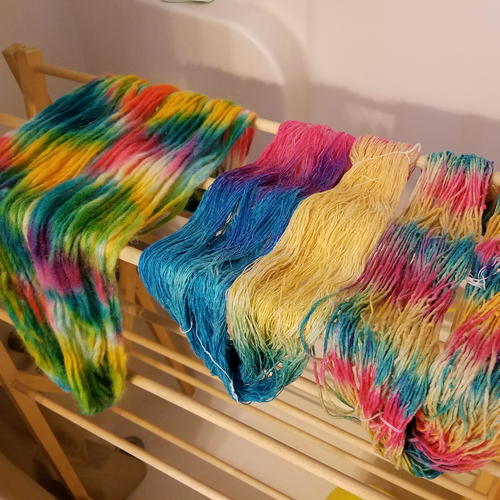
When you're all done dyeing and washing your yarn, hang them to dry! (Caitlin’s favorite way to dry it outside in the sunshine, but during the colder months she puts them on a drying rack in the bathtub)
-
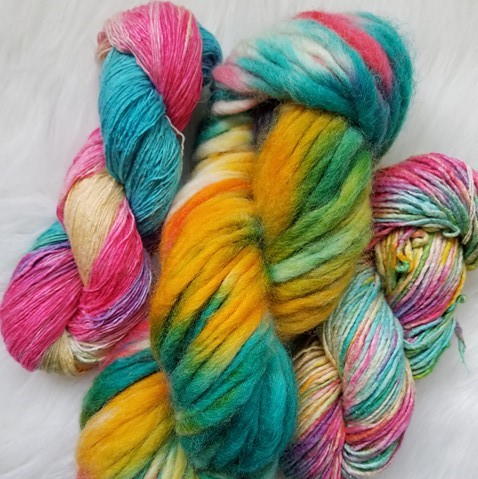
The final products! (Pictured from left to right: lace weight silk, thick and thin wool, worsted weight wool.)
-
The colors on the silk yarns ended up being a pretty pastel shade. The colors on the wool were very vibrant and beautiful!
-
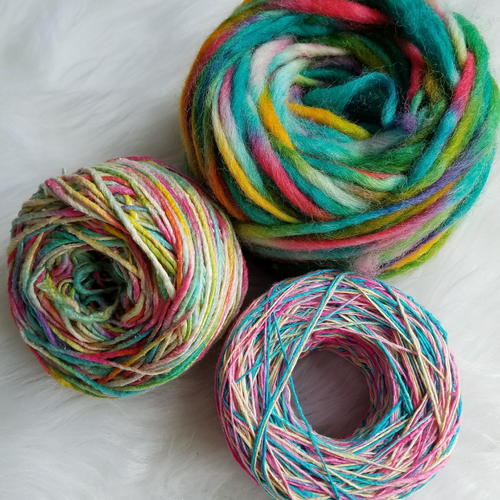
We decided to cake the yarn up to make it easier to use!
-
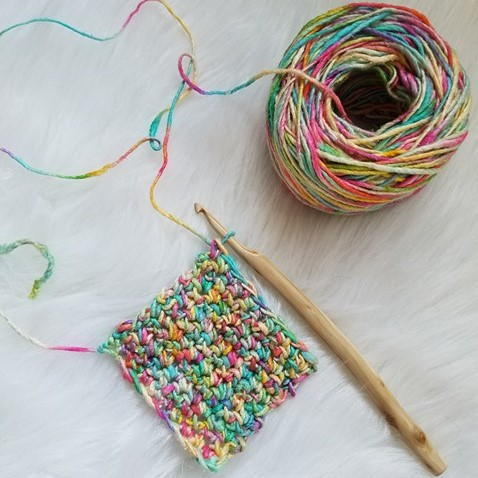
And finally. Time to start your project!


Have you ever dyed your own yarn? What colors would you choose?