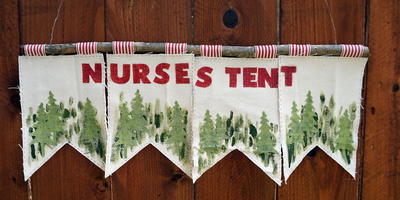
Camp Banner Mod Podge Craft
Make a charming mod podge idea for your home or classroom when you create this too cute DIY craft idea.

Creating adorable DIY crafts can be one of the best parts of running a Girl Scout Camp or other kids activity is being able to decorate and create a space for them to let their imaginations run free. Whether you need camp craft ideas or are just looking for rustic kid’s room ideas, this Camp Banner Mod Podge Craft is the perfect idea to brighten up any space. You can almost smell the campfire and hear the crickets while you’re making it.
In the Blogger’s Words: “Every summer I run a Day Camp for Girl Scouts. One of the best parts is getting to make super fun and cute camp crafts. This year our Nurse's Tent needs a spruce up. Today I want to share this project I made using Fabric Mod Podge.”
Estimated Cost$11-$20
Time to CompleteIn an evening

Project TypeMake a Project
Materials List
- Fabric Mod Podge
- Canvas pieces
- Cotton fabric from ADORNit
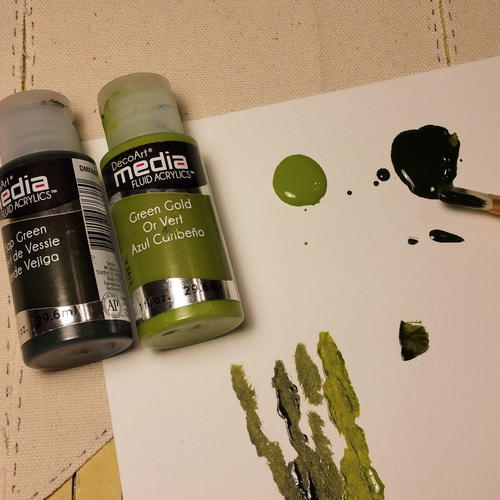
- DecoArt Media Line Fluid Acrylic Paints
- Sizzix dies (alpha and tree)
- Black pen
- 1 1/2" wide cotton ribbon
- A long stick
Instructions
-
I started by adding faux stitching around the edges of each panel, then painting some trees in the style of Bob Ross for the background. Putting two shades of paint on my mixing palette and loading both on my brush at the same time gave me the depth of color I was looking for.
-
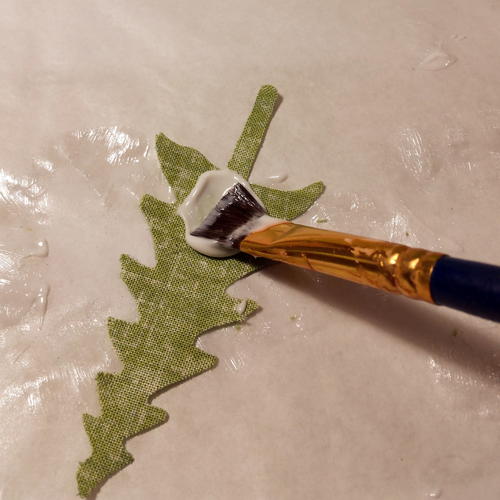
After die cutting the trees it was time to apply the Mod Podge. I grabbed a fluffy craft paint brush and applied the Mod Podge to the back of each piece one at a time. It dries surprisingly FAST! Apply the appliqué to your base piece and use your fingers to smooth the fabric piece down, starting from the center and working your way out to the edge to avoid trapping air bubbles underneath. Set everything aside to dry for a couple of hours. I had a couple of stray threads that had come loose from the edges and I used tiny scissors to trim them away before moving on to the next step.
-
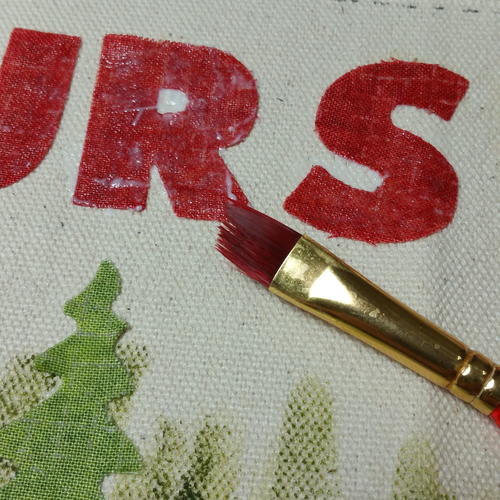
Apply a thin layer of Mod Podge to the top of the appliqués to seal. Using a fairly stiff paintbrush, I brushed just slightly over the edge to make sure I didn't leave any loose threads from the fabric. I also went ahead and brushed a thin layer over the painted areas since we will be using this banner outside.
TIP: Be sure to wait 72 hours before washing your piece. -
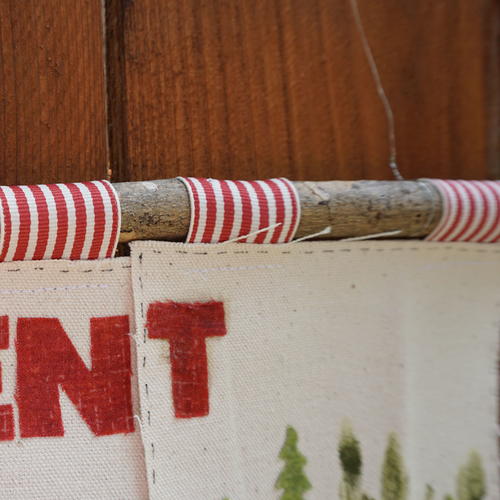
To hang the banner I sewed loops made from cotton ribbon (isn't that the cutest ribbon EVER?? It is a roll I have been hoarding saving for a while now as it is no longer available). I grabbed a stick from the back yard to hang it from and there you go- super cute banner all ready to add to our nurse's tent.