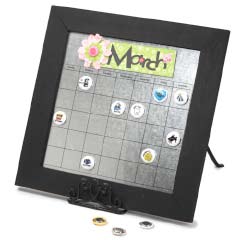
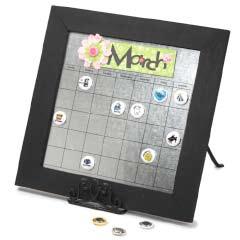
Calendar Magnet Board
Make a framed calendar magnet board using sheet metal and homemade magnet buttons. This project from Imaginisce includes clipart for different occasion magnets, including birthday, doctor, vacation and more.
Materials:
- 12” x 12” Unfinished Frame
- 12” x 12” Sheet Metal*
- 12" x 12" Calendar Transparency
- Assorted Papers & Embellishments
- i-top Brad Maker Tool
- Large Magnet Daddies #002180
- Paint
- Diamond Glaze, Judikins
- Clipart (see page 2 of pdf)
Instructions:
-
Paint wood part of frame any color acrylic you desire.
-
Place "Calendar Transparency" behind glass.
-
Place "Sheet Metal" behind transparency, glass and close back of frame. *NOTE: If you're not sure where to purchase sheet metal from, most heating/cooling shops will cut metal to size for a very minimal cost.
-
Punch the clipart (page 2) using the large i-top punch.
-
Use i-top tool and large magnet daddies to create calendar magnets. To learn how to use the i-top tool, visit our website to watch how-to videos on the tool and more fun projects.
-
Once you've created your magnets, coat them with a thin layer of Diamond Glaze by Judkins. It protects the clipart and also makes them shiny.
-
Finish off your calendar by either printing montly headers on transparency sheets or create them from your favorite Imaginisce scrapbook products (like the samples shown).

Read NextBoho Packing Tape Storage
Your Recently Viewed Projects
Thanks for your comment. Don't forget to share!
craftinsue
Jun 13, 2011
Love this idea but where did you find "Calendar Transparency" Not sure what 1/2 glass balls for plants are. Where do you get them?
Bev
Jun 02, 2011
I LOVE this calendar. I reduced the size of it to fit better on my desk to fit int a 5x7" frame. I painted the frame a bright red. For the magnets I reduced the clip art to 1/2" and purchased small 1/2" glass half balls that you use for plants. I glue the pictures on the flat side and let dry. The glue dries clear. Then I glue on a small round magnet. The ball magnifies the picture. Thank you for the awesome craft.
HRHCraftQueenie
Jun 02, 2011
Such a good idea especially for kids who can't read. Put representative magnets for special events
Report Inappropriate Comment
Are you sure you would like to report this comment? It will be flagged for our moderators to take action.
Thank you for taking the time to improve the content on our site.