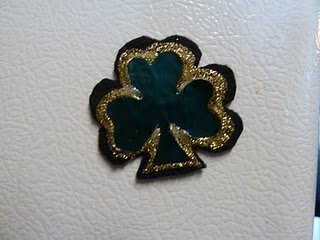
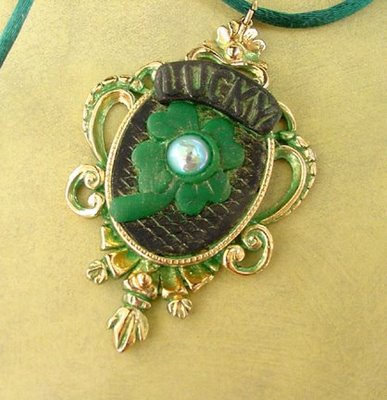
Lucky Irish Clay Pendant
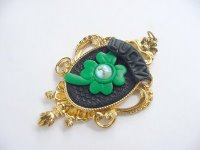
This lovely jewelry project comes to us from artist Marie Segal. This lucky clay pendant is perfect for St. Patrick's Day, but you can attract luck any time of the year. Step-by-step photos show you how to create the clay shamrock. Wear a little bit of green on St. Patrick's Day so you don't get pinched!
Materials:
- Cernit clay in black CG-025 and green CG-018
- Lumiere in Pearl Emerald green 572
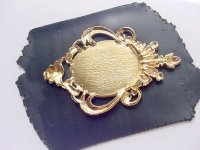
- Necklace finding- decorative swirl, DECO1
- Small round turquoise flat back glass cabochon
- Rattail satin cording 2mm in green
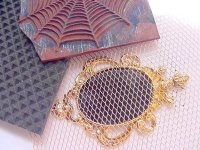
- Piece of screen, lace, un-mounted stamp or anything else with a soft hand for texturing
- Ultimate Clay Machine M35054
- Scalpel (SCP) or Craft blade
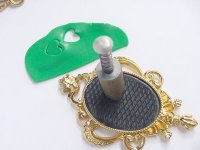
- 3/8” heart cutter APC3H
- Crafter’s Pick “The Ultimate” glue
- Word Mold
- #2 pencil with brand new eraser
- ½” round stencil brush
- Paper towel or old towel
Instructions:
Making the pendant:
Prepare the pendant with glue and let dry till the glue is clear.
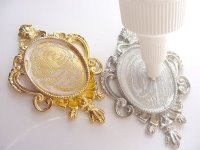
This glue will bake in the oven with out any problems and is not the same as using regular white glue for this purpose.
Condition the black clay until it is a smooth consistency and roll out in the clay machine on the 4th thickest setting.
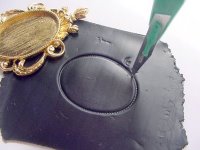
Use the finding to gently mark the clay for the size of the inside of the bezel. Do not press all the way down to cut it or the glue will stick to the clay. You can also do this step first if you wish.
Use the scalpel to cut around the marked area, slightly inside the deep line. Hold scalple straight up and down vertically to cut.
Place the cut out oval into the opening and center before gently pressing in to place.
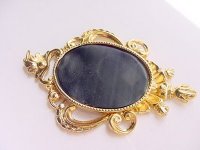
With a piece of screen or a rubber stamp or some other texture press the black clay all the way into the area.
Condition and roll out the green clay on the 4th thickest setting in the clay machine. Use the 3/8” pattern cutter to cut out a heart shape and place the cutter on the black textured clay and pull back the cutter really fast to get the clay heart to release on to the black clay. Sometimes this will not work, you do have to practice at this and if it doesn’t work cut out the hearts and turn the hearts over and place on the black clay to prevent the indentation from the plunger from being on the front of your design.
Before you place all of the hearts on the black clay in the shape of a shamrock, cut out one of the green hearts and roll in to a ball and then roll in to an elongated cone about ¾” to 1” and place the point of it towards the middle of all of the points of the hearts.
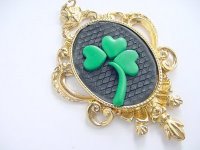
Now place on the last heart from the cutter.
Then mark all of the hearts with the back (thickest side of the blade) of the scalpel blade. A couple or three lines in each one will be fine and I also like to vary the length of the lines.
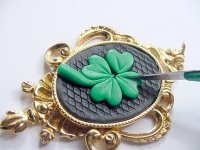
Cut out another green heart and roll it in to a ball and place in the center of the shamrock where all of the points meet and gently press down but not smash in place.
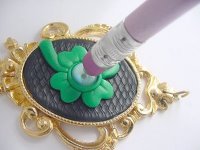
Add a tiny, tiny bit of glue to the back of the stone and let dry. If the glue is wet it will slide on top of the clay.
Add the small turquoise cabochon to the top of the ball and use the pencil eraser to push the cabochon all the way in to the green ball of clay. I find that when I am using the pencil eraser as a “stone pusher” it is best to hold the pencil straight up and down vertically to the stone.
Condition and roll out a small ¼” coil of black clay.
Place the coil end in one end of the LUCKY mold and lay the coil across the rest of the word mold.
Do not cut off but press the clay coil in to the mold.
Use what is left of the coil as a tab to pull the molded word out.
Cut off the rest of the coil right next to the word.
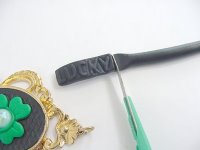
Curve the LUCKY word banner a little in an arc and place a tiny, tiny bit of glue on the back of the banner. Place on the top of the oval, a little on the bezel and a little on the clay.
Bake in a preheated 275 degree oven for one half hour shut off the oven and let cool to touch before removing.
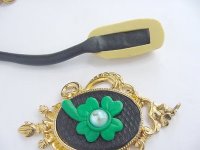
When completely cool use the stencil brush to punch in the green Lumiere paint on to the pendant metal and the clay. With a damp not wet towel or paper towel wipe off the excess paint from the clay and the finding.
Cut the length of rattail or ribbon that you are going to use and thread through the jump ring to finish the necklace. I also add a very small amount of glue to the ends of the rattail to prevent it from unraveling. You can also do this with the green Lumiere paint, just dip the end in to the jar and let dry.
Read NextKiss Me Irish Button