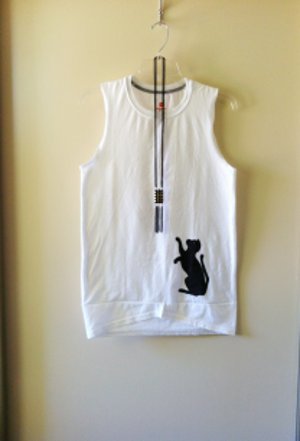
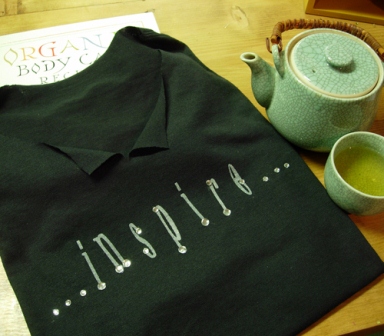
Inspire Sparkle Shirt
This quick and easy t-shirt has a great message and just a touch of sparkle with rhinestones. Use the technique to create a tee with your own favorite sentiment and design of rhinestones. This project comes to us from Tiffany Windsor of Inspired at Home, and you can view a helpful video tutorial here.
Materials:
- Aleene’s® Jewel-It® Embellishing Glue
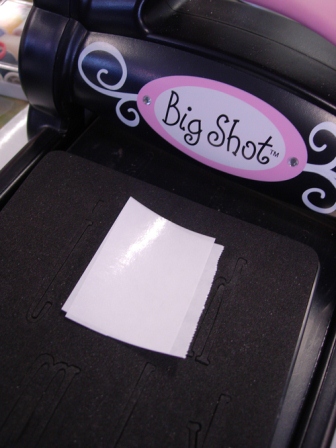
- Sizzix Big Shot
- Sizzix Bigz Alphabet Set 4 Dies - Go Slim Lowercase
- Freezer paper
- Tulip Soft Matte Fabric Paint – Glacier White
- Cosmetic sponge
- Iron
- Rhinestones
- T-shirt
- Paint palette (paper plate, freezer paper or waxed paper)
- Scissors
- Tweezers (optional)
Instructions:
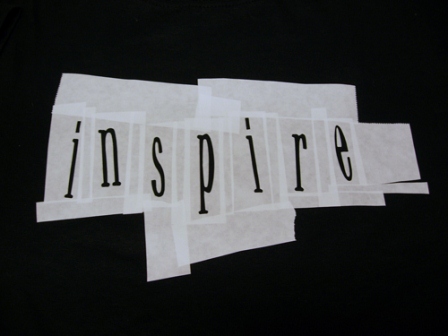
Pre-wash and dry t-shirt. Do not use fabric softener in the wash or dry cycle. Iron if needed. Using Sizzix die, cut alphabet letters from freezer paper. (Place freezer paper shiny side (waxed) up on die so that letters will be facing the right way when ironing.) I like to cut my freezer paper to approximate rectangle size first and then place several layers of freezer paper on the die at one time. Be sure to save the cut out portion of the alphabet letters because you can use these for other projects.
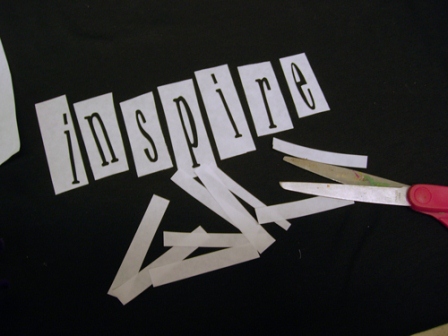
Lay lettering on t-shirt adjusting for placement. Iron in place. Be sure that you have all edges ironed down so that you get a nice crisp image when you apply the paint.
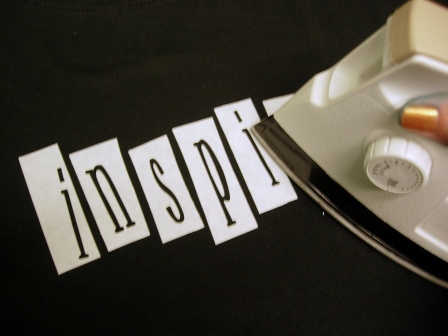
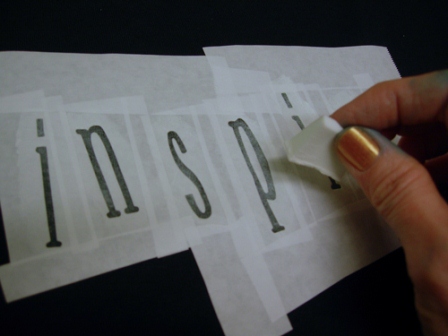
Next I like to take small strips and scraps of freezer paper and iron them around the lettering so that when I am stenciling my letters I don’t accidentally get paint where I don’t want on the t-shirt. So, just cut some pieces to fit around the lettering and iron in place.
Although you are applying paint in very light coats, go ahead and insert a piece of waxed paper or freezer paper between t-shirt layers to keep paint from accidentally seeping through to back. To stencil your lettering, pour a small puddle of paint onto palette. Dab flat end of cosmetic sponge into paint and then dab several times off to the side of the palette. This will help to evenly saturate the cosmetic sponge. I have found the best way to keep crisp lines when stenciling, is with a light straight up and down dabbing motion. Don’t press too hard or you might oversaturate the t-shirt with paint. It’s better to start with a light layer of paint and add more paint for good coverage than trying to oversaturate with one coat. On this t-shirt, it took several light coats of white on the black fabric.
After the paint is applied, carefully lift and peel the freezer paper from the t-shirt to reveal the stenciled lettering. Let paint dry.
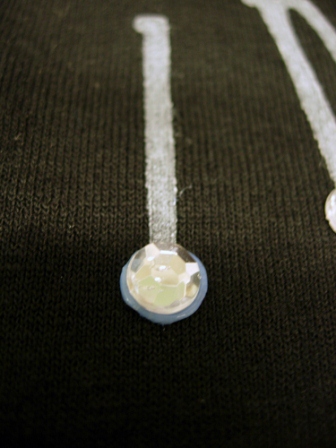
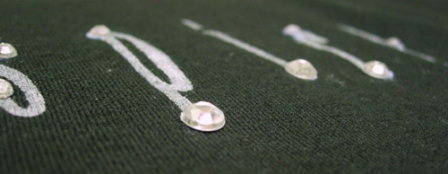
I wanted to add a touch of sparkle to this t-shirt project so I grabbed my Aleene’s® Jewel-It® Embellishing Glue and rhinestones and glued them to the tops and bottoms of the letters and a few extra rhinestones sprinkled around here and there. The key to holding the rhinestones in place with the Jewel-It Glue is to apply just enough glue so that it barely squeezes up and around the rhinestone. The glue needs to cup the rhinestone in order for it to hold through washings. Sometimes the rhinestone are hard to hold on to while gluing so just grab your rhinestone with tweezers, add a dab of glue and press in place. The glue is cloudy white when applying but will turn clear when dry.
Be sure that you let your paint and glue dry according to package instructions before washing your tee.
Tiffany’s Designer Tip: I’m not a fan of crew necked t-shirts so I cut the ribbing from the crew and fashion different necklines such as square or tapered. I also do the same along the bottom and on the sleeves by removing the double seam stitching and ironing flat. This gives your tee more of a designer look and I like the look of the soft curled edges!
Read NextEasy DIY Tank Top