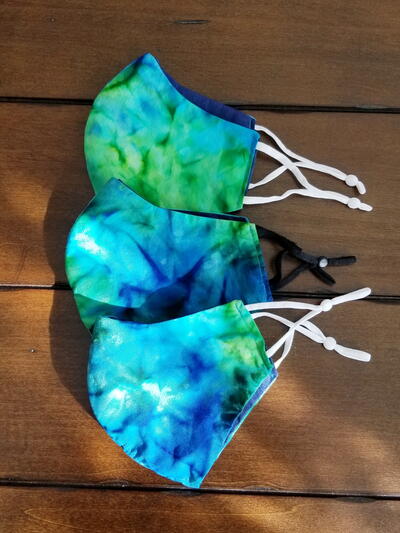
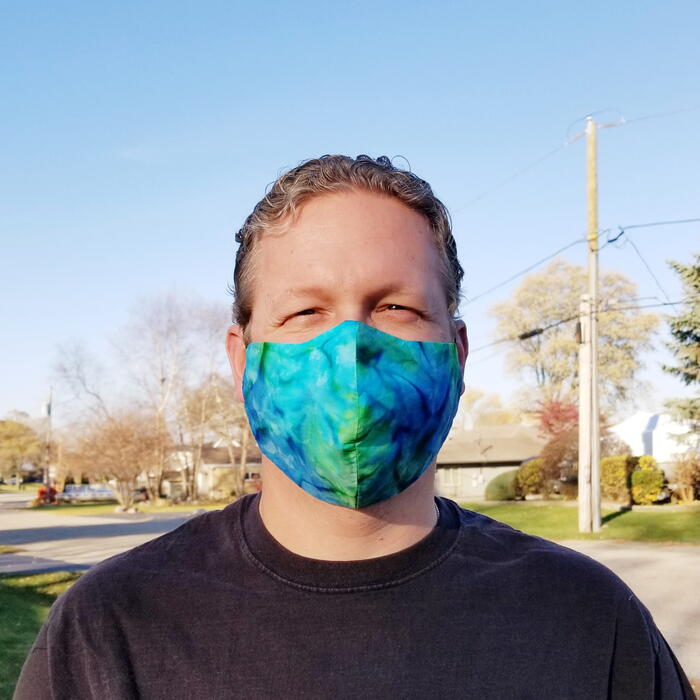
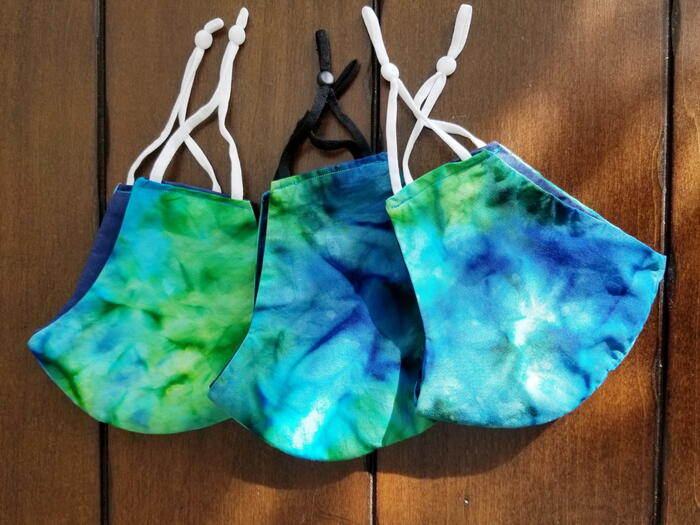
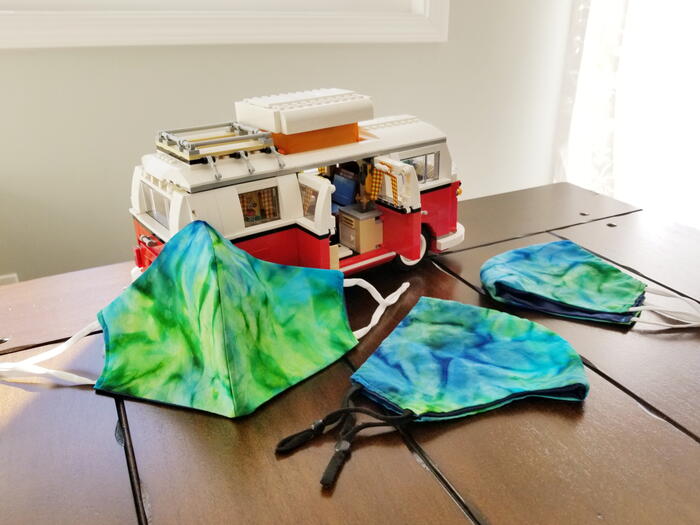
Tie Dye Mask DIY
This free tie dye face mask pattern is easy to make and looks awesome!

Since many of us now wear face masks on a regular basis for work, school, shopping, and more, it only makes sense to try and make them more stylish. That's why we're happy to share this cute tie dye mask DIY.
This colorful face mask pattern comes with a free printable template. So, you can easily cut fabric into the correct size for either an adult's or a child's face mask. You could even make matching "Mommy and me" or "Daddy and me" tie dye face masks! Or you could just whip up a batch for your friends and family. We think a lot of people would be happy to receive a cute homemade mask as a thoughtful gift.
You can also use this pattern to make face masks with other types of fabric, if you'd like. We're obviously partial to the tie dye pattern, but the options are truly endless! No matter what style of mask you choose to make, we encourage you to stay safe and help keep those around you safe while we weather this pandemic together. As always, you can stay up-to-date with the latest expert guidance by referring to the CDC.
Time to CompleteIn an evening
Main MaterialFabric
Primary TechniqueSewing

Materials List
- 100% cotton tie-dyed fabric (4 template-sized pieces for a two-layer mask, 6 pieces for a three-layer mask, and a scrap for filter pocket if desired)
- Sewing machine
- Matching or complementary thread (for machine)
- Scissors
- Rotary cutter/self-healing mat (optional)
- Fabric pins or clips
- Iron
- Ironing board
- Elastic or adjustable earloop bands
- Face mask template (available in different styles and adult/child sizes) or face mask template of choice
- Filter - learn about filters here (optional)
Tie Dye Mask DIY
Instructions
-
Print the provided mask template PDF in the style and size desired or use another template of choice.
Note: Read through the tips and details on the template page before printing. -
Cut out the mask template pieces.
-
Using the template, cut out 2 tie-dye fabric pieces for the front of the mask.
Note: If the tie-dye design is directional or there is a specific shape/color you'd like to feature, make sure you align the template in the correct area before cutting (both front pieces). -
Cut 2 additional fabric pieces for the back (and 2 middle if you are making a three-layer mask).
Note: The back fabric will not be visible unless you are making a reversible mask (see finishing note in Step 12). If making a non-reversible mask, we recommend using a soft and comfortable fabric - like t-shirt fabric, flannel, or fleece. If making a reversible mask, the same tie-dye fabric or another favorite fabric can be used. -
Place 2 fabric pieces right sides together and pin or clip to hold. Sew along the curved edge with a 3/8" seam allowance. Lock stitches at the start and end.
-
Cut excess thread and clip curves along the sewn edge. Be careful not to cut the seams. Repeat for all the attached pieces.
-
Open and press the seams to one side for all the attached pieces. Optional: Add a filter pocket on the center of the back mask piece.
-
Put the sewn mask pieces right sides together and pin to secure. Line up the middle seams (which is more important than lining up the sides). Sew along the top and bottom with a 3/8" seam allowance to attach. Lock stitches at the start and end.
-
Cut excess thread and clip curves along the sewn edges. Do not cut the seams.
-
Turn out your DIY mask and then press both sides of the mask to flatten seams and remove any wrinkles.
-
Fold in sides about 1/2-inch for a reversible mask. For a non-reversible mask, you can choose to fold over the side to the back of the mask.
-
Sew on elastic (should be about 7" for adults and 5" for children) or adjustable earloops.
Note: Again, for the reversible option, you will want to slide the elastic/earloops inside the open sides and sew over the ear elastic/loops. Otherwise, you can attach the elastic/loops in any way you’d like. Lock stitches going over the earloops to secure.
Read NextReversible Sewn Coasters