
This project was submitted by one of our readers, just like you.
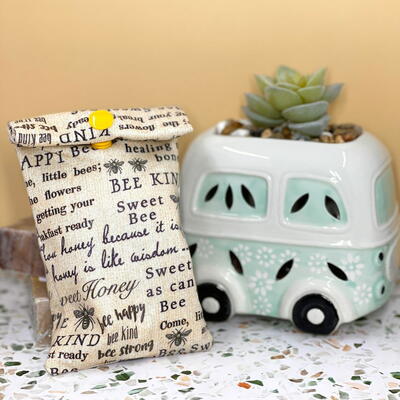
DIY Travel Soap Saver Pouch

DIY Travel Soap Saver Pouch
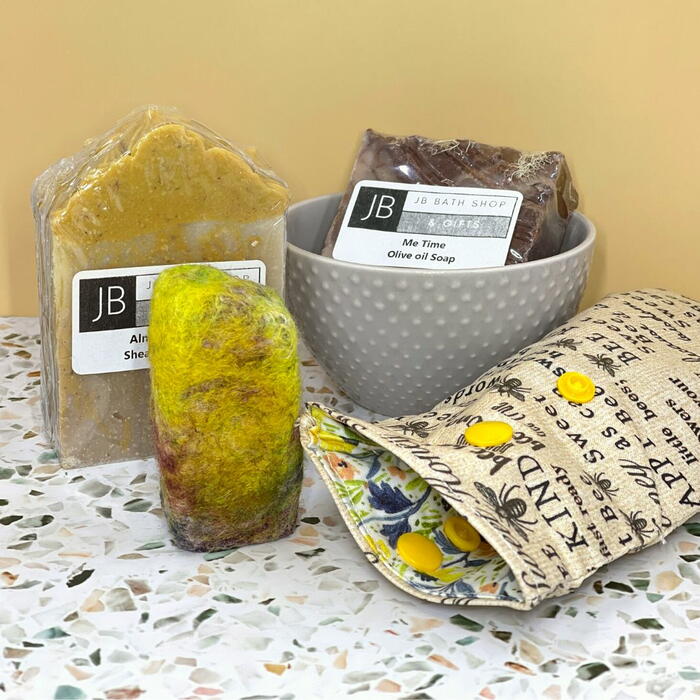
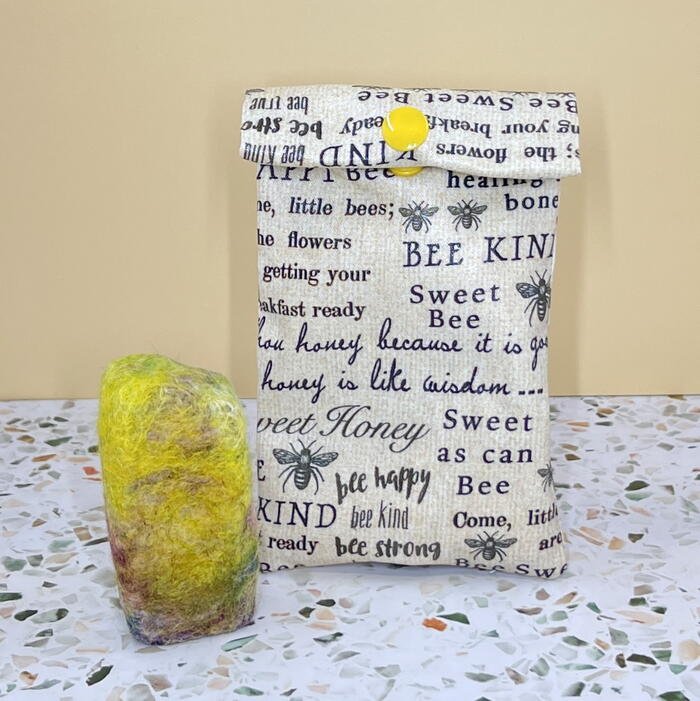
"Traveling is exciting...except for making it through the TSA security line. Trying to get my toiletries to all fit in one 1-quart zip-top bag is my greatest travel challenge, so I've been looking for ways to minimize my liquids. Carrying bar soap and shampoos help, but let's face it, they get slimy in a zip-top bag. My solution is to create a small, waterproof fabric pouch that is still breathable. You can also create your own DIY Soap Saver Travel Bag with basic sewing skills and laminated fabric. PS. I felted my bar soap. Voila! Now I have a built-in washcloth."
Primary TechniqueSewing

Materials List
- bar soap of choice
- 1/4 yard cotton fabric (or laminated fabric*)
- Heat-n-Bond Liquid Vinyl (if using cotton fabric)
- small paintbrush
- craft mat or wax paper to protect your surface
- Heat-N-Bond pressing paper
- parchment paper
- iron
- sewing machine
- Schmetz nonstick sewing machine needle
- coordinating thread
- Omnigrid Ruler
- Omnigrid rotary cutter
- self-healing mat
- scissors
- Dritz Mini Clips
- optional Kamsnaps and snap setting tool or ribbon
Instructions
-
Measure the height, width, and thickness of your soap. If your soap thickness exceeds 1", you will need to add additional width and height to your fabric.
-
Determine measurements for your fabric based on your soap size. My soap bar in the sample is 1.5" wide by 3" tall and 1" thick. Note: I cut my soap bar with a butcher knife to make it smaller and more compact for travel.
-
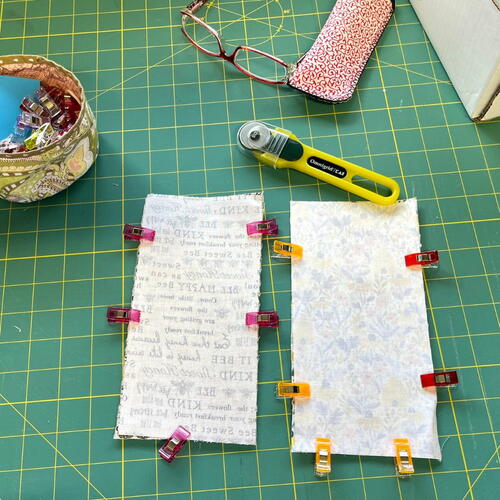
Cut fabric with a rotary cutter and ruler for straight edges and easier sewing. I used a different pattern fabric for the inside and outside of my pouch. Cut two pieces for the inside and two pieces for the outside of the pouch. I cut my fabric pieces at 4.5 x 8.5 inches. *If you are using purchased laminated fabric, it is already water resistant. Skip to step 7.
-
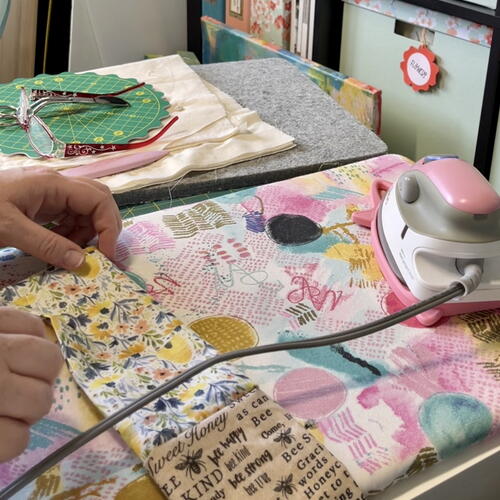
Follow instructions for Liquid Vinyl to make your fabric water resistant. Place fabric on a nonstick craft mat or wax paper, and using a paintbrush, paint the fabric with a light, even coat of Liquid Vinyl.
-
Allow the coat to dry and press with heated iron as instructed on the Liquid Vinyl jar, placing your fabric on parchment paper and using your nonstick craft mat or Heat-n-Bond pressing paper over the fabric. Press with medium heat iron.
-
Repeat steps 4 & 5. Two coats of Liquid Vinyl will leave your cotton fabric waterproof.
-
Place your fabric for the outside of your pouch right-sides together. Clip pieces together with mini clips or pins.
-
Sew sides and bottom with 1/4" seam allowance.
-
Press seams and clip corners being careful not to cut into your seam.
-
Turn fabric right sides out. Make sure to push those corners out. Press fabric with a nonstick pressing cloth.
-
Place the fabric for the interior of the pouch with the right sides facing, clipping the fabric together with mini clips or pins. Mark one section on one long side about 4" long with different color clips or pins. We will not sew this section yet.
-
Sew the sides and bottom of the fabric, leaving that 4" section open so you can turn the pouch later.
-
Press seams and clip your bottom corners; careful not to cut into your seam.
-
Place the outside sleeve down into the 'inside-out' inside fabric. Line up side seams.
-
Take your time and sew around the top edges of the fabric pouch with a 1/4" seam allowance.
-
Turn the pouch out using the 4" space you left open on the side of the interior fabric. Both interior and exterior right side-outs will be facing out and connected in the center.
-
Topstitch to close that 4" space on interior fabric or slipstitch opening closed by hand. This seam will not be seen on the finished project.
-
Tuck the interior fabric down into the exterior pocket to create your pocket pouch, making sure to roll the interior fabric to the inside
-
Topstitch around the top opening to finish.
-
At this point, you can fold down the bag top or tie the top with a ribbon or string and call your bag finished.
-
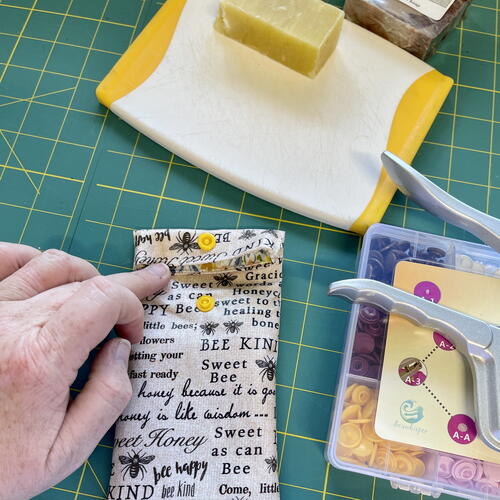
I decided to add snaps. Follow Kamsnaps directions to add snaps if you desire.
-
Drop your soap into your pouch and make some travel plans with one less thing to pack in your clear 1-quart TSA-approved toiletry bag.


Read NextSwaddle Babies