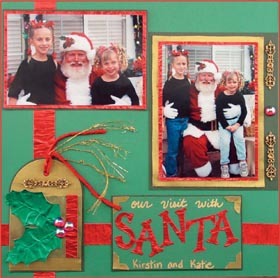
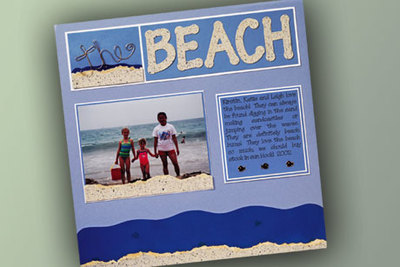
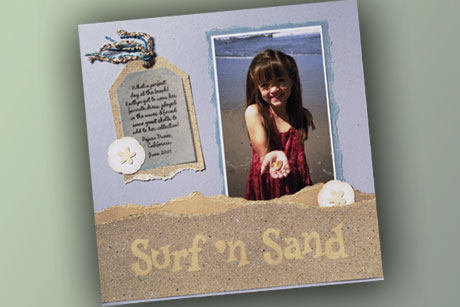
Surf 'N Sand Scrapbook Layout
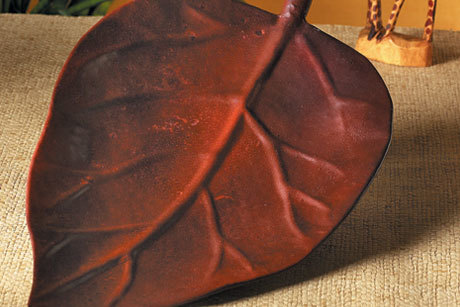
Stone textured paint looks like sand from the beach–perfect for your summertime scrapbook pages, like this one from Krylon!
Materials:
- Krylon Make It Stone!® Textured Paints - Charcoal Sand (#18202)
- Krylon Preserve It!® Digital Photo & Paper Protectant - Clear Gloss (#7026)
- Krylon Spray Adhesive - Spray Adhesive (#7011)
- Krylon Easy-Tack™ Repositionable Adhesive - Easy-Tack™ Repositionable Adhesive (#7021)
- Blue, Natural and Light Tan cardstocks
- Light Blue vellum
- Fibers
- Brown oval eyelet
- Sand Dollar diecuts
- Alphabet diecuts
- Black pen
- Pastel crayons
- Craft knife
Steps:
- Cut one strip of tan cardstock to approximately 3" high and another strip approximately 5" high; tear the top edge of each one. Create a simple tag by trimming the top corners of a 4" × 5 1/2" piece of tan cardstock and tear the bottom edge.
- Cut out title and apply Repositionable Adhesive to the back of each letter. Glue to larger strip to create a mask and spray over with Make It Stone!® paint. When dry, carefully remove letters to reveal tan color underneath.
- Spray tag with one coat of Make It Stone!® paint and set aside to dry. Print out journaling onto plain computer paper and place piece of blue vellum over the top. Trace with black pen, shade edges with blue pastel color and glue to stone tag background. Attach eyelet and fibers to complete tag as shown.
- Die cut sand dollar shapes from tan and natural cardstock (2 each). Carefully cut out centers from tan shapes with a craft knife and adhere to center of natural shapes. Shade with sandy brown pastel colors all around edges.
- Protect digital photo with Preserve It!® spray and let dry. Leave narrow white border around photo, then layer onto torn blue cardstock mat.
- Layer and glue down both tan strips at bottom of layout, leaving approximately ¼" of blue cardstock at the bottom edge showing. Tuck in one sand dollar and photo; glue all down. Add tag and last sand dollar to background to complete project as shown. Glue down portions of fibers to help keep its shape, if desired.
For more project ideas, please visit www.krylon.com/projects.
Read NextVintage Wedding Day Scrapbook Layout