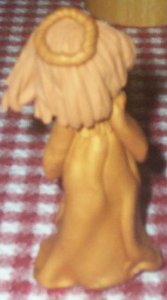
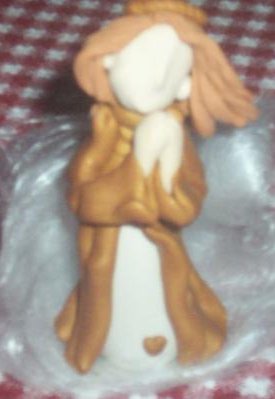
Polymer Clay Angel Doll
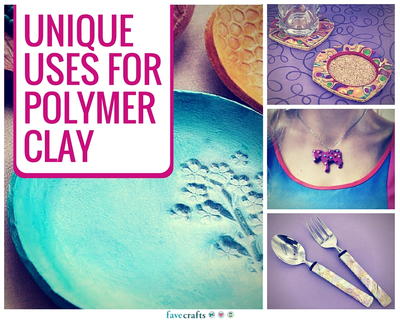
Use these polymer clay tutorials to learn polymer clay techniques and tips! There are so many things to make with polymer clay, like this beautiful angel doll, so get started now!

Materials:
- Premo! Sculpey Polymer Clay in the following colors:
White
Beige
Raw Sienna
Gold - 3x5 Index card
- Round toothpicks
- Small pair of scissors
- Polymer Clay template #11140B
Instructions:
Before starting:
- Always wash your hands before and after working with clay...and especially when working with white & lighter colored clay.
- Cover your work surface with a piece of poster board or designate an old clean cookie sheet no longer used for food.
- Condition your clay by rolling, twisting, and flattening until it's warm & plyable.
- Use template to roll clay into balls of clay needed for each step.
BODY CONE:
- Rock 3/8" ball of White clay back and forth on work surface ..pressing down slightly on one end to shape into a 1" tall cone.
- Place body cone on top of index card.
- Push a toothpick down into top of cone leaving 1/2" exposed. Make sure cone still sits flat on index card.
DRESS:
- Flatten a 1" ball of Gold clay into a 2 1/2" pancake.
- From bottom edge measure up to 3/4".
- Use a toothpick to mark a horizotal line straight across. Use scissors to cut clay on this line.
- Place cut edge around top of cone, but do not cover toothpick.. Use your fingers to create folds & pleats.
TIP: Use index card to turn body while adjusting dress ( less handling means fewer fingerprints overall).
- Cut remaining piece of clay in half vertically.
- Fold each piece over lengthwise to form a hollow "sleeve".
HANDS:
- Roll a 3/8" ball of Beige clay...divide that in half.. Roll these into small cone shapes with one end rounded. Push narrow pointed end into wide opening of sleeve.
- Bend sleeve up slightly to form a elbow.
- Repeat with other sleeve & hand.
- Position both arms on top of dress.
HEAD:
- Use 1/2" ball of Beige clay for head. Pinch together top center of head to form nose area.
- Carefully push head down, with head slightly tipped to the side onto the toothpick until none of toothpick is visible.
HAIR:
- Roll 12...1/4" balls of Raw Sienna clay.
- Place each ball on flat surface & roll back & forth using index finger to form 3/4" long logs.
- Apply in a semi circle with points meeting up at center top of her head.
HALO:
- Divide 3/8" ball of Gold clay in half.
- Roll each into a 1" long strand.
- Twist both pieces together to form a braid.
- Cut off jagged ends. Press ends together to form halo.
- Position on Angel's head.
- Roll 2 tiny balls of Beige clay.
- Use a toothpick to place each ball of clay on sides of head for her ears.
- Arrange hair the way you like.
HEART:
- From 1/8" ball of Gold clay roll into 1/4" log...bend up in center.
- Pinch together bottom end with your fingers to form heart shape.
- Place on lower front part of body cone.
BAKE:
- Check all sides of Angel for any visible imperfections.
- Remove with toothpick.
- Smooth and reshape dress folds with fingers.
- Curl back front edges of dress.
- Press hands together.
- Bend arms up at elbows so that Angel's chin is resting lightly on tops of her hands in prayer.
- Bake once you're satisfied (after the clay is baked, everything is permanent--flaws or not).
- Bake her @ 275 degrees F (130 degrees C) for 40 minutes.
- Visually check on her frequently to advoid over darkening of white & lighter color clays.
- After bake time is finished, don't remove! (Clay is very fragile when it's hot.)
- Leave doll inside to cool down completely before taking her out of the oven.
- Sign and date her with permanent marker.
Optional Finishes:
- Add wings molded out of clay or purchased.
- Change hair color
- Use gold wire for halo
- Add tiny holeless glass beads for eyes
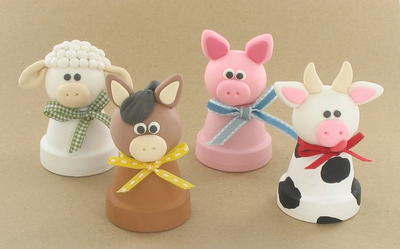
Read Next4 Barnyard Polymer Clay Ideas
Your Recently Viewed Projects
Thanks for your comment. Don't forget to share!
Report Inappropriate Comment
Are you sure you would like to report this comment? It will be flagged for our moderators to take action.
Thank you for taking the time to improve the content on our site.