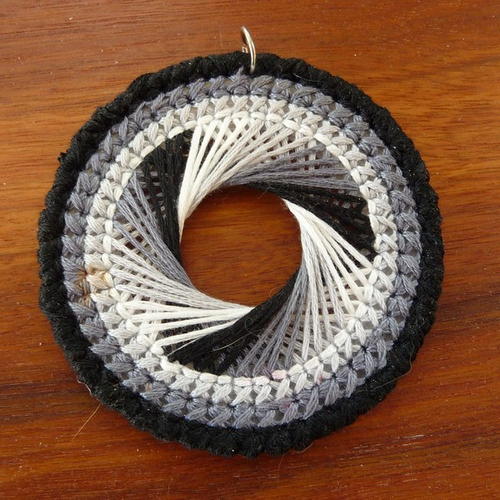
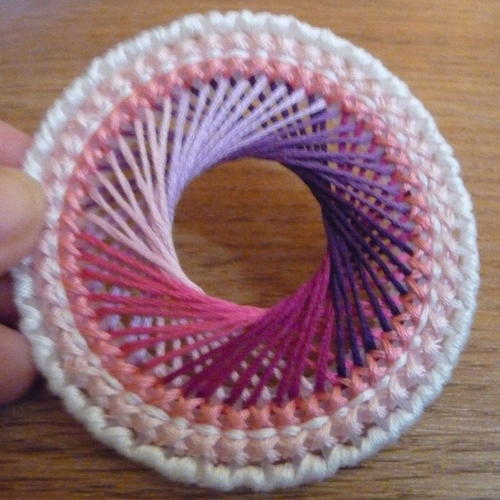
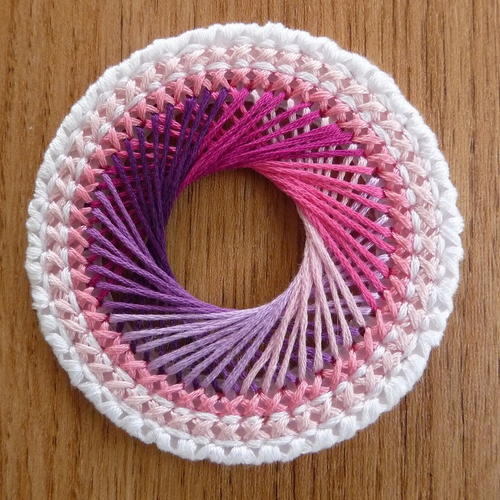
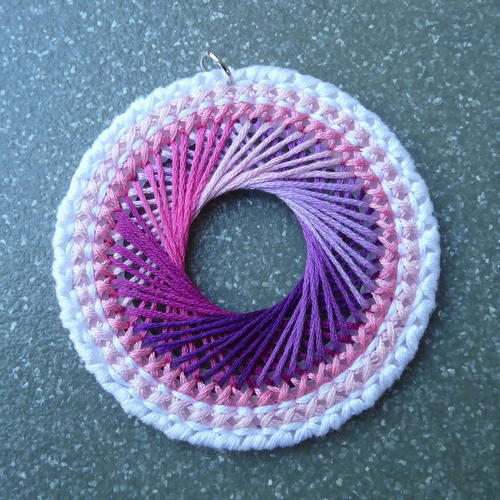
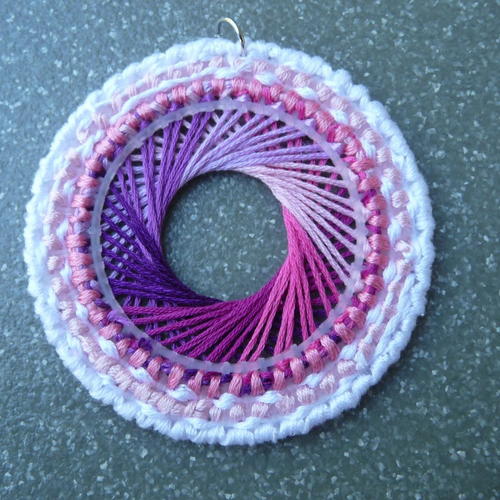
Spirograph Necklace Plastic Canvas Tutorial

Learn how to make a stunning new statement piece with this Spirograph Necklace Plastic Canvas Tutorial!
If you're a fan of plastic canvas patterns, this tutorial is perfect for you. Use a few of your favorite colors to make a captivating design. If you remember playing with Spirograph toys as a kid, you'll have a few nostalgic moments while making this necklace!
Learning how to make a necklace with plastic canvas is made easy with the helpful step-by-step photos included in this tutorial. The Spirograph design is so beautiful and fun to do once you get the hang of it.
If you're looking for new plastic canvas projects to make, this is a totally unique project you'll want to give a try.
Estimated CostUnder $10
Time to CompleteIn an evening
MaterialsEmbroidery Thread, Plastic
Primary TechniqueNeedlework

Project TypeMake a Project
Materials List
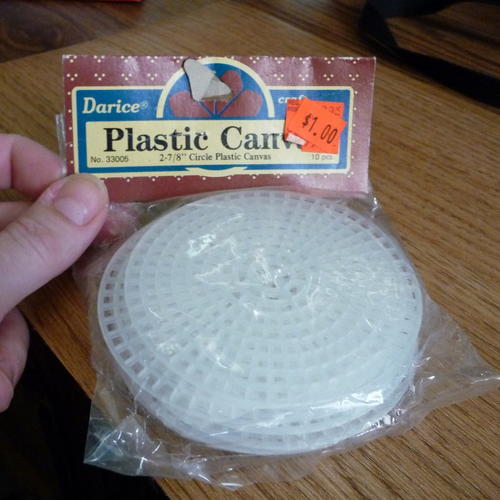
- Round plastic canvas in the 3" diameter range: make sure that there are 2+ rings that have the spokes aligned and the same number of squares in each ring.
- Embroidery Floss: However many squares your rings have, you want to pick a number of color sections that is evenly divisible into the number of squares in your ring.
- Scissors
- Needle
- Jump ring
Instructions
-
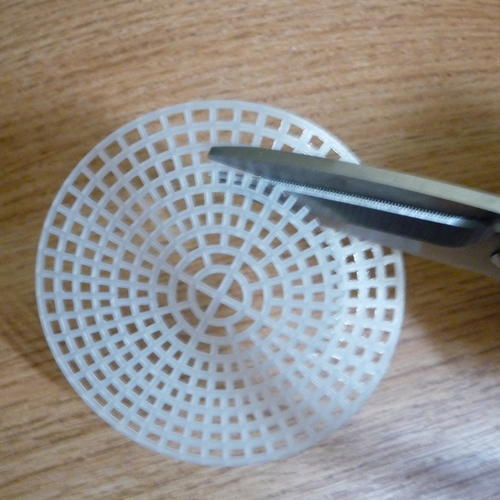
Take one circle and figure out how large you want your finished piece to be. At minimum, you need 2 rings of canvas, but you can have as many additional rings as you like.
-
Cut out the inner circle. You don’t need a perfect inner edge, since it will be covered, but it’s better not to leave any jagged edges.
If you want a smaller necklace, you could use just the 3rd and 4th rings (from the outside) and cut off the unnecessary outer two rings, as well as the inner circle.
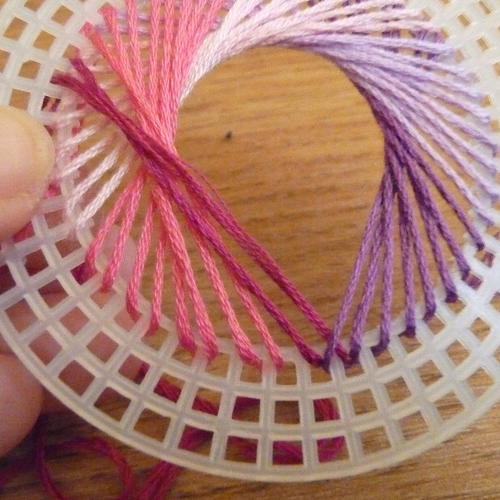
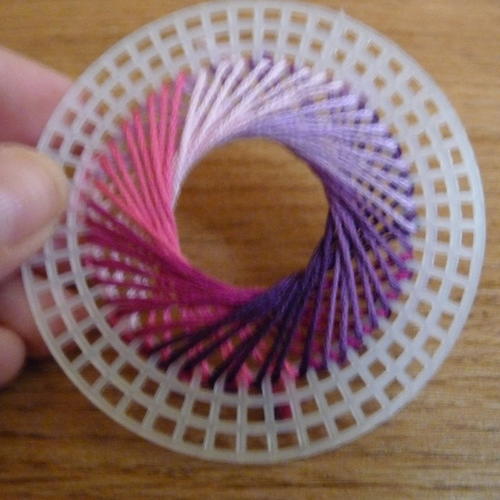
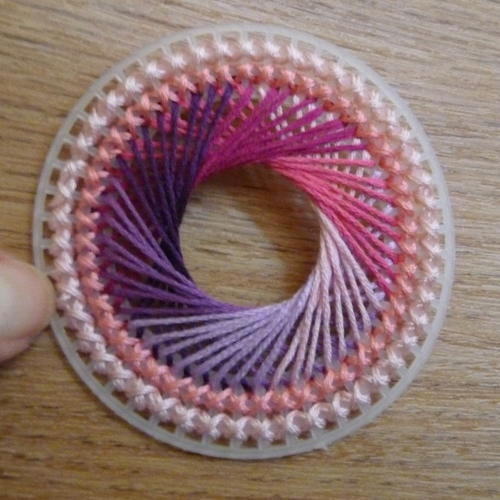
Also, make sure that all the spokes on your rings match up. If you look in the first picture below, you’ll see how the inner most ring only has 4 squares, the second ring only 8, and it increases to 48 by the outer rings. -
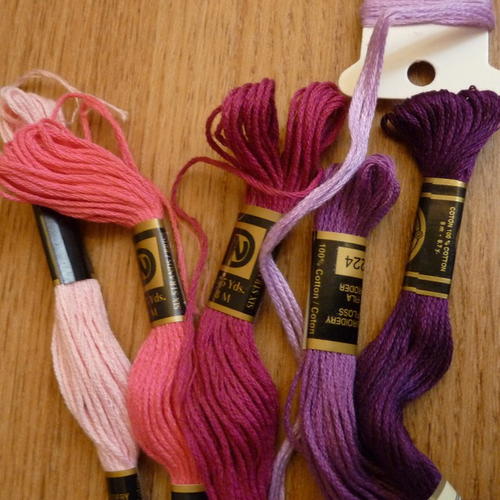
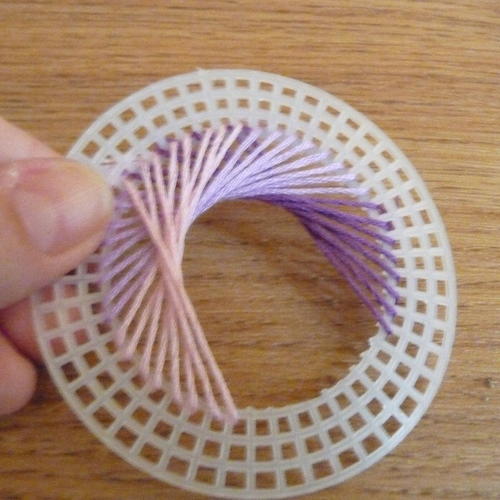
Next, select your string colors. However many squares your rings have, you want to pick a number of color sections that is evenly divisible into the number of squares in your ring. Now, I say color sections, rather than colors, because you could have colors that get used multiple times, but what you want to be counting is each section. For example, in the second photograph below, I used4 colors, but used each color 3 times, meaning I have 12 color sections. The number of colors you use doesn’t matter, the number of individual sections does.
My canvas has 48 squares, so I opted to go with 6 color sections, selecting 6 colors to use one time each. -
So, count up the number of squares in one ring of your canvas. Now, take the number of squares and divide it by the number of color sections. So, as a formula it’s:
[# of squares] / [# of color sections] = X.
For me, my canvas had 48 squares and 6 color sections, so X=8.
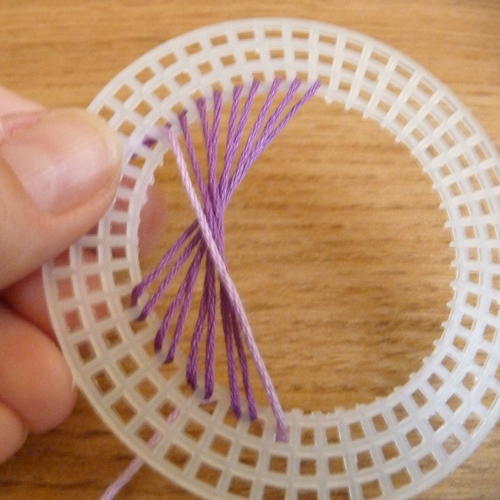
X is the number of cross-strings you’ll use for each color. In the picture below, that single light purple string is counted as one cross-string.
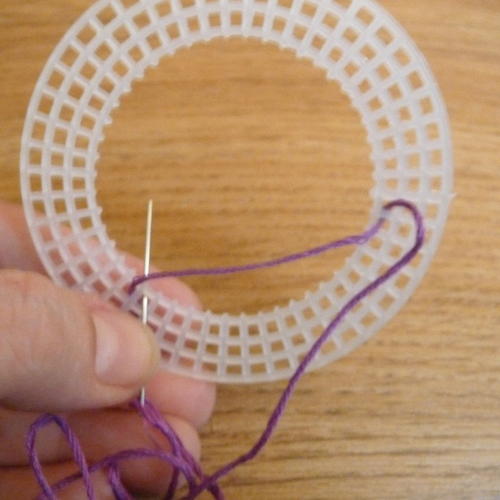
So, cut a piece of string in your first color. As for lengths to use, it’s going to vary depending on what your X is, but 18″ – 24″ should be plenty.
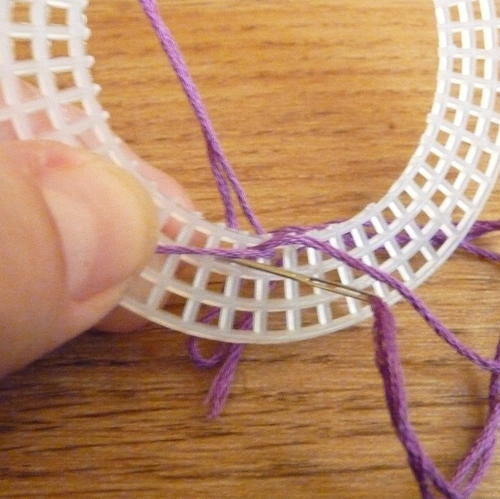
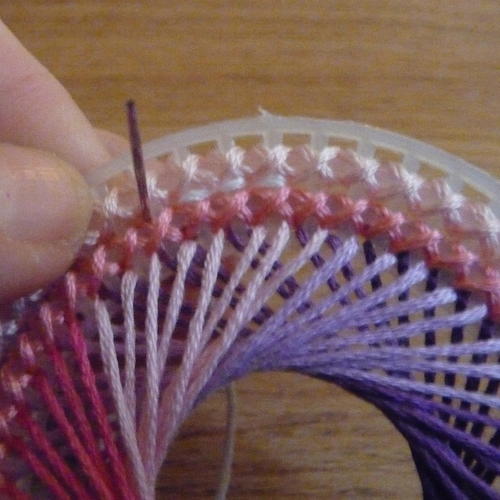
Thread your string up through a hole in the inner-most ring. Now, more counting. Take X and double it, then subtract 1 [ (X*2) – 1]. This is how many squares you want between the connecting points of the cross-string. So, for me, X=8, so I leave 15 spaces between my connecting points. -
Next, bring the needle up through the square one to the right and cross the hole in the canvas to bring the needle down through the hole one to the right of your original starting point.
-
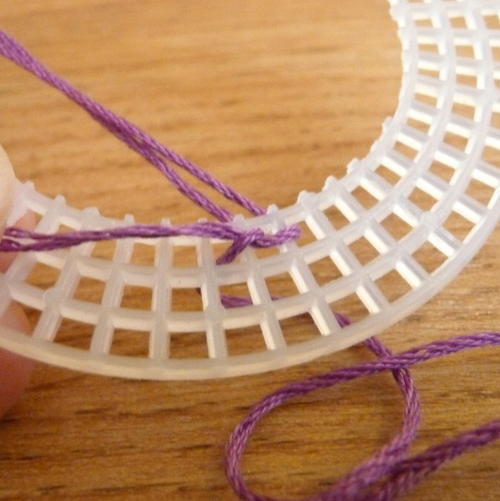
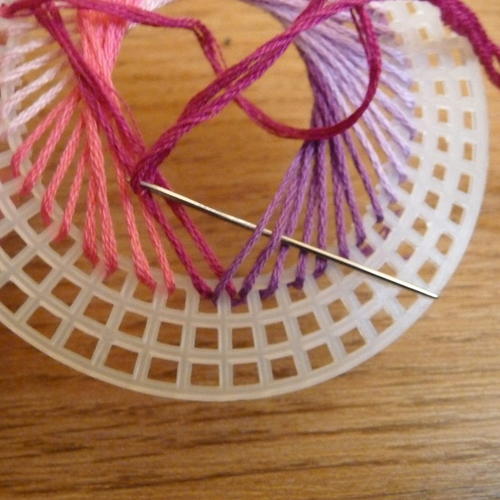
Now to fix your end string, just be sure to tie it down by slipping it under the loop between the 2nd and 3rd cross-strings, like so:
-
Now, do laying cross-strings across the front of your piece, moving one square to the right on both ends. You shouldn’t have any cross-strings across the back of the piece, just the front; the back of the piece just serves to move your string one square to the right. Once you have X number of cross-strings (for me, 8), its’ time to move onto a different color section.
Pick up with your new color one square to the right of where you left off. You’ll probably have the lose string from the previous color dangling about back there, but just secure it like you did before, by tying it down between cross-strings 2 and 3 of your new color (picture 2 below). -
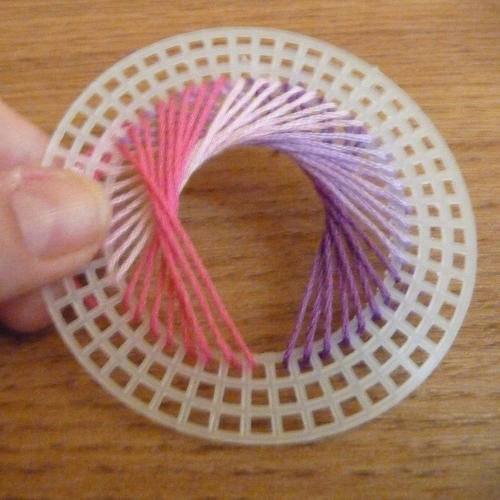
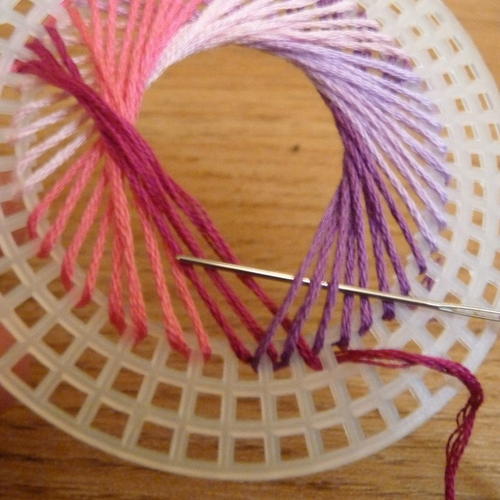
Do X number of cross strings in this new color-section, then switch to your third color. Now, you’ll see in the photograph below that when beginning your third color-section, you’ve now caught up with the other end of your first color section cross-strings. Don’t worry, just overlap across the 1st color section and keep moving your way around the circle, like you’ve been doing, moving one square to the right for each cross-string.
-
Keep doing it the same way with the 4th color section.
-
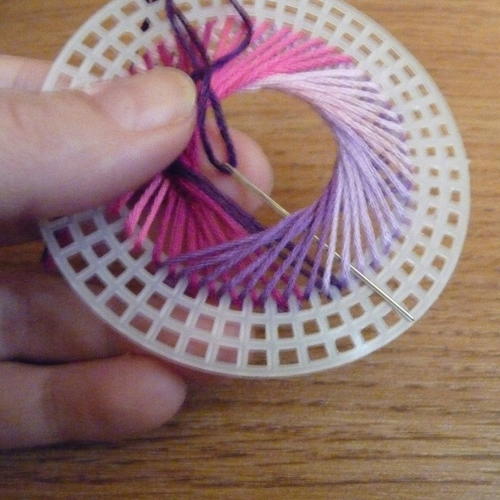
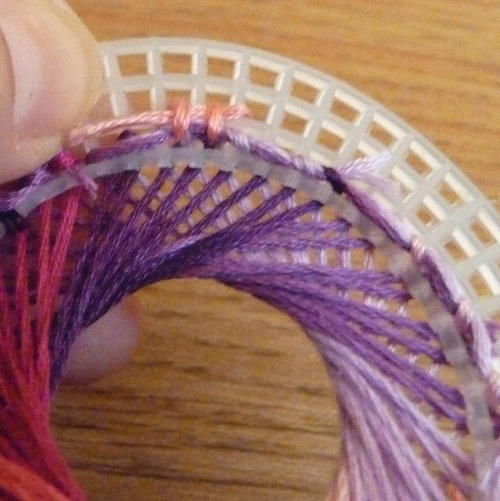
Now, in the 5th color section is where things get a bit tricky. Or, if you’re using different numbers of color sections, when you come up on your very first cross-string in your very first color section.
Place your first cross-string like normal. However, when you come up to begin the second cross-string, you’re going to want to go underneath that 1st cross-string in the 1st color section, like so: -
On the 3rd cross-string, you’ll want to pass under 2 of the 1st color cross-strings, like so:
-
And so on on around the circle, for both the 5th and 6th color section:
-
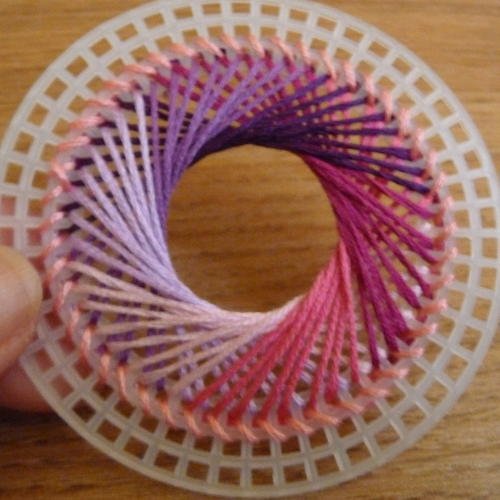
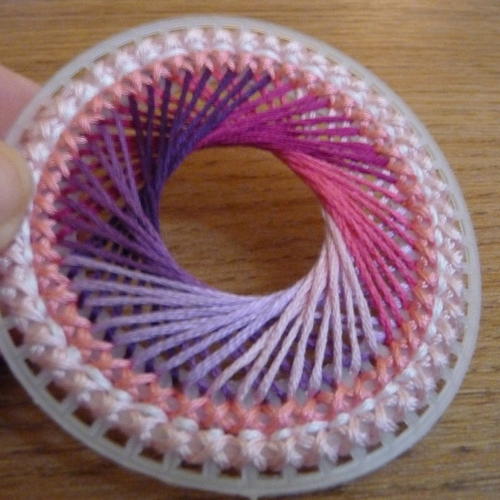
And after the 6th section, your piece should look roughly like the picture below. If any of your cross-lines are out of line, you can take your needle and straighten them a bit.
-
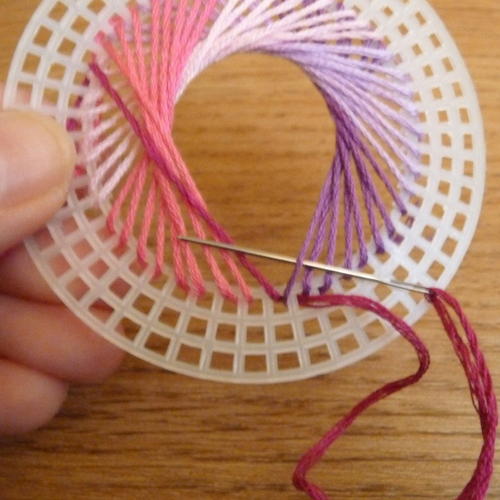
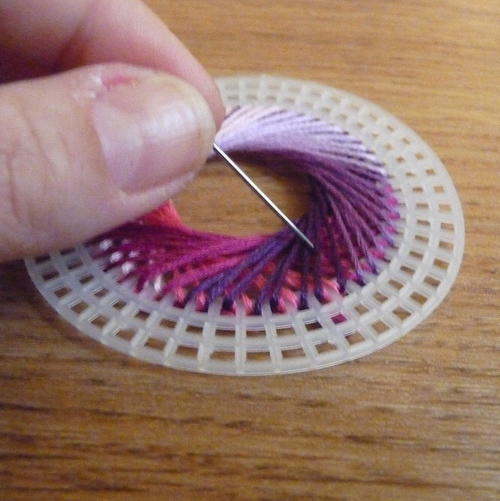
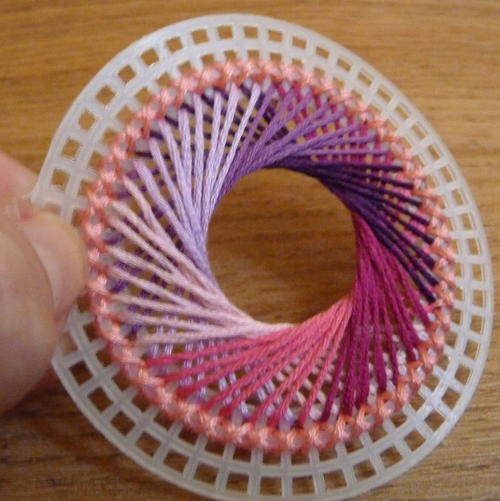
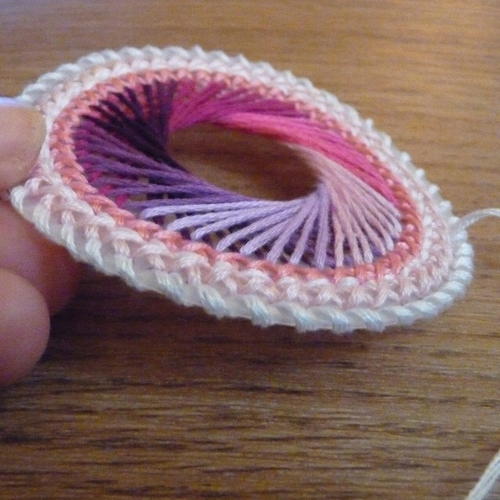
So, that was the difficult part and now you’re ready to move along to familiar territory. Now you simply take the 2 or 3 rings remaining and cross stitch, straight stitch, or whatever until you’re happy with the pattern and visibility of the plastic. For mine below, I did an inner row of darker pink cross stitches, then an outer row of lighter pink cross stitches.
-
Now, what I like to do when I do that first row of cross stitch on the inner ring is pick up the threads on the back, wrapping our current thread around and under all the threads we used on the cross-lines. This helps secure those cross-string threads and makes the back look a little nicer.
-
After that, cross stitch as usual.
-
And see how nice and neat the back looks:
-
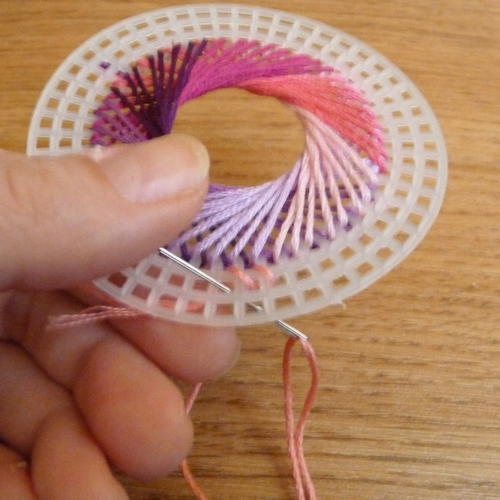
I then added another row of cross stitch in a lighter color (no need to pick up the back threads on a second row). Now, if you only started with two rings of plastic camvas, you won’t have room for a second row of cross stitch, which is simply an aesthetic choice.
-
I also added some white straight stitches between the rows of cross stitch, just to cover up a bit more of the plastic canvas peeking through.
-
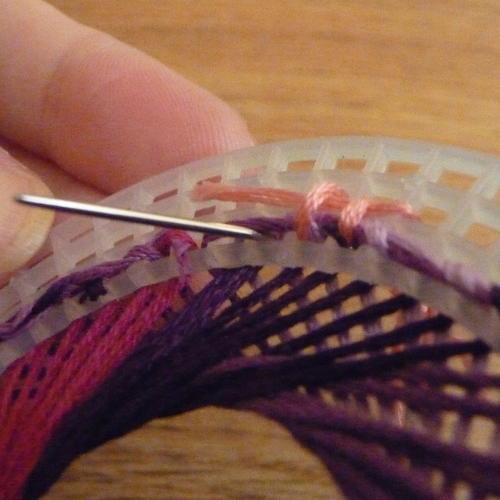
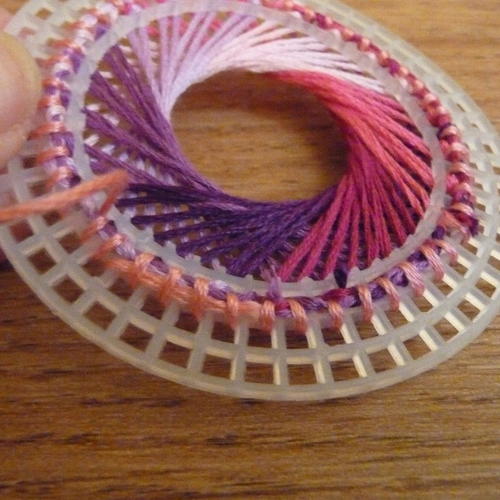
Finally, we’re going to cover up the outer edge of plastic canvas, which is by far my least favorite part of this process. It’s totally aesthetic, so if you don’t mind the edge of plastic canvas showing, you can easily chose to skip this step. It’s not difficult, it’s just tedious.
Simply wrap your way around the outer edge, going up through hole 1 and around the outside and then going up through hole 2, then around the outside and up through hole 3. Do this all the way around, then reverse and go back the other direction, up through hole 48 around the edge and the up through hole 47, then around and up through 46, etc. You can repeat this step as many times as you like until you’re happy with the coverage of the plastic canvas. I’m usually happy with 3 rings, around, back, and around once more (so, you’ll technically have twice as many threads going in one direction than the other). -
Then I’ll do one final row of straight stitches along the outer ring of plastic canvas. On this piece, I was simply going for coverage of the plastic canvas, so I used the same color as I used on the outer wrapping, but you could easily do the straight stitches in a different color for a different pattern.
-
And now you’re pretty much done. When I finish a piece, I will run it under water to get all the threads thoroughly wet and allow the piece to dry between multiple sheets of paper towels, held down with a heavy book, which will help the threads to even out and make sure the piece wears flat. Then, simply place a jump ring through one of the holes in the plastic canvas and wear proudly. Pictures below of the front and the back (and me).


Read Next29 Free Patterns for Plastic Canvas