This project was submitted by one of our readers, just like you.
Foiled Treasure Box

Foiled Treasure Box
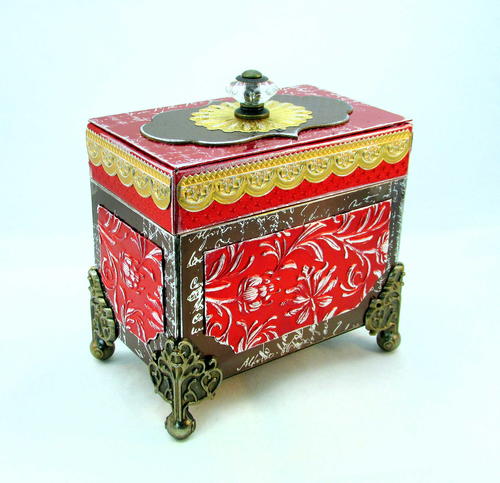
From the Designer: "The Treasure Box is cut using a Sizzix Scoreboards Die and covered with dazzling Rinea Foil paper. It measures 5.25 x 3.25 x 6 inches so you can fit quite a bit inside. What treasure would you store in it? You can use it as an elegant home decor piece or as a kingly gift container for a very special present. Read on to see what techniques I used to construct it. I think you will be surprised at how easy it is!"
Primary TechniquePaper Crafts

Project TypeMake a Project
Materials List
- Rinea Foil - Autumn Variety Pack
- Rinea Ghost Ink
- Xyron 3in Disposable Sticker Maker
- Sizzix Scoreboards Die - Treasure Box
- Sizzix 3-D Texture Fade - Botanical
- Sizzix 3-D Texture Fade - Mini Scallop
- Sizzix 3-D Texture Fade - Burst
- Sizzix Bigz Die - Styled Labels
- Tim Holtz Idea-ology Foundations Feet
- Tim Holtz Idea-ology Curio Knobs
- Ranger Alcohol Ink Mixatives - Gold
- Tim Holtz Stamp Set - Ledger Script
Instructions
-
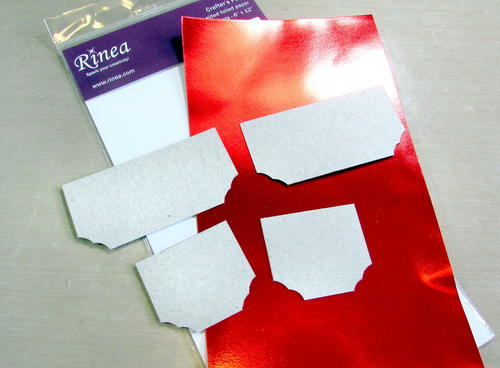
I die cut the treasure box out of matboard using the Sizzix Treasure Box die. (You will need to cut it twice to get all the pieces you need.) I hand cut special panels out of thin chipboard to fit on the box sides and follow the contour of the Foundation Feet. (see photo)
-
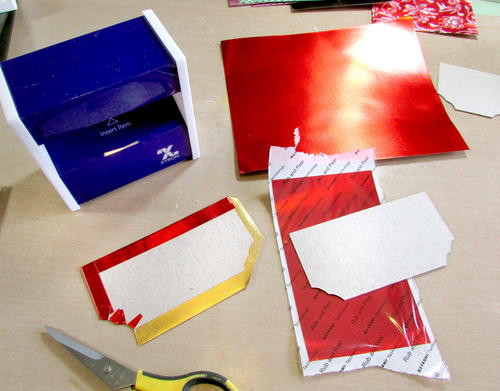
I cut pieces of Rinea foil about a .25 inch bigger around than the chipboard panels and ran them through the Xyron Sticker Maker to apply adhesive. After removing the sticker sheets, I centered the chipboard panels onto the foil and folded the edges over the back. It helps to clip out the corners and around the curves first. (see photo)
-
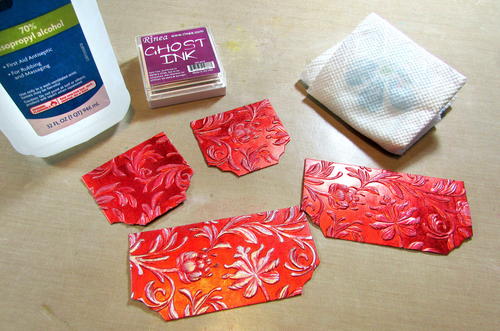
I embossed each panel using the Botanical 3-D Texture Fade folder. To give them a worn, antiqued look you can use Rinea Ghost Ink to remove the color from the foil. I rubbed the ink pad over the raised areas of the embossing and dried the ink. Then, using 70% rubbing alcohol, I wet a paper towel with it and rubbed the panels. The color under the areas with the ink on it came right off, exposing the silver. (see photo)
-
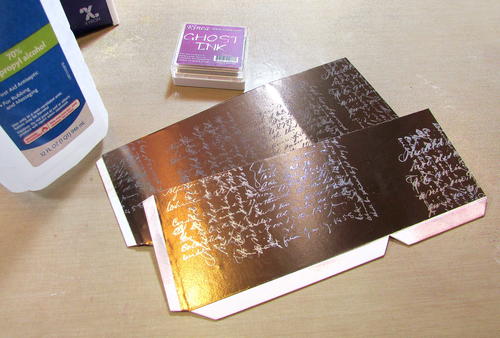
I trimmed pieces of brown foil to fit the sides of the box and ran those through the Xyron Sticker Maker, then applied the foil to the box pieces. You can also use the Ghost Ink with stamps! I inked up a stamp with the ink and carefully stamped onto the brown foil. Once again, I dried the ink and wiped it off with an alcohol dampened paper towel. (see photo) Once that was done, I assembled the box base. TIP: Gently cut through the foil along the score lines of the box with a craft knife. Otherwise the paper will tear when you bend the box pieces to assemble it. To change the color of the Foundation Feet from silver to gold, I applied Gold Mixative Alcohol Ink to them. I glued them onto the box base with a strong liquid glue.
-
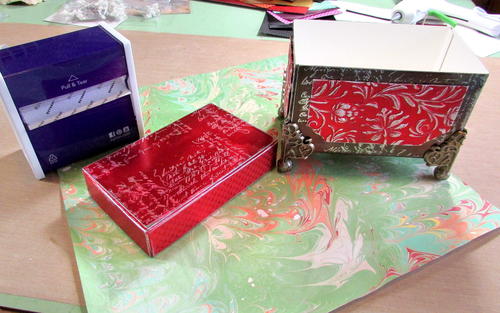
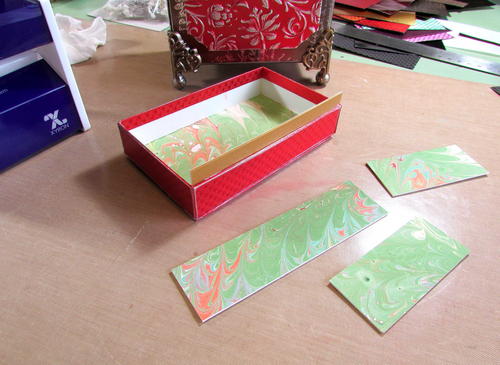
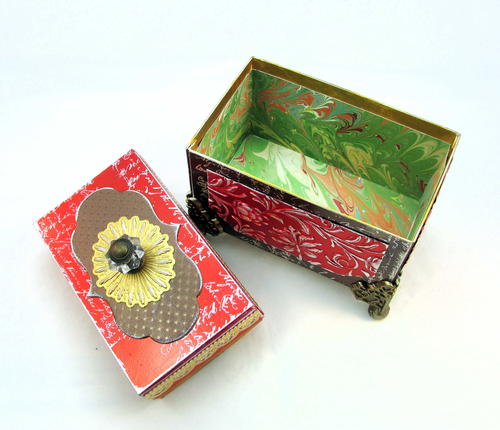
I lined the box with a piece of paper that I had previously marbled. In the meantime, I also covered and assembled the lid to the box using the same techniques as the base. (see photo) TIP: For the scalloped trim and the burst on top of the lid, I backed the foil with cardstock before I embossed it. It helps keep the 3-D details from getting crushed while handling.
-
Instead of using hinges for the box, I wanted a lid that would lift on and off. I cut pieces of scrap matboard to fit inside of the lid and hang down ⅜ of an inch. I glued them into the lid and the friction between the lip on the top and the base keeps the lid firmly in place. (see photo)