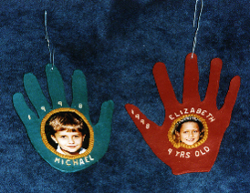
"Hand" Made Ornaments
These adorable handmade ornaments are a fun and easy activity to do with your kids. It's an easy Christmas craft that will take no time to make, and you can look back on your kids' little hands from years past.

Materials:
- 2-ounce bar of polymer clay in your favorite color
- 2-ounce bar of polymer clay in another color that you like
- 6 toothpicks
- A clean surface
- Bag of alphabet pasta
- Brown paper grocery bag
- 1 Photograph - in which the face will fit in the palm of the hand
- Scissors
- Glue
Steps:
- Cut the grocery bag so you have a work surface large enough to accommodate your clay work. Roll out a flat sheet of polymer clay on the paper, in color desired, so the clay sheet is big enough for a child's hand to fit on it.
- With a toothpick, have the child trace his/her handprint on the clay. Go ahead and push on the toothpick a little - so it actually cuts through the clay. Then gently pull away the excess clay from the hand you just traced.
- Trim the photo so you have just the face. It should fit comfortably in the palm of your clay hand. Gently press it onto the clay.
- Take the other-color clay and break off a piece about the size of a dime. Roll it out into a long thin "snake." Use the snake to "line" your photo all the way around - kind of like a frame. It should touch the edges of the photo you trimmed. Gently press it down along the edges of the photo so it holds the photo in place in the palm of the hand. Careful! Don't mash it down too hard!
- Pour out a pile of alphabet pasta. Have the child pick out the letters in his/her name, and any other letters or numbers that would make a nice extra message - like your name or "MERRY CHRISTMAS" or "HO HO HO" or the year (noting the year would be a great way to remember when you actually did this, in later years). Then arrange the letters and numbers around or near the face you just framed with the "snake" in that other color of clay.
- With the toothpick, poke a little hole so you can hang the hand when it's finished. Don't go too near the edge of the clay!
- Bake at 275 degrees for 25 minutes - ON the grocery bag. It's easier to just leave the clay hand on there til it's baked. Then let it cool to the touch.
- When cool, carefully pull the paper away. Turn the hand over, and on the back of each of the fingers, glue a toothpick. The toothpick will keep the fingers reinforced. Your clay hand will be thin, and if it's handled roughly, one of the fingers might snap off. Reinforcing the fingers in the back will prevent that. When the glue dries, your hand can be hung!
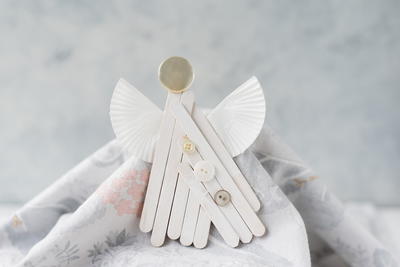
Read NextRose Angel DIY Ornament


Thanks for your comment. Don't forget to share!
personalizedgiftsl ady 6999718
Oct 22, 2011
Very cute ornaments project. Thank you for sharing such detailed information. I think the kids will love these!
Report Inappropriate Comment
Are you sure you would like to report this comment? It will be flagged for our moderators to take action.
Thank you for taking the time to improve the content on our site.