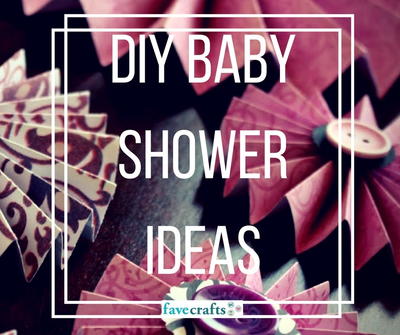
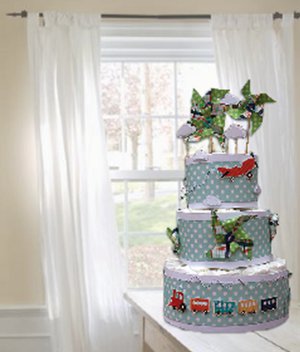
Baby Boy Diaper Cake
Perfect for a baby shower centerpiece or a gift that keeps on giving, this Baby Boy Diaper Cake is sure to be a hit with new parents. Made entirely from diapers, this baby diaper cake is one gift any new parent would be happy to receive! You could even add cute embellishments to the cake to make it more colorful. This diaper cake from Craftwell uses paper to cover the diapers, so it really does look like a cake. Even though this one is for a boy, you can easily change it to be a girl cake or a gender neutral cake.
Materials:
- eBosser Automatic Embosser & Die Cutter
- 30-40 Diapers (Smaller Diapers Make A Smaller Cake. Cake Displayed In Picture Requires Size 3.)
- Rubber Bands (Small & Large)
- 4” Cardstock
- ‘Little Boy’ Stickers From Echo Park
- Quickutz 4“ X 4” Pinwheel Die
- Hot Glue
- Pop Dots
- Twine
- Sizzix ‘Big Shot’ Die
- Sticks
- Cloud Puncher
Instructions:
-
Start by rolling the diapers and securing them with a rubber band. take the bunch and use a large rubber band to hold them into a round shape. repeat this for three tiers using fewer diapers on each tier.
-
Cut 4” strips of white cardstock and wrap it around each tier.
-
Cut a 3” strip of pattern paper and adhere it to the cardstock. The Little Boy line from Echo Park was used in the picture.
-
Cut 4“ x 4” squares from cardstock paper and send it through the eBosser using the QuicKutz 4”x 4” pinwheel die.
-
Tie twine through the middle of the button, positioning on the pinwheels to decorate . Use hot glue to adhere the pinwheels to the cake.
-
The plane and trains are from the Echo Park Little Boy Element Sticker Sheet. Attach them with pop dots to give dimension. Twine from The Twinery is used for the smoke on the plane and the train.
-
Use the eBosser and the Sizzix ‘Big Shot’ die to cut stars. Add these to the bottom tier of the cake.
-
Cut more pinwheels and prepare two sizes of punch out clouds. Attached them to sticks for the cake topper.
- Use the eBosser and your favorite cutting dies or embossing folders to continue embellishing the cake as desired.
Read Next75 Homemade Baby Gift Ideas
Your Recently Viewed Projects

Thanks for your comment. Don't forget to share!
elocin1104 2800379
Jul 04, 2018
This is a great tutorial. I am looking for ideas for my sisters baby shower in September. They are doing the baby room in Dr. Seuss, and I think I can find some cute paper to use on a great diaper cake. I will have to practice, because I have never done this. I am a little nervous, but with great tutorials such as this one I am confident I can figure it out.
M Altenberg
Jan 06, 2017
These make awesome gifts and have so many layers of fun items the mom can use for her baby. Clever and always welcome. Keeping this in mind for next baby gift.
Weberme
Feb 22, 2017
They sure do make great gifts and so super fun to make and to collect the baby items to put on the diaper cake. It is so fun to watch the look on the mom to be face as she looks at each different item on the cake especially if it is her first child. I try and find items that are colorful or different them the same thing you see at store. You can make it any theme or color you want and if they are having twins then make two. Double the fun. They are so easy to make the hardest thing is to figure what you want to put on it. It does make a super gift.
Report Inappropriate Comment
Are you sure you would like to report this comment? It will be flagged for our moderators to take action.
Thank you for taking the time to improve the content on our site.