This project was submitted by one of our readers, just like you.
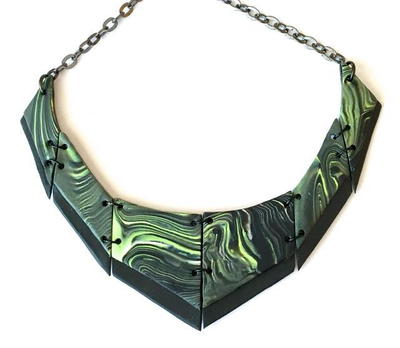
Pistachio Clay Necklace

Pistachio Clay Necklace
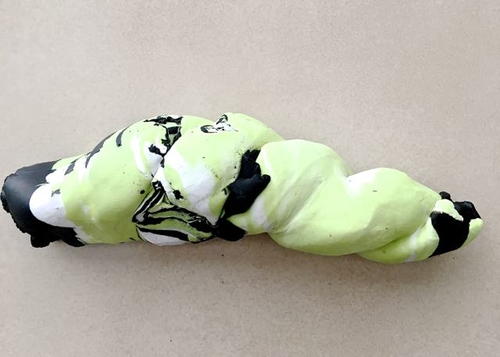
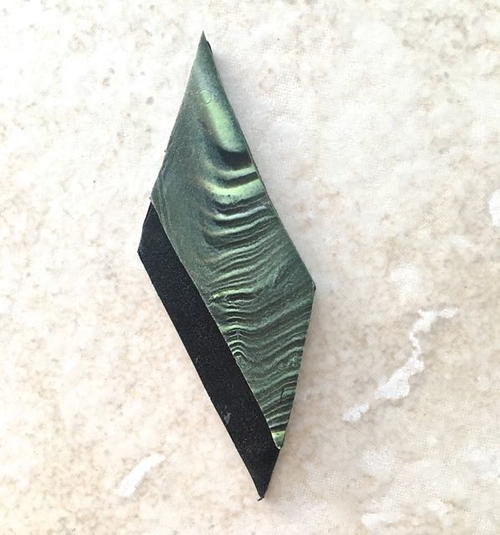
From the Designer: "Black, White and Pistachio mix together to form smooth matte beads in this contemporary clay necklace. I used Sculpey Souffle which results in an almost suede-like finish. Lightweight to wear, the six beads increase in size from two inches in the center and one inch on the ends. Jump rings link the beads in this custom design, with chain finishing off the sides. The color of this necklace is deep and rich and the texture just begs to be touched. Make this project and your friends will wonder if you are wearing a leather necklace."
MaterialsClay
Primary TechniqueJewelry Making

Project TypeMake a Project
Materials List
- Pistachio Clay Necklace Pattern PDF
- Clay conditioning machine
- Sculpey Souffle Clay - 2 oz. Black, 1 oz. each of White and Pistachio
- Acrylic roller
- Tissue Blade (for slicing clay block)
- Clay sculpting tools
- 8mm jump rings - 13
- 12" black chain
- Lobster clasp
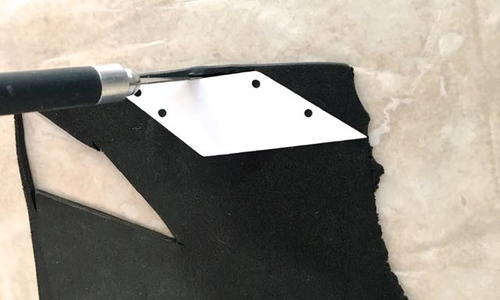
- Craft knife & card stock
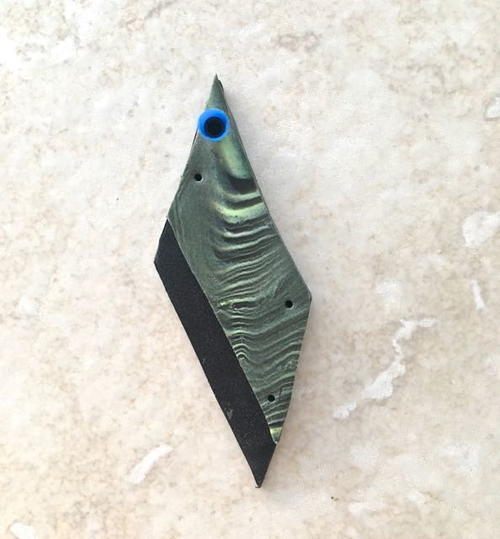
- 3mm hole cutter
Instructions
IMPORTANT NOTE - Setting numbers vary on clay conditioning machines. On my Sculpey machine the thickest setting is 1 and the thinnest is 9.
-
Download and print out the necklace templates. Print the bead templates onto card stock. Cut them out with a craft knife.
-
Roll out one and a half ounces of Black Souffle clay on the #2 setting of the conditioning machine. Using the templates, cut out the black necklace pieces with your knife. Arrange them in order on a mat or card stock. Set aside.
-
Form three tubes - one with one ounce of Pistachio, One ounce of Black and one ounce of White Souffle.
-
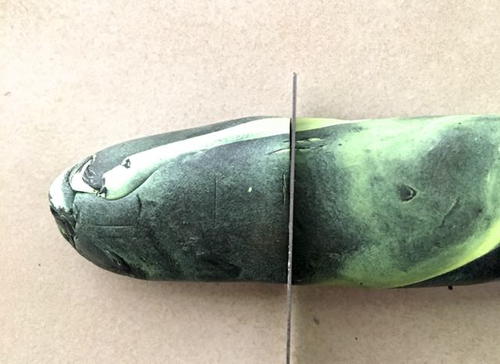
Twist the tubes together and roll them on the work surface with your hands to form one large tube. Twist it then roll it onto the work surface. Make sure there are no air pockets in the roll. If you feel any, push the roll in from the left and right sides and roll again. Twist once more then flatten slightly.
-
Cut one-inch wide slices from the oval shape.
-
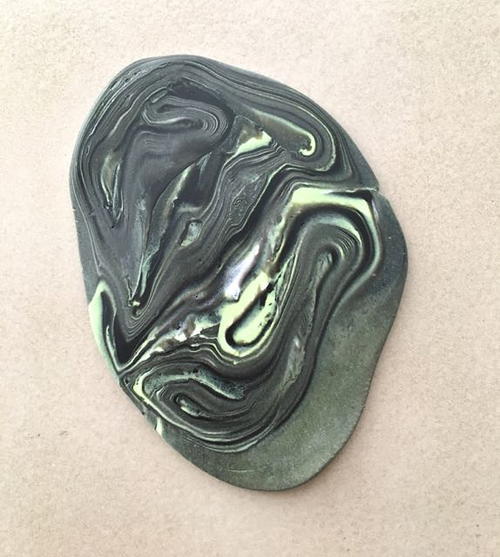
Thin the slices with an acrylic roller so they can be fed into the conditioning machine. Roll them on the #2 setting.
-
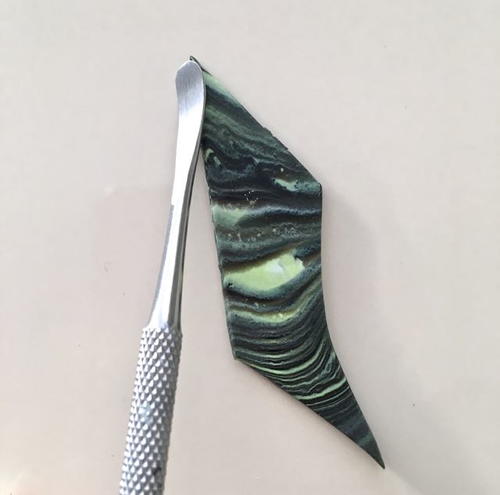
Using the templates, cut multi color beads from the clay with your craft knife.
-
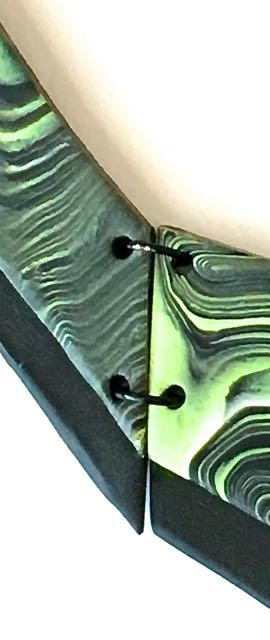
With a sculpting tool or the back of a small spoon, smooth and bevel the bead edges.
-
Place the multi color clay pieces on top of the black pieces, aligning the sides and tops. Press lightly to stick them together. Blend the layer's edges with the sculpting tool.
-
Cut out the marked holes with a 3mm hole cutter, piercing through both layers.
-
Bake all the beads on flat parchment paper on a ceramic tile for 30 minutes at 275 degrees. Allow the clay to cool.
-
Connect the beads with 8mm jump rings. Attach two equal chain lengths (5.25" or more depending on your neck size) to single rings on each end of the necklace. Adjust the fit if needed by removing or adding links to the chain ending with the same number on each side. Add a lobster clasp to one end of the chain and a 8mm ring on the other.
-
Want to make this project using an SVG or Silhouette cut file? Find the files and more information on how to make the project here.

Read NextAnchors Aweigh Necklace