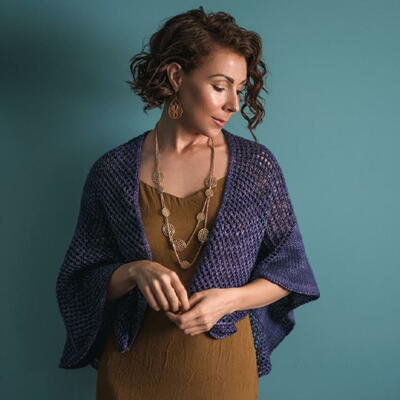
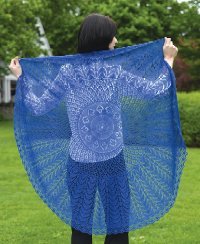
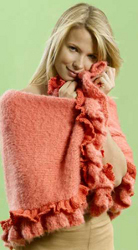
Coral Ruffle Wrap
Use a free knitting pattern like this one to create a brightly colored ruffle wrap. It's sure to keep you nice and warm and the ruffles are a fun embellishment to spruce up the outfit.

Materials:
- Caron International's Bliss #0006 Coral, 7 balls
- Caron International's Simply Soft Brites
- #9603 Papaya, 1 skein
- One each size US 8 and 10 (5 mm and 6 mm) 24" long circular, or size to obtain gauge
- One each size US H/8 and J/10 (5 mm and 6 mm)
- Tapestry needle
- Stitch markers or waste yarn (WY)
GAUGE
In stockinette stitch, using larger needle and MC, 13 sts and 20 rows = 4"/10 cm;
in Stockinette stitch, using smaller needle and CC, 18 sts and 24 rows = 4"/10 cm
STITCHES USED
Stockinette stitch (St st): Knit on RS, purl on WS.
Chain (ch)
Single crochet (sc)
HELPFUL
Place additional markers or WY at even intervals along edges of Wrap and Ruffles to aid in attaching Ruffles evenly around.
NOTES
Wrap is worked in one piece.
Ruffles may be worked in pieces, joined together then sewn around lower edge and both ends of the Wrap, or Ruffles may be made in one piece. [This will require a 36" or longer circular needle; number of stitches for working Ruffles in one piece are given in ( ) after the number of stitches for working separate pieces].
Neck edge of Wrap is trimmed with single crochet or optional Picot crochet edging.
WRAP PANEL
Using larger needle and MC, CO 54 sts. (WS) Begin St st; work even until piece measures 54" from the beginning, and AT THE SAME TIME, pm at beginning of RS row every 18". BO all sts loosely.
MAIN COLOR RUFFLE [make 5 (1)]
Using larger needle and MC, CO 186 (900) sts. (WS) Begin St st; work even for 9 rows, end with a WS row.
Shape Ruffle: (RS) * K4, k2tog; repeat from * across—155 (750) sts remain. Work 1 row even.
(RS) * K3, k2tog; repeat from * across—124 (600) sts remain. Work 1 row even.
(RS) * K2, k2tog; repeat from * across—93 (450) sts remain. Work 1 row even.
(RS) * K1, k2tog; repeat from * across—62 (300) sts remain. Work 1 row even.
BO all sts loosely.
CONTRAST COLOR RUFFLE [make 5 (1)]
Using smaller needle and CC, CO 172 (828) sts. (WS) Begin St st; work even for 9 rows, end with a WS row.
Shape Ruffle: (RS) * K2tog; repeat from * across—86 (414) sts remain.
BO all sts loosely.
FINISHING
Pieced Ruffles
Using MC Ruffle pieces, sew 3 pieces together into a strip.
Pin one of the remaining Ruffle pieces to each short end, allowing approximately 1" overhang at each corner. Pin, then baste pieces in place, beginning and ending approximately 1" from each corner, adjusting extra fullness evenly across, if necessary. Pin, then baste the 3-piece strip to one long edge in the same manner, allowing 1" overhang at each corner and aligning seams with markers on side of Wrap. Sew the pieces together at each corner, then baste in place, gathering the overhang evenly around the corners and at each end.
Sew CC Ruffle pieces together, making a continuous strip; go to Picot Edging for Contrast Ruffle.
One-Piece Ruffles
On both Ruffles, measure 18" from each end, across BO edge and pm for corner. Pm 2" from each corner marker on center section of Ruffle, then place 2 markers, dividing center section into 3 equal parts.
Pin MC Ruffle along one long edge, and both ends, allowing 1"overhang at each end, aligning first 2 and last 2 markers at corners (with 2" of overhang at corner), and remaining markers with markers on side of Wrap. Baste in place, adjusting extra fullness between markers if necessary, and gathering overhang at corners to make a smooth turn at each corner, and at each end.
Picot Edging for CC Ruffle
With RS facing, beginning at end of strip (pieced or solid), using smaller crochet hook and CC, join yarn and work Picot edging as follows:
Row 1: Work 1 row sc evenly across, working a multiple of 3 sc + 1, turn.
Row 2: * Ch 3 (picot), sc in next 3 sc; repeat from * across, end ch 3, slip st in last sc. Fasten off.
Pin, then baste CC Ruffle to Wrap (see photo), aligning markers as for MC Ruffle.
Using tapestry needle and MC, sew Ruffles neatly to Wrap, being sure that both Ruffles are being attached to the Wrap, with BO edges at WS of piece.
Neck Edging: With RS facing, working along long edge of Wrap without the ruffle, beginning at corner using larger crochet hook and MC, work 1 row sc evenly across. If desired, work Row 2 of Picot edging as for CC Ruffle.
Weave in ends.

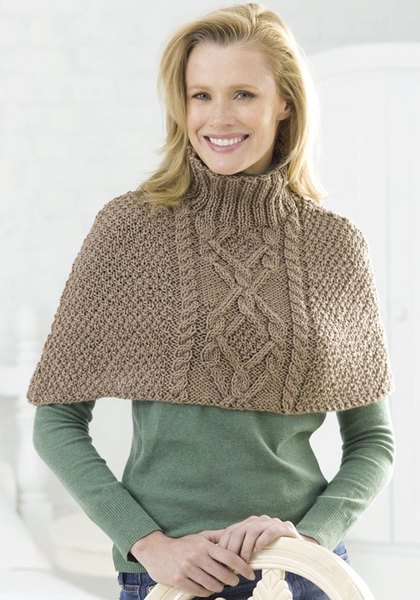
Read NextCable Half Poncho
Your Recently Viewed Projects
Thanks for your comment. Don't forget to share!
clsteffie10 155607 2
Nov 24, 2012
I am enjoying working on this wrap but am stumped as to what stitch to use to sew on ruffle, as the stitching will be visable on the inside or ws....thank you
RevDi
Jul 03, 2010
I suppose they're counting the picot edging as crochet. They should list this as a combination knit/crochet project, though. You are correct.
PK Hawk
Apr 14, 2010
While I think this is a very nice coverup, it is not a crocheted item. There was nothing in the message I got stating it was a knit version. Someone who is not really a knitter might be somewhat confused, don't you think?
Report Inappropriate Comment
Are you sure you would like to report this comment? It will be flagged for our moderators to take action.
Thank you for taking the time to improve the content on our site.