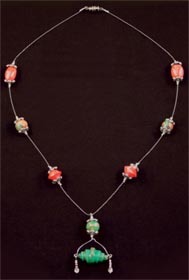
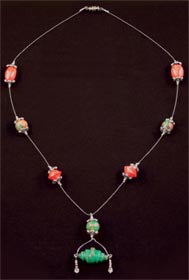
Peppermint Swirl Necklace
Swirl translucent clay with green, red and yellow for cute and colorful beads, from AMACO.
Materials:
- FIMO® Soft — 2 oz. blocks of: Emerald (#56), Cherry Red (#26), Lemon (#10), White (#0), and Translucent (#014)
- AMACO® Tri-Bead Roller™
- AMACO® Bead Making Tool Set
- AMACO® PolyRoller
- FIMO® Lacquer
- Polyester Batting
- Metal Baking Sheet
- Home Oven (or dedicated toaster oven)
- Bead Reaming Drill
- Beadalon® 19 Strand Bright Silver Flexible Beading Wire
- Silver Barrel Clasp
- 3 Silver Plated Eye Pins, 2" Long
- 2 Silver Plated Head Pins, 1" Long
- 22 Gauge Wire, Any Color
- Two 4mm Faceted Beads
- Silver Seed Beads
- 14 Silver Plated Metal Bead Caps, Size 10mm
- Crimp Beads
- Round Nose Jewelry Pliers
- Wire Cutters
- Crimping Pliers
Steps:
- Preheat home oven (or dedicated toaster oven) to 265ºF (130ºC). Knead clay to condition. Make three nickel size balls of Translucent. Knead one of the balls to gradually blend in a pea size ball of Emerald. Repeat to blend Lemon and Cherry Red with the remaining Translucent balls.
- Make three more nickel size balls of Translucent. On a covered work surface use PolyRoller™ to roll all balls flat to make six thin sheets of clay. Stack sheets, using Translucent to separate the colored layers. Use roller to lightly press layers together then roll “jellyroll” style to create a rope. Follow directions found with Tri-Bead Roller™ to make three round beads from the layered rope.
- Knead remaining rope slightly then roll flat. Fold in half and roll again, repeat as needed to create a narrow sheet with your preferred color blended pattern. Tip: Knead or roll too much and colors will blend completely. Follow instructions found in AMACO® Bead Making Tools set to create a wrapped bead from the clay sheet using small triangular template (pointed), cutting blade and small mandrel.
- Knead and then roll a quarter size ball of White to make a thin sheet. Blend a quarter size ball of Cherry Red with a dime size ball of White to soften color tone then roll flat. Stack the White sheet onto the Red and roll lightly. Cut the layered sheet into three equal pieces and stack on top of one another. Use roller to lightly press the layers together. With Tri-Bead Roller™, create two bi-cone and two oblong beads from cut strips of the layered clay.
- Use dimple tool to mark drill hole openings on all but the wrapped bead, indenting slightly to create a guide hole that will be used for easy drilling once clay has been cured. Place all beads onto polyester batting and bake in home oven for 35 minutes. Let cool.
- Drill holes in beads then slip them onto 22 gauge wire. Apply 2-3 coats of FIMO® Lacquer. Let dry completely while suspended on the wire. Remove beads from wire and mandrel.
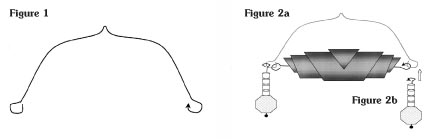
- Create dangling pendant referring to diagram. With one 2" eye pen use round nose jewelry pliers to bend a matching eye-shaped loop at straight end. Fold in half to find center, then shape referring to diagram (see Figure 1).
- Insert an eye pen through wrapped bead and bend an eye-loop on opposite side. Use eye-loops to connect the two pens referring to diagram (see Figure 2a). Press loops closed. Slip a faceted bead, then four silver seed beads onto eye pens, bend a eye-loop at straight end then connect at both ends of the wrapped bead (see Figure 2b).
- Slide two crimp beads, bead cap, round clay bead, bead cap followed by two more crimp beads onto remaining eye pen. Crimp beads to hold the arrangement in place close to eye. Bend remaining end to create another eye-loop then attach the dangling pendant referring to photo. Press loop closed.
- Cut beading wire to desired hang length plus 2". Slip two crimp beads onto wire, thread same wire end through loop on barrel clasp then back through crimp beads. Slide crimp beads close to barrel loop leaving a 1" tail length of wire. Use crimping pliers to flatten crimp beads; holding barrel clasp secure. Cut wire tail close to last crimp bead.
- Refer to photo to slide beads onto wire, repeating the same sequence used in instructions number 9 for each added clay bead. Once all beads are on wire, slip wire end through remaining loop on barrel closure, attaching it just as with first side to connect, crimp beads and cut tail end of wire.
- Open eye pin on dangling pendant, slip onto wire separating the beaded strand, press eye pen closed. Place necklace onto a flat surface evenly arranging the beads as shown. One set at a time crimp beads to hold the beaded sections in position on wire.
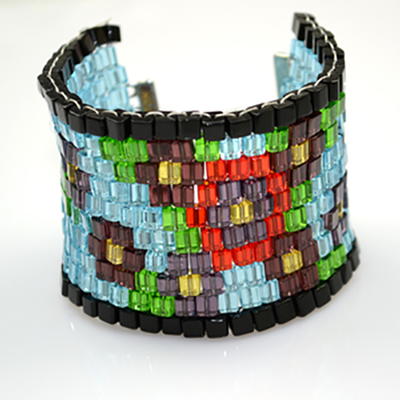
Read NextBoho Chic Spring Bracelets