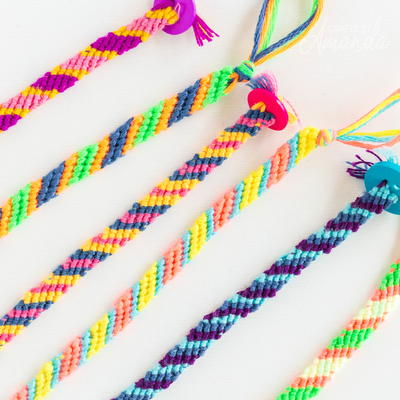
Beginner Loom Bracelet
Learning how to make a bracelet is a useful skill, especially since DIY jewelry is both popular and cheap. This Beginner Loom Bracelet is a wonderful way to warm up with a loom if you are unfamiliar or are seeking a new challenge. This African-inspired bracelet pattern is bold and artsy. You'll love learning how to make it and then wearing it for the wide world to see. It is not as difficult to learn how to make bracelets as it looks, and this easy tutorial will show you how to do it the fun way.

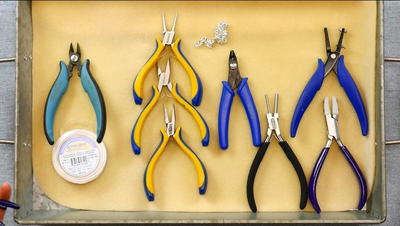
Materials:
- Bead Loom
- 220 Inches or 560cm Thread/Strand of Floss
- Variety of Size 10 Seed Beads
- Beading Needles
- Ruler/Tape Measure
- Scissors
Instructions:
Setting Up the Loom
- Firstly, before you set up your loom with thread, decide how wide you want your bracelet to be. Once you've decided you'll need one strand of thread for every bead plus one.
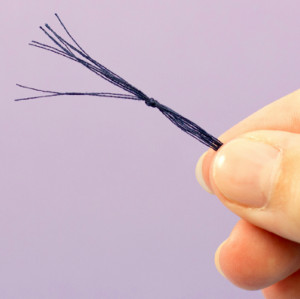
- Measure your strands of yarn that they are all 22 inches (56cm) long. Then you'll want to gather one end of the threads together and tie them in a basic knot about one inch (2.5cm) from the end. Trim the ends if necessary to make them neat.
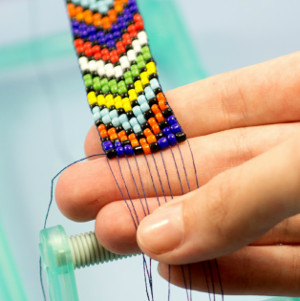
- If your loom has a tall end start by wrapping the threads around the stem of the lock several times.Then taking your threads pull them up and over the top bar of your loom. Then turn your loom around so that you can pull the threads towards you while arranging them evenly on the groves.
- {Note: Do not worry if the threads aren't perfectly placed in the middle. This won't affect the outcome.}
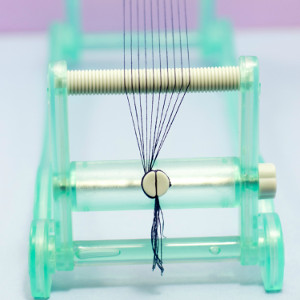
- Pull the threads down and over the bottom end, making sure to space your threads out evenly once again. NONE of the threads should cross over each other. Then wrap the remaining thread around the stems lock.
Starting Off the Bracelet
- Start off by threading your needle with about 80 inches (204cm). Taking the end f your thread, tie it onto the top left-most warped thread leaving about a 2 inch (6cm) tail.
- Thread 9 beads onto your needle and beading thread, then pull the beads under the warped threads, push them up between the warped threads and weave your needle back through them making sure to guide the needle OVER the warped threads.

Finishing Off the Bracelet - Side 1
- When your bracelet is long enough, unwind it at the bottom of the loom and take it off of the loom.
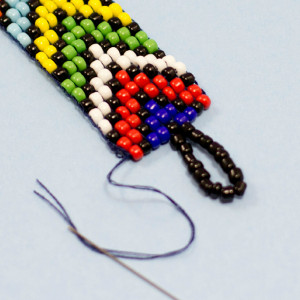
- Start with one end of your bracelet, then thread an outside warp/thread onto your needle and weave it into your bracelet. Weave all but the 2 center warp threads into your bracelet. You'll be usng these to create fasteners.
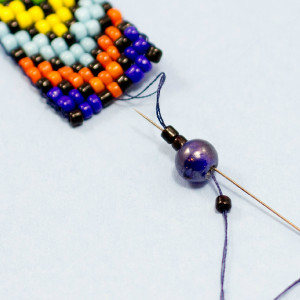
- Thread both center threads onto your needle. Then thread 2-3 seed beads onto your needle, followed by a large round bead, and then 1 more seed bead. Push your needle back through ONLY the round bead and 2-3 seed beads. Then weave remaining thread in 2 inches (5cm). Cut off any excess thread.
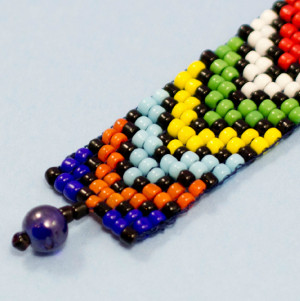
Finishing Off the Bracelet - Side 2
- Now go to the other end, and repeat Step 1 and Step 2 of Side One.
- Thread both your center threads onto your needle. Thread between 15-20 seed beads onto your thread. Push your needle through the first bead, and pull tight. Before weaving in the threads into your bracelet, check if the seed bead loop isn't to big or to small for your bead on Side One. It should be just big enough to slip over the bead easily. Add or remove beads until you get the right size.
- Weave the remaining thread in 2 inches (5cm). Cut off any excess thread.
Read NextHow To Make Friendship Bracelets