
This project was submitted by one of our readers, just like you.
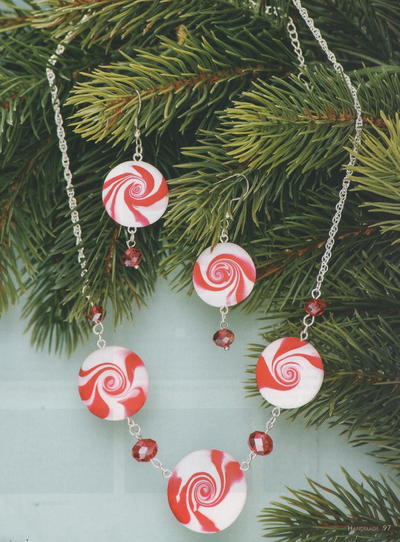
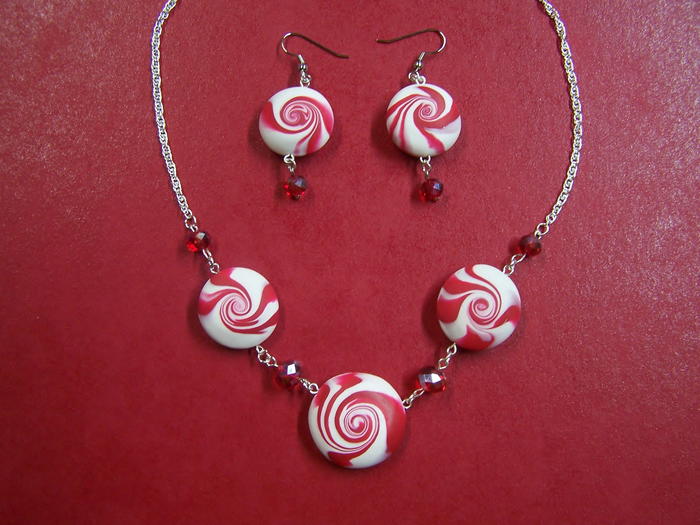
Peppermint Pendant and Earrings
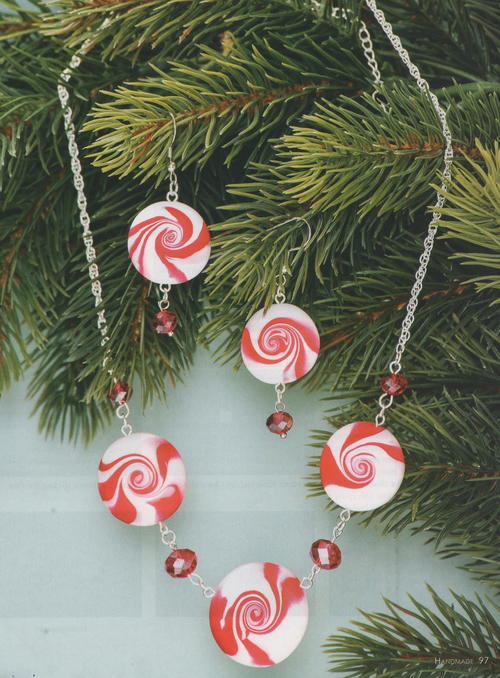
"This super sweet pendant and earring set is a snap to make with just two block of polymer clay and some simple jewelry findings! If you have not yest working with polymer clay or made jewelry, you will find this a great beginner project. The swirl beads are made from two colors marbleized clay and rolled with an easy an fun technique! Change up the colors and you have a pendant and earring set you can wear all year or give as gifts. "
Main MaterialClay

Materials List
- Premo Sculpey (Polymer Clay): One 2 oz. block each: 5001 White; 5383 Alizarin Crimson Hue
- Sculpey Acrylic Roller #AS8AR or large wooden dowel
- Sculpey Super Slicer # ASBSET or craft knife
- Sculpey Wet/Dry Sand Paper
- Variety Pack Sculpey Gloss Glaze ASG33G (optional)
- Smooth, non-porous surface for cutting such a large ceramic or marble tile
- Ovenproof baking tray
- Clear glass plate 6-8” diameter with no markings on the bottom
- 4mm silver tone jump rings (10)
- Ready-made silver necklace of choice 18” long or longer
- Assorted faceted red beads of choice (2 large, 4 small)
- Silver head pins (2)
- Silver Eye pins (10)
- Silver fishhook earring findings (2)
- Needle nose pliers (2 pair)
- Round nose pliers
- Super glue
- Baby wipes
- Aluminum foil
Instructions
-
Wash hands and clean working surface before working with clay.
-
Conditioning the clay: Cut White and Alizarin Crimson Hue clay blocks into quarters. Condition two (2) quarters White and one (1) Alizarin Crimson Hue by hand until pliable. Be sure to clean hands, work surface, and tools well after working with red clay.
-
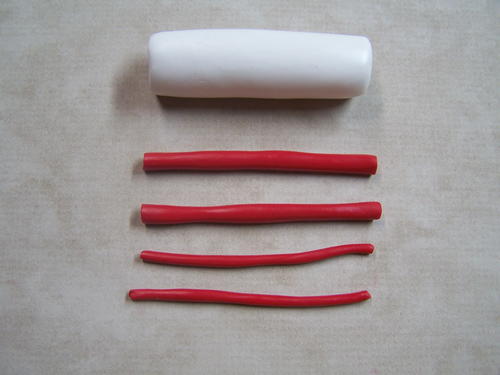
Forming log and snakes: Roll white clay into a 3” log. Roll two thin snakes and two medium snakes from red Clay (Fig.1).
-
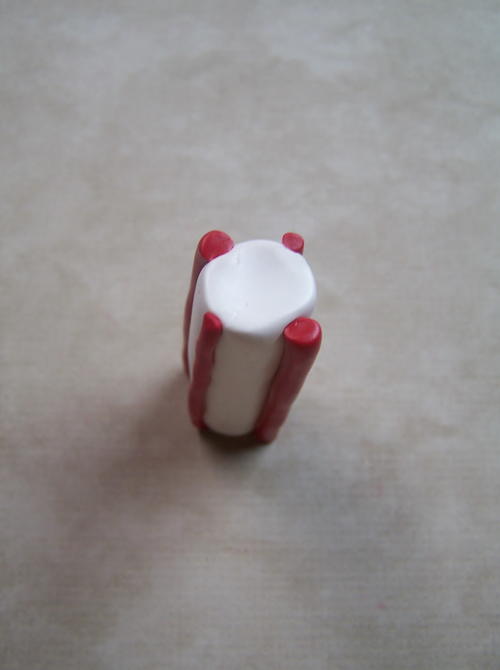
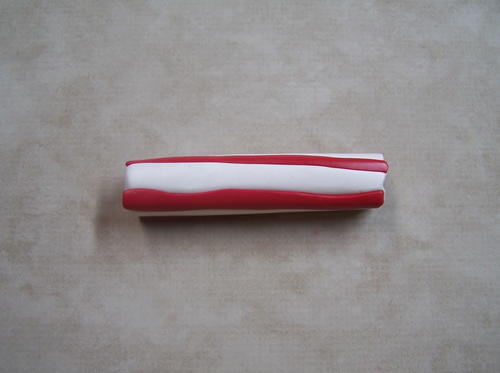
Apply the red snakes onto the white log alternating sizes (Fig. 2).
-
Roll lightly on a hard surface to flatten snakes slightly (Fig. 3).
-
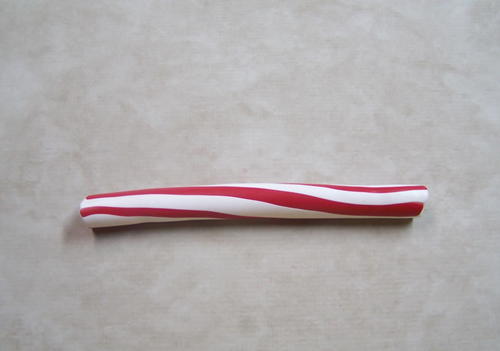
Continue to roll to lengthen the log slightly (Fig. 4).
-
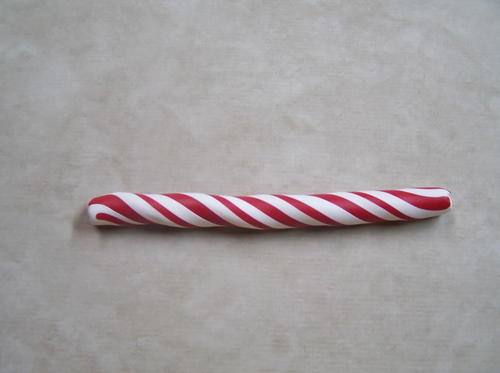
Hold one end of the log gently and twist the other end to form a striped pattern (Fig. 5).
-
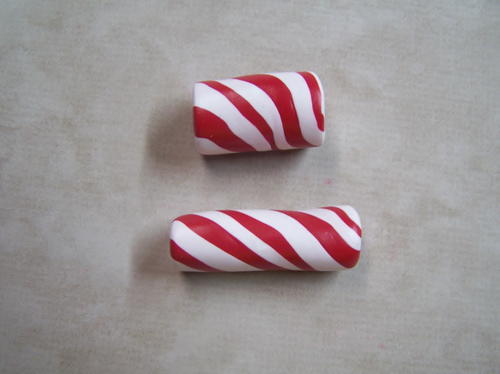
Cut the striped log in half. Use hand pressure to condense each half making it shorter and wider. Occasionally roll the compressed log on a hard surface to keep its cylindrical shape. Continue to work one shorter log until it is approximately 2/3 as long and 2/3 wider as the other log (Fig. 6).
-
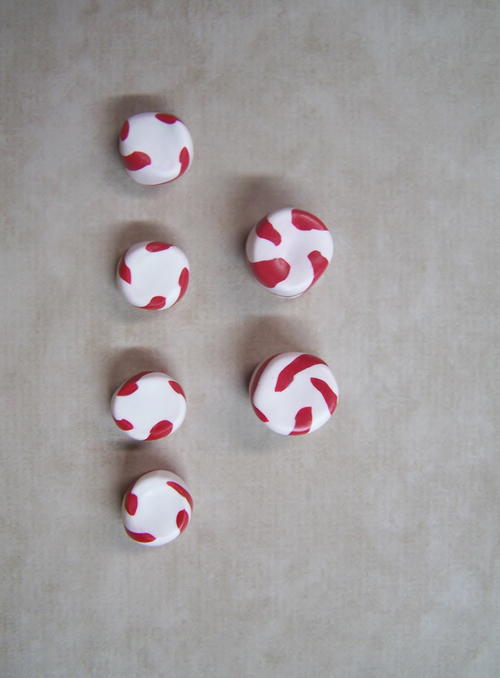
Making the discs: Cut the short log into 4 equal sized discs. Cut the long log into 3 equal sized discs (Fig. 7 & 8).
-
Gently roll each disc in your hands until the edges are fairly round (Fig.9). Place clay on a tile and refrigerate for 30 minutes. Chilling the clay will help to keep the red clay from bleeding into the white clay thus leaving a pink haze.
-
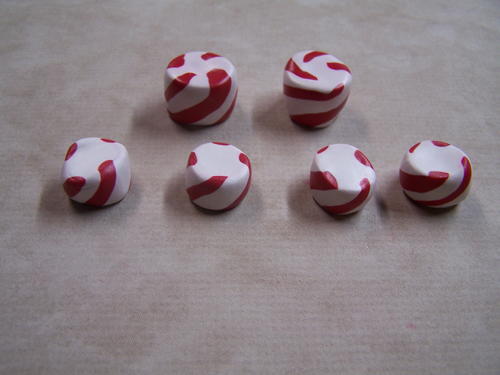
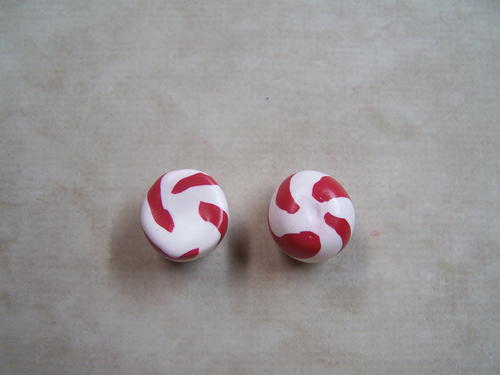
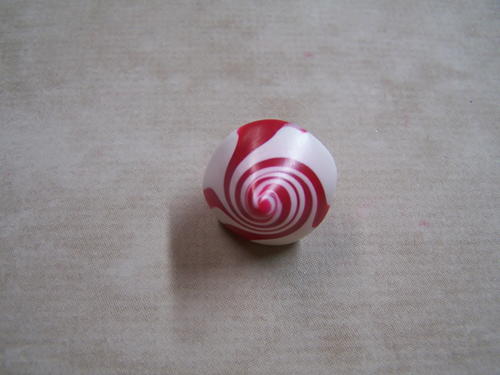
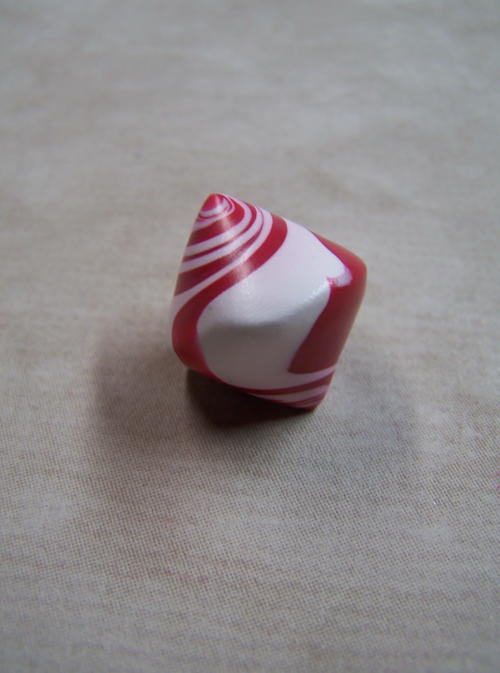
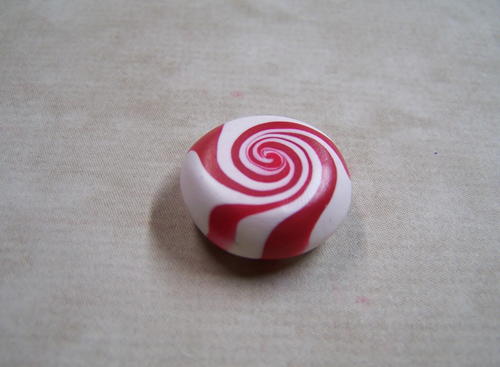
Making the swirl beads: Place a ball on your work surface with the stripes facing upward as in Fig. 9. Hold the plate’s edges with both hands and lower the bottom part of the plate onto the top of the clay ball making sure to center the ball under the plate. Make contact with the clay ball but do not compress it. Begin moving the plate in small circular motions until the ball begins to form a cone shape. Continue to move the plate without stopping until a pleasing swirl pattern forms. Stop moving the pate at this point and observe a bi-cone bead with a swirl pattern has formed (Fig.10 A & 10 B). Place the center of the plate on the top point of the bi-cone bead and press until a disc shape has formed (Fig.11). Repeat with the remaining clay balls making sure to clean your plate and work surface between beads.
-
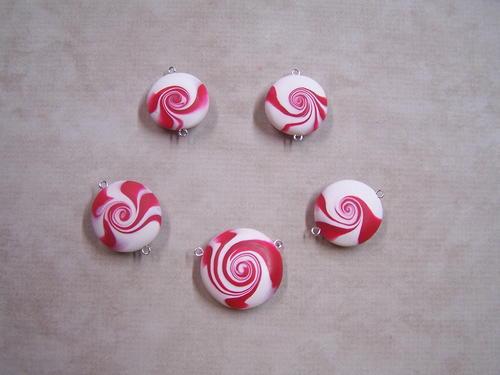
Baking the clay: Place assembled beads onto an ovenproof baking tile or tray lined with white cardstock or parchment paper. Make a tent made from aluminum foil to protect oven from polymer particles and to keep clay from scorching. Bake according to manufacturer’s instructions. Let cool then gently remove baked clay pieces. Tug gently at eye pins to see if they are secure. If not remove them and add a drop of glue to the cut end. Immediately replace the eye pin into the bead and let the glue set a few minutes.
-
Sanding and glazing: Let 600 grit sandpaper soak in a small container of lukewarm water with a drop of liquid soap 5-10 minutes. Remove sandpaper and carefully sand each swirl bead until smooth. Repeat with 1000 grit paper. Rinse and dry. Optional: Apply several thin coats of Gloss Glaze allowing each coat to dry thoroughly.
-
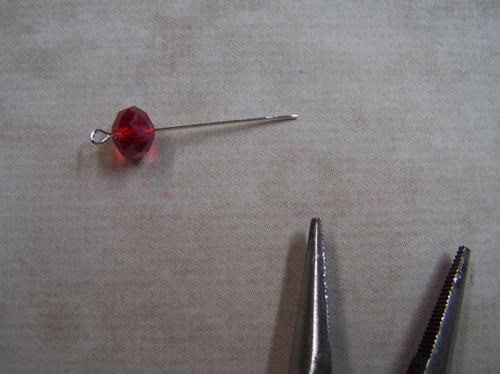
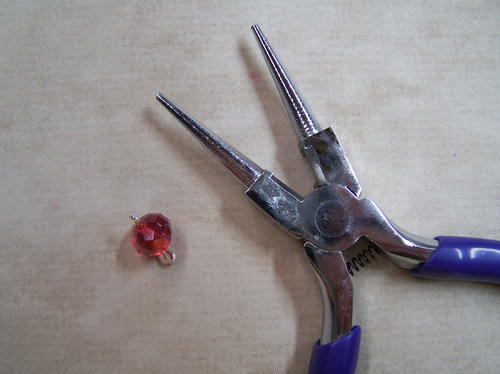
Assembly: Trim four (4) eye pins down to ½” (Fig.13). Thread a large bead onto the eye pin and use round nose pliers to form a loop or second eye (Fig. 14). Repeat with another large bead and two (2) small beads. Use the needle nose pliers to cut the silver chain. Measure 6” from the clasp on either side of the chain and cut. Use jump rings to connect faceted beads and swirl beads to one another. To open and close a jump ring: hold the jump ring between two pairs of needle nose pliers at 9:00 and 3:00 with the opening at 12:00. Move the pliers simultaneously in opposite directions until the ring opens. Insert the eye pin then reverse the motion to close the ring. Begin with the large swirl bead. Add a jump ring to one side then add a large faceted red bead followed by another jump ring. Add a small swirl bead then another jump ring. Add a small faceted red bead followed by a jump ring. Before closing the last jump ring attach one end of the chain. Repeat this process on the other side of the large swirl bead. For the earrings: Insert a head pin into a small bead. Trim wire to 1/3”-1/2’ and use round nose pliers to for a loop. Add a jump ring and add to a small swirl bead. Add a jump ring to the other end of the swirl bead and attach the fishhook before closing the jump ring. Repeat for the other earring.
NotesFollow all manufacturers’ instructions for all products used here. Wash hands and clean working surface before working with clay.
Use baby wipes to clean hands and tools after using clay.
The technique for making clay swirl beads is not difficult but does take some practice to become good at. For a demonstration of the swirl bead technique see the following video:
http://www.sculpey.com/project/sculpey-souffle-spumoni-swirl-bracelet

Read NextPeppermint Pendant and Earrings